When I took this picture in late August I was working all day on some papers for university, so after many hours behind the desk some sport and photography was well earned.
In the Bag
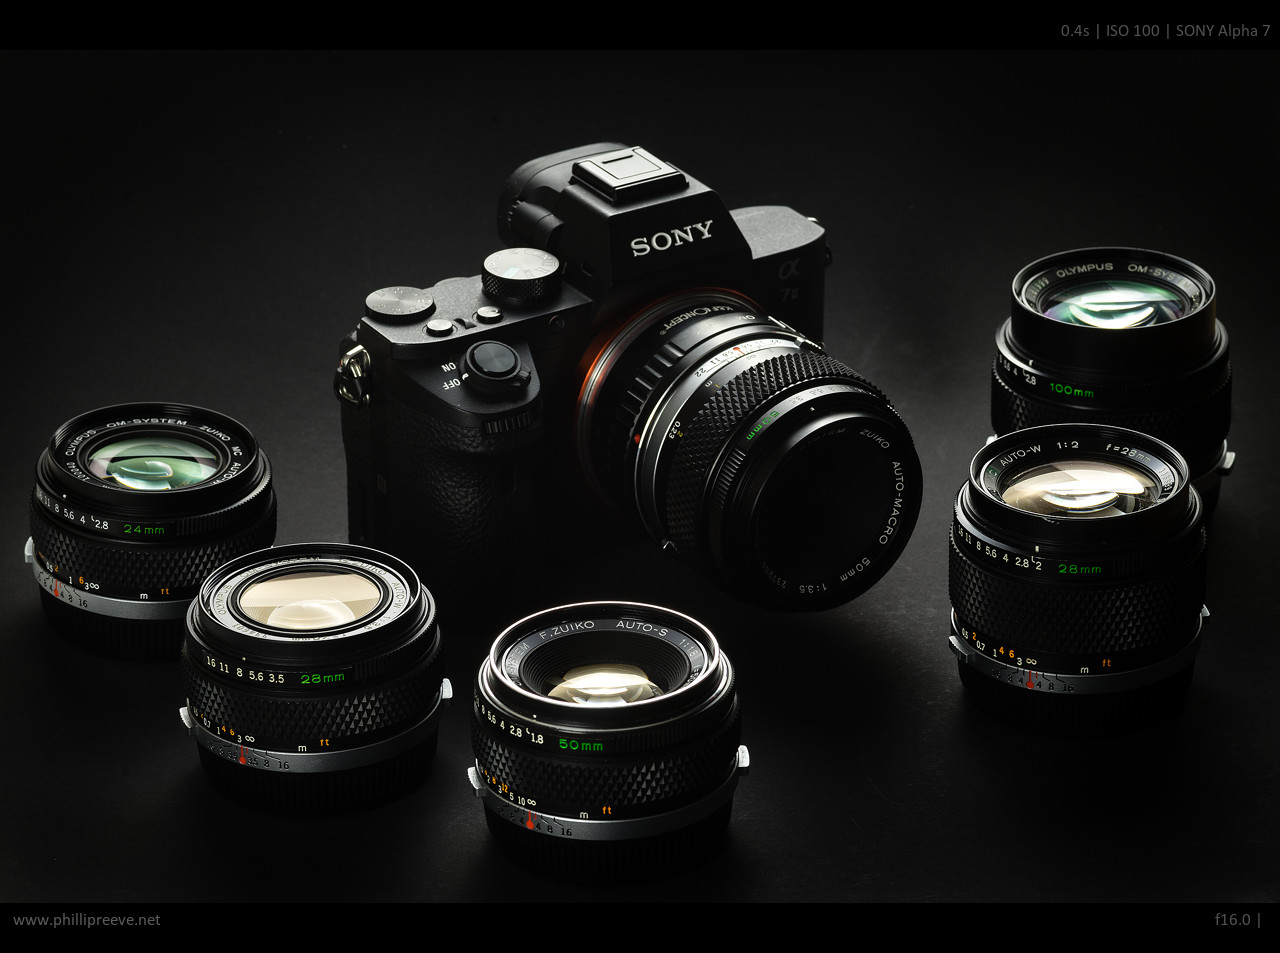
I packed my small camera bag* with the lightest lenses I could find in my cabinet: a Olympus OM 3.5/28*, Zeiss C/Y 1.7/50* and Olympus OM 2.8/100.* Since I had some strenuous cycling before me I didn’t want to carry any unnecessary weight and I knew that I could capture about anything with this little setup. Of course one is always a bit limited by just three lenses. But I think it is a good exercise to be limited and to be out there is much more important than to have the absolutely best gear anyway.
*=Affiliate link
The Scene
I take most of my pictures quite close to home but 90 minutes on my bike gave me a bigger radius of about 25 km so I headed for the uplands which I don’t frequent that often. I knew that if the weather had mercy with me I would be able to capture the very last sunlight which I usually can’t, because near to home it is always blocked by trees.
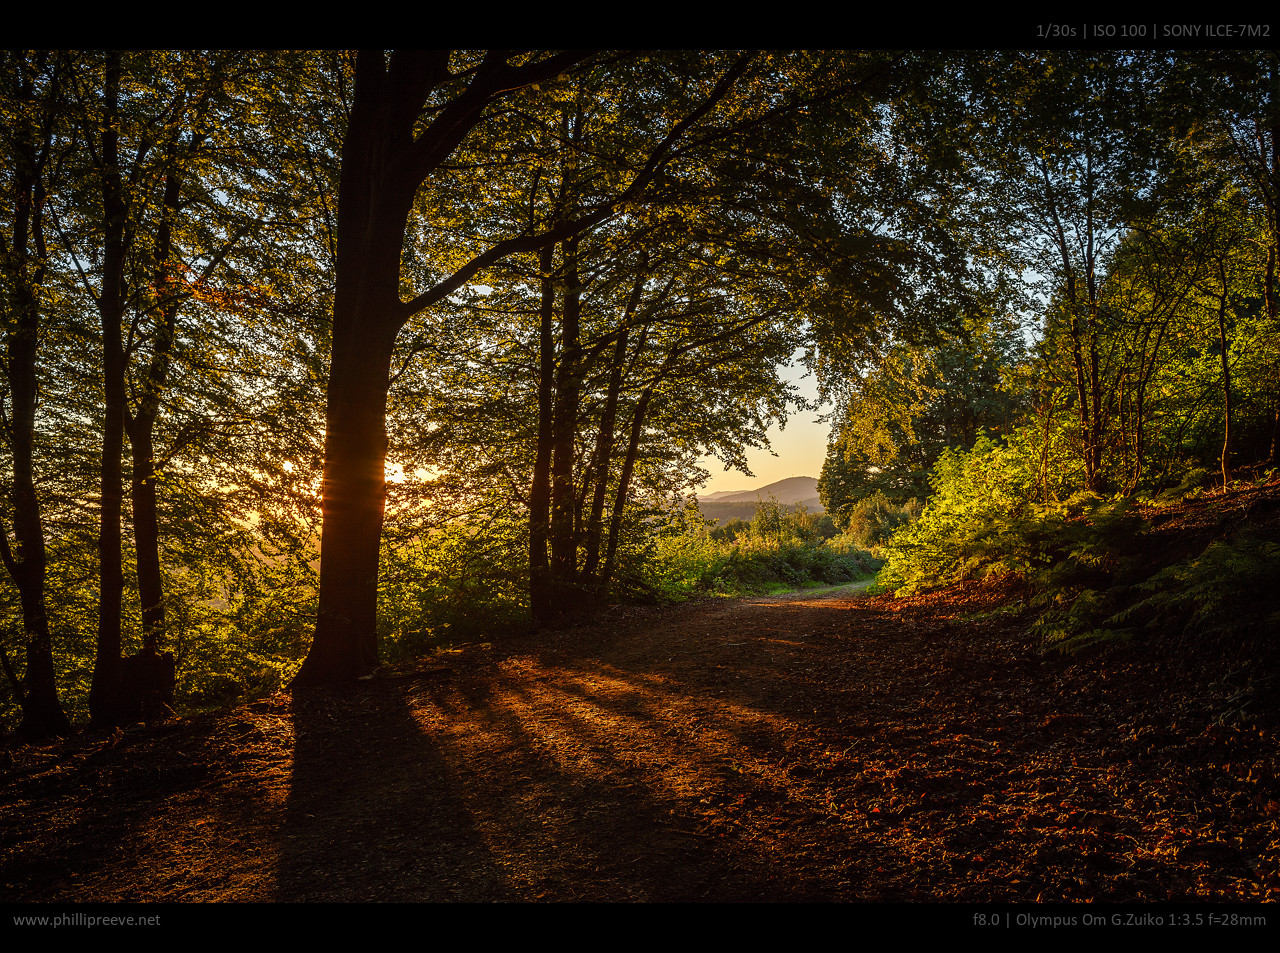
What I liked most about the subject is the chain of hills in the distance. Since I arrived at the scene above about 30 minutes before sunset great light was guaranteed but I needed to find a good composition. My approach to composition is mostly intuitive and I first tried to capture the scene with the Planar 1.7/50 but that photograph lacked some depth so I switched to the 28mm which allowed my to frame the hills with an interesting foreground.
You can’t see it in the small image presented here but I placed the focus on the foreground of the image and allowed the background to be very slightly out of focus. As usual I used the focus magnification feature of my Sony a7II.
Gear Considerations
Now the Olympus 3.5/28 is as sharp as it is tiny but it has only single coatings which make it very susceptible to flare. My Pentax 3.5/28 or Zeiss 2.8/28 aren’t any sharper but they have much more efficient coatings. Because of the lower weight I preferred to take the Olympus though. Therefore I had to shield the sun with a tree but this worked well enough here.
In general I have come to like Olympus OM lenses quite bit recently. It started with the great Olympus OM 100mm 1:2, but I have since bought a few other lenses which are all tiny and very well made. Their optical performance is quite solid and comparable to Minolta SR and Canon FD lenses. Yo can expect quite a few Olympus reviews in the future.
Exposure
This scene brought the dynamic range of my a7II to it’s limits so it was very important to get the exposure right. For that I relied on two features of my Sony. First I activated the DRO level 5 function which doesn’t affect my raw but it gives me a good idea how far I can push the shadows later. I also activated the Zebra 100+ function which shows overexposed parts of the image. Actually it shows up much too early and the way in which I work around that I turn the exposure wheel down until the zebra doesn’t show up and then lift the exposure 1.66 stops from there which is a pretty sure way to keep the highlights from being overexposed.
Postprocessing
Of course the resulting image looked very dark in Lightroom:
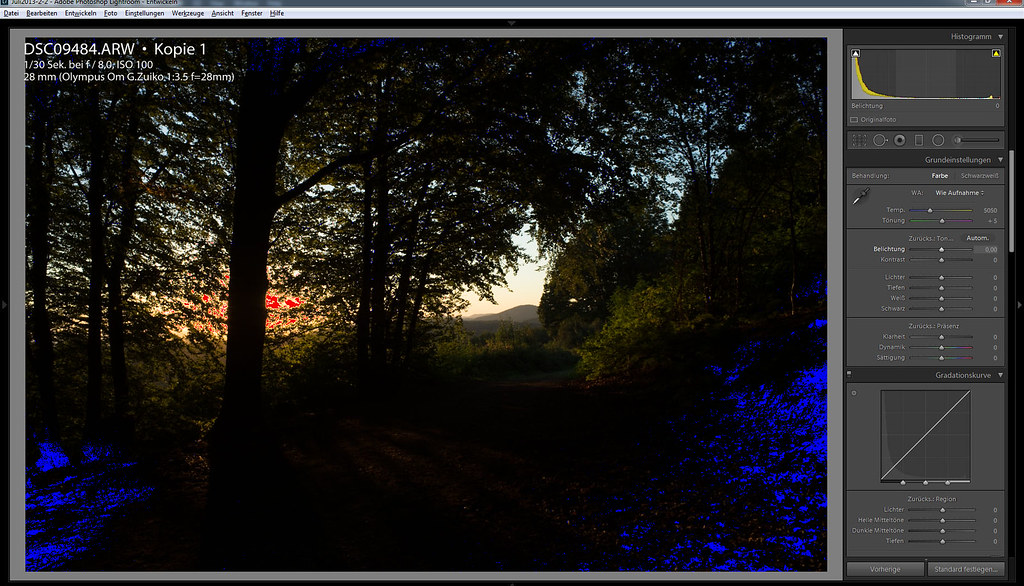
But if you own an a7 series camera you know that this isn’t an issue, you can easily lift the shadows 5 stops.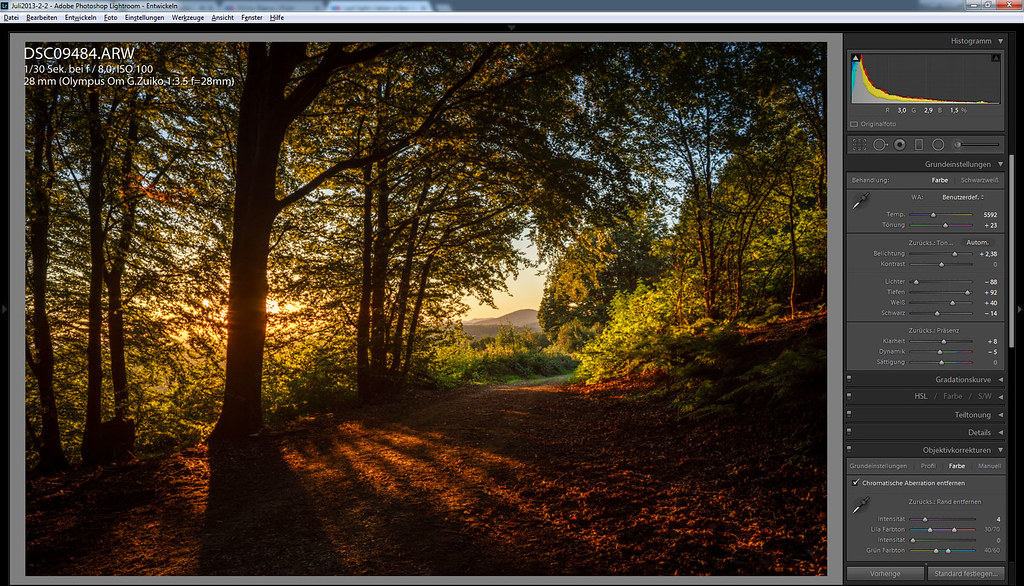
I am quite lazy when it comes to post processing and I very rarely spend more than 2 or 3 minutes on a single image. Usually I apply one of 5 profiles I have created for similar scenes, push 2 or 3 sliders and then I am done.
This profile lifts exposure of the whole image by a good two stops and the shadows a lot more. My goal is to keep detail in highlights and shadows but only just so. I also used the camera standard profile which can create some very nice and warm colors but it adds too much saturation which I had to dial down a little.
An that’s it. I still like to look at the image because for me it resembles a warm summer evening quite well and I like to remember summer, now that autumn is nearly over here in Germany.
Other Articles
- How I create Images Part 3: Postprocessing
- Affordable manual lenses for the Sony Alpha 7,7r,7ii,7rii and 7s
- User-Guide to wide-angle lenses for Sony a7 a7ii a7rii
Latest posts by Phillip Reeve (see all)
- Review: Samyang AF 75/1.8 FE - April 12, 2021
- The FE-List now has 113 lenses on it - March 25, 2021
- Announced: Voigtlander 35mm F2 Apo-Lanthar - February 15, 2021
As always, well captured and processed Phillip. I enjoy reading your blog and always look forward to new reviews and write ups. Thank you.
you are welcome 🙂
Thanks very much for that review!
I have the Olympus OM 3.5 28 and I love it! Sharp, tiny and manual, the perfect combination for my A7.
I’m glad that you will do some other olympus reviews as I have a lot of those olympus OM lenses and I’m sure you will make me want to use them more!
Awesome tutorial for exposing! Thanks. Shame i don’t have zebra on sony nex5r. Cheers. Thanks for article !
Hi Philip,
I find in its standard exposure mode the A7 is pretty conservative already, only allowing for very limited overexposure of local highlights. As a result of which the images usually are pretty dark in their default settings and very often require PP. Is it your experience that the standard settings still are not conservative enough to avoid blown highlights? (I personally tend to be lazy exposing my images, making sure that there is no heavy over exposure but for the rest the dynamic range of our machines is so good that I get away with a lot without paying much attention)
p.s.: 3 lenses, and you’re _limited_..? Wow, your back is stronger than mine 😉
I very rarely pay attention to the exposure meter and just adjust by visual impression with the help of Zebra and DRO. As you say, in standard situations it doesn’t matter too much.
Well with a 4/16-35, 1.2/58 and 2/100 + 4/300 I would have been even better prepared 😉
I recently came across this site and have been coming back frequently to read your reviews of various lenses. I have been a long time OM mount user so I’m excited you’ll be reviewing more Zuiko lenses. I have, for the most part, been very satisfied with the lenses I have (21/3.5 , 24/2.8, 35/2, 50/1.4, 100/2.8) but am curious to read your take on some of these lenses. In general, the later multi-coated version tend to fair better than their single-coated brethren and there is even some performance differences between MC version (i.e. the 50/1.4 with S/N > 1.1m or the 50/1.8 marked “made in Japan”).
Anyway, thanks for the quick tutorial on post processing. I had read about turning on the zebra feature to protect the highlights but don’t use it much (though I should). 🙂
Hi Phillip,
I’ve got exactly the same camera bag (!), yet for some reason, I always have trouble to cram more than 1 extra lens into it. Even with short focal lengths. It’s always just a little to tight for 3 lenses next to each other. Yes it fits, but only with force. Not nice.
What’s your trick? Not camera + lens in the middle, looking down, and two lenses on either side protected by the separator pieces?
Which lenses are you using? With such small lenses as on this trip there is plenty of space. With larger lenses such as the 2/100 Makro Planar or FE 4/16-35 I can only fit two small lenses with them but with most of my lenses I have no issues at all.
Well, what I have repeatedly tried to carry is my A7 + the Minolta 35-70mm attached (in the middle, lens looking down); and then to the side a Minolta 50mm f1.2 and on the other side a Canon FD 24mm + adapter. That fits, but not smoothly. You kind of have to cram the lens on the camera in between the other two lenses with some force. I usually end up leaving one of the lenses at home that way.
Do you have a smarter way to pack these things into the bag?
Hello Phillip:
I’m really enjoying your website and all the information about shooting with the A7 series and these old manual lenses. I have a different application that you might be interested in. I use an A7R with the Olympus OM series lenses in an aerial survey drone of my own design. I typically shoot from an altitude of about 120 meters with the 24mm 3.5. I will normally shoot in shutter priority and auto ISO to compensate for lighting variations during the flight. Most common setting on a bright day is 1/2000, F5.6 The images are then processed into mosaics that are geo-registered, creating an accurate aerial map. I’ve found the OM lenses to be outstanding for this application.
Interesting application, I see why the Oly would be first choice here.
Hi Phillip,
I would love to see a full review of this lens, the OM 28/3.5. Any chance you’ll write one?
Do you test lenses for focus shift? When you take picture with manual lenses, which method do you use: (a) focus at desired aperture and press the shutter button or (b) focus wide open, stop down to desired aperture, and press the shutter button?
Thanks for the great content. It’s educational and enjoyable.
It is one of the sharpest if not the sharpest legacy 28mm I have tested, it is tiny and handles great. But coatings are very primitive so it isn‘t suited for backlit subjects. If that isn‘t your thing then it can be a very good option. Since I shoot a lot of backlit scenes I didn‘t use it a lot and don‘t see me doing a review. David will publish an OM guide soonish though which I think covers it.
Ooo, an OM guide – I’m looking forward to that 🙂 It’s frustrating that so many of the old OM lenses only have 6 aperture blades.
You may want to give the Pentax-A 28/2.8 SMC a try. I know you did a great review of the older Pentax 28/3.5, but I would presume the coatings on the 28/2.8-A are better.
I actually find the Pentax-A 28/2.8 SMC to be a tad sharper in the corners than the OM 28/3.5. I switched to the Oly because I prefer the Oly’s handling and (with minor modification) it can be safely mounted on a Metabones Speed Booster Ultra to form a small package with a Sony NEX camera.
Generally, Nikkor lenses (love my 105/2.5 AI) are my favorite vintage options; however, I haven’t found a 28mm version that resolves sharp corners on a Sony sensor.
I so wish that there was more of this series! And that the story around the site and photo is told. It’s inspirational.