
As many readers asked for and looked forward to a follow-up to the Projector Lenses article—one that explains how Mark carried out the conversion and offers some hints and guidance so you can try it yourself—he kindly put together this second piece on the subject. All photos and text are by Mark; the article design and layout are by me, Martin.
So, I’ll hand it over to Mark…

Welcome back! This post seeks to introduce you to the possibilities of adapting old 16mm-film projector lenses to Evils, SLRs and even Rangefinders. The aim is using these old treasures for creative photographic expression. But whilst the charm lies in the resulting pictures more than the resulting object, feel free to wake your inner fine mechanic! Mine has definitely been fast asleep, and yet, through immersion, I graduated from first putty attempts to a solid interchangeable mount setup, the recipe of which I’ll share.
So here we go, I guess.
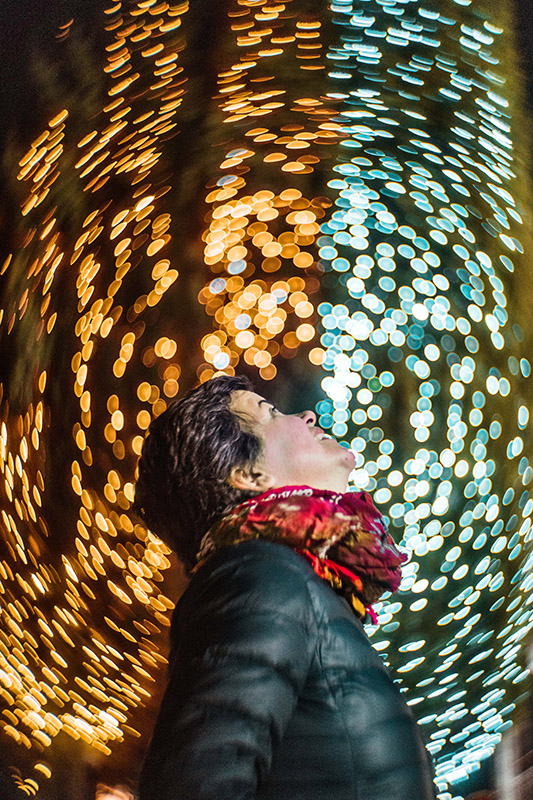
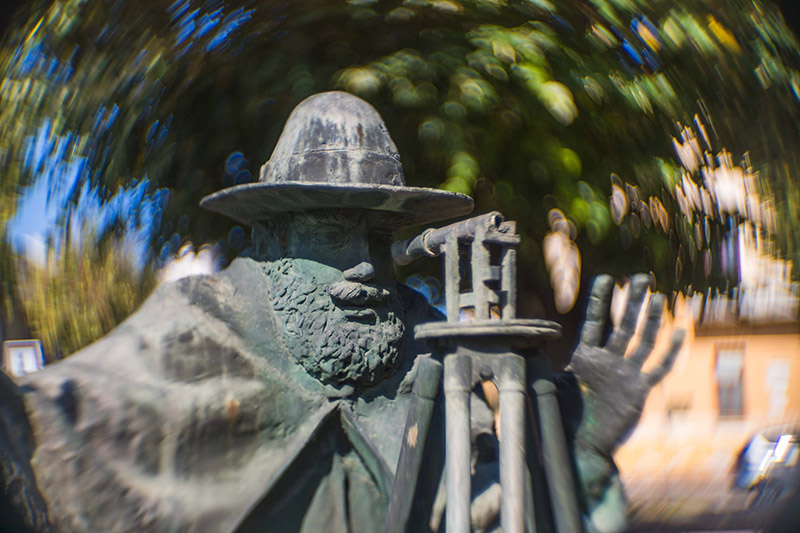
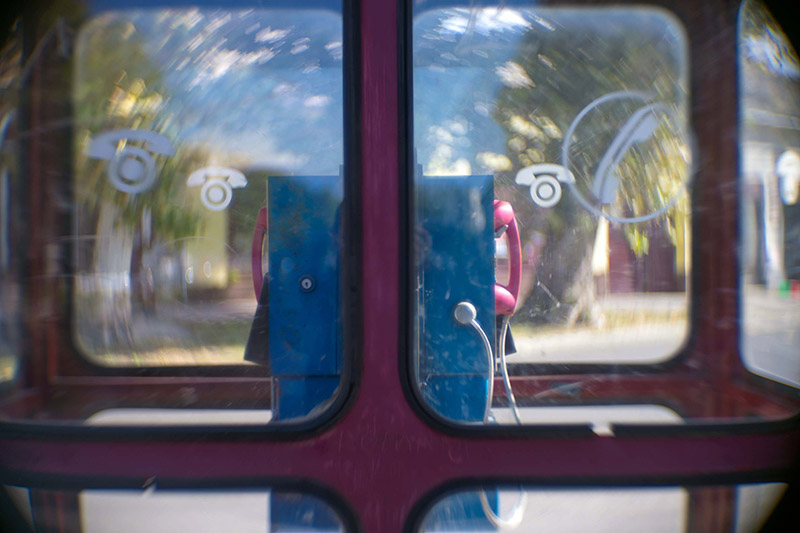
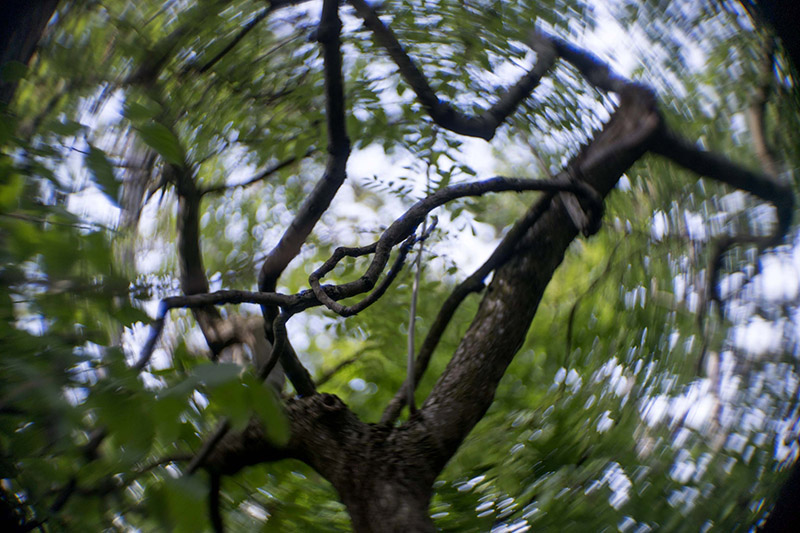
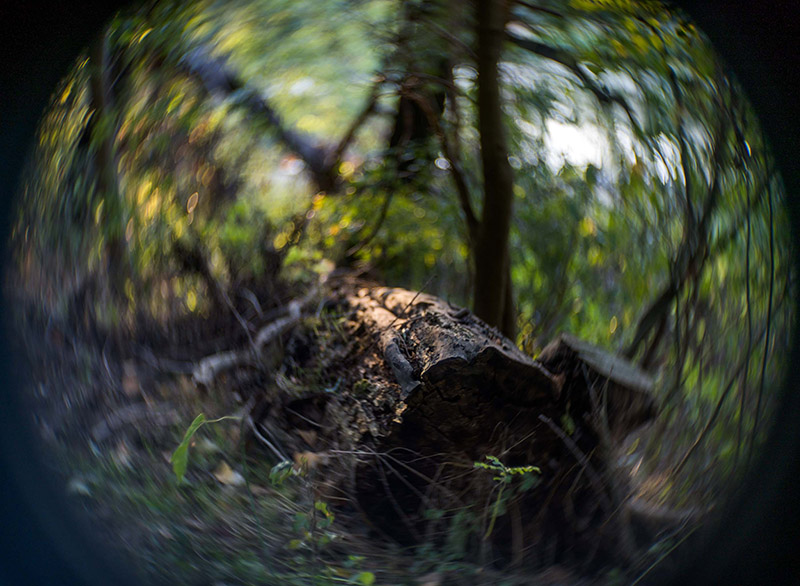
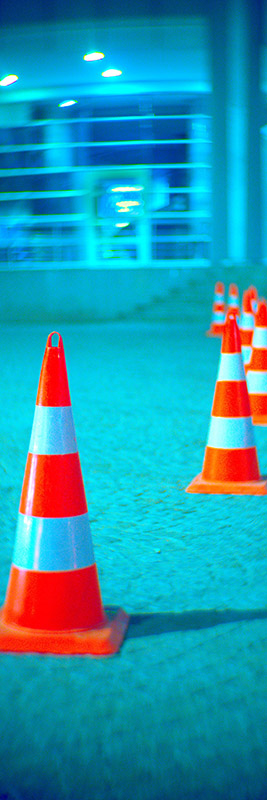
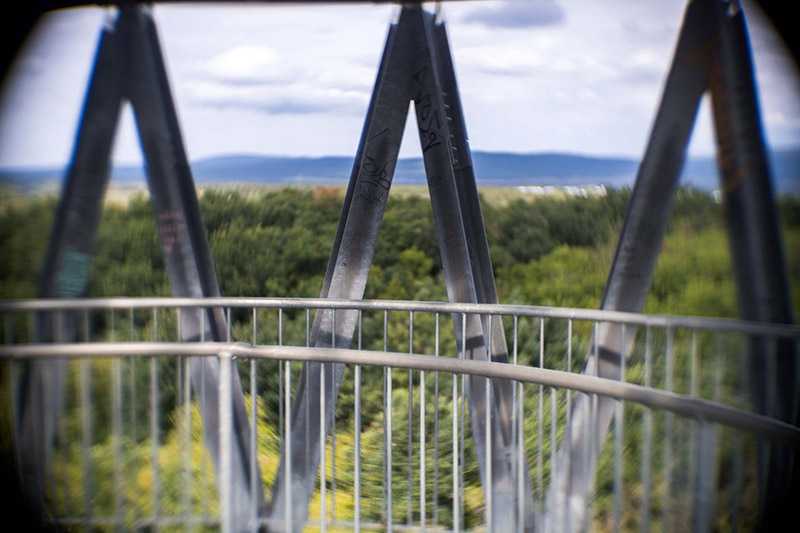
Sample Images


Contents
Disclaimer
We are going to ADAPT old lenses, i.e., putting the entire thing in a new mechanical surrounding. Adapting entails no modifications to the optical blocks, and no or as few as possible modifications to its metal parts.
Whatever camera system you use an old lens with today, might be obsolete in a decade. The first Evil systems, a technology barely a decade old, are already discontinued. Lenses, however, survive centuries, as testified to by the specimens here. Give future generations a chance to enjoy them just as much and refrain from any invasive procedures.

Yet, should the idea of simple mechanical adapting still sound too complex (it really isn’t), you likely find people online prepared to do it for you. An inquiry in a user forum might yield results.
And yes, a silver Noctilux will look sleeker and therefore make a better status symbol – if you define your status through consumption rather than creativity. Chances are, if you’re reading this, you’re not.
So get out that putty and get converting. Just remember to wear gloves.

Let’s go
I’d love to direct you to ready-made adapter kits imported from Asia. Alas, every single lens design is different. So whilst the principles are always the same, the required parts vary. But fear not. All you need is an apparatus to physically hold your lens and connect it to your camera.
That is, unless you are a proponent of freelensing, whereby you handhold a lens to your camera without a physical connection. This introduces both a tilt-shift effect and creative light leaks.

Projector lenses have standardised barrel diameters, but there are several standards. They are mostly a function of entrance pupil. 50mm-ish focal length lenses typically have a 52.5mm barrel diameter. A 50mm f/2 lens has an entrance pupil diameter of 25mm (i.e. 50 : 2); an f/1.4 of 36mm. Add the required metal barrel to hold all the glass together, and 52.5mm is ample for even the fastest lens.
But a 70/1.4 lens already has an entrance pupil diameter of 50mm, a 90/1.6 of 56mm, and a 240/1.8 of 133mm. They thus require wider barrels. They also need more (i.e. thicker) metal to hold their much heavier glass in place.


3D-Printing
This is perhaps the moment to remind old-timers like myself of the existence of 3D printers. S/he who commands their dark art can just download a pre-designed file of the camera bayonet mount and modify it to add a tube long and wide enough to receive the barrel of the projector lens.
To focus the lens, either pull it out of its holder tube, or add a helicoid. See details for both below. That makes printed lens holders a neat option – if the lens is not too heavy, otherwise the plastics will break.

Metal Mounts
Sadly, not all of us are versed in the dark art of turning plastic spaghetti into lens mounts.
For us peasants, there’s always metal and putty. You might be aware of the near endless variety of adapters, extension tubes, helicoids and gimmicks sold to the intrepid photographer. Ebay has loads, especially if you’re prepared to import from China, which I have been doing for years without hiccups. Most pieces are just metal spacers, so there’s little quality concern and no electrics at all. Yay.
Sadly, the EU now presses us for customs fees and VAT even on cent items. Despicable shipping companies like DHL, Fedex and many local postal services have established “policies” of charging you a “handling fee” of 12-30€ for the privilege of handing over your letter or parcel (the one you already paid them postage on!) from the customs office. So research or do a test buy to see what to expect and if that’s worth your nerves. Or do what the Brits did and leave the EU.
Rafcamera.com is a dedicated dealer for exotic mount adapters. They make bespoke pieces to even adapt old Kodak Aero Ektar air surveillance lenses to modern cameras. However, even they have no kits for Petzval projector lenses. But they do have enough bits and bobs to cobble together anything you might need. Sadly, they are in Belarus, another of the EU’s annoying-to-import-from countries.


Focus Units
When buying your lens, try to find out which film projectors it was historically sold with. On the one hand, this often results in cheap deals, as nobody buys film projectors. Just buy the whole hog and remove the lens. In this manner, I have kitted all my friends out with the gutted projectors as decorative, stylish vintage mantlepiece items. Sadly, even the biggest extrovert eventually runs out of friends to dump old projectors on.

On the other, more important, hand, the projector might have a mounting tube that holds the lens. It makes a great focus unit for adaptation, which also leaves the lens completely unaltered. I’m duly aware that these lenses will never go back onto any film projector, but having to grind and file away at them for adaptation still hurts.
Some lenses still require slight mechanical barrel modifications to reach infinity focus, even on evils. Luckily, these are limited to shaving off a few millimetres of metal behind the rear lens to bring it closer to the sensor. You can do so by hand with a block of wood covered in sandpaper, or with a plane sander. Just ensure not to angle the lens, or you’ll create a tilt effect! And be very careful not to scratch the glass!

The mounting tube is just a lens holder with a set screw. Simply glue a camera mount adapter to it. To focus the lens, pull it out as far as needed. If the tube and mount adapter are thin enough, you get infinity focus when pushing the lens all the way in.

A more elaborate approach is to “re-house” a standard diameter 52.2mm mounting tube in a cheap kit of macro extension tubes. Their rear has a camera mount like Sony FE, thus the whole monstrosity securely attaches to the camera. Extension tubes are modular; pieces of different lengths screw into each other. You can even combine several kits to the world’s longest tube. Sadly, the cheapo’s threads are nonstandard and will not connect to anything else.
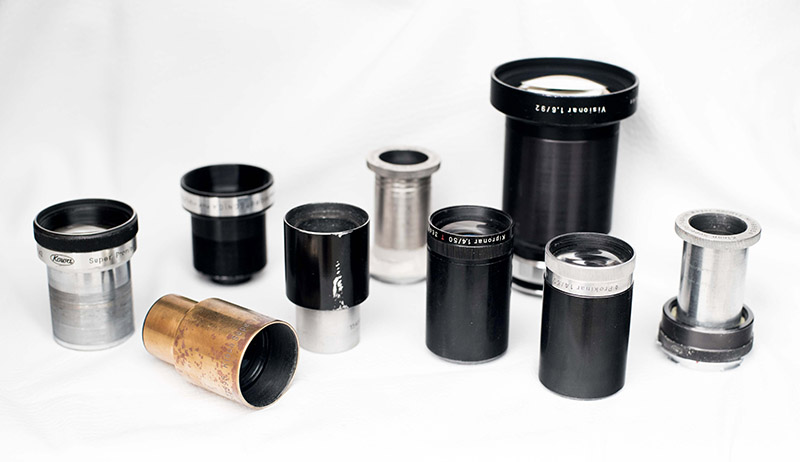
In the following image, note how the Meyer 50/1.6 sits inside the standard mounting tube, inside the Sony E macro tube, whilst the 50/2.2 in the background is thinner. There are versions of the f/2.2 with added body parts to make them fit as well, but they are less common.
And of course, no combination of tubes is ever perfectly long. So a thin layer of putty, silicone, Sikaflex, or resin bridges the gap. My current go-to is Milliput, because I had some left over. It’s a two-component paste you massage together for five minutes, then you have an hour to shape it. It dries for a day and then is resistant to impacts and humidity. It’s not smooth, though, and not pretty. But at least it sticks. Sugru, an expensive novelty, does not. Superglue fogs up optical surfaces and imagers!

For a simple mock-up, though, nothing beats Blu Tac, aka Uhu Patafix, a chewing gum-like substance that sticks but stays soft and comes off easily again. Lighter builds can live with it permanently!
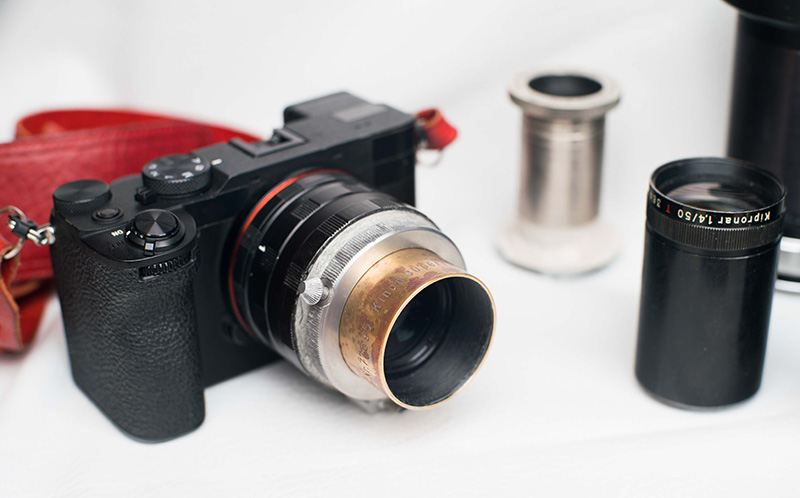
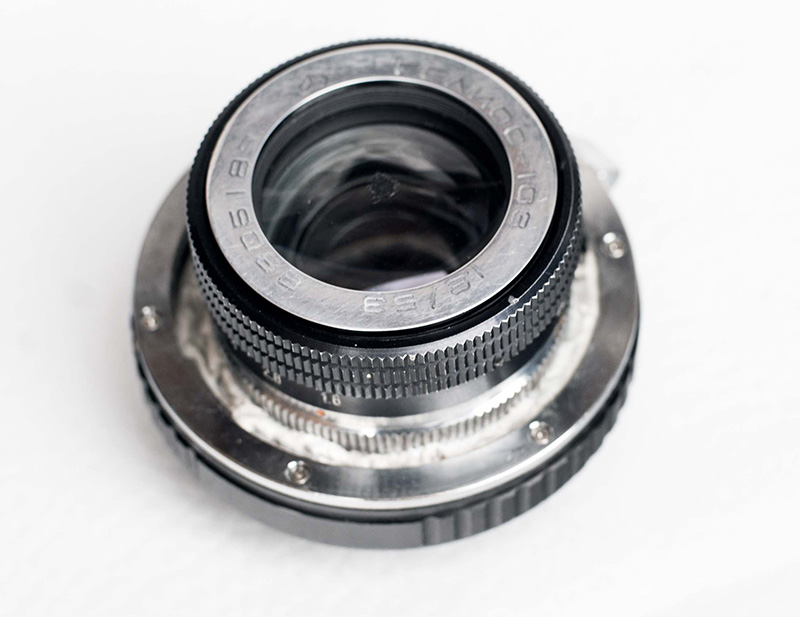
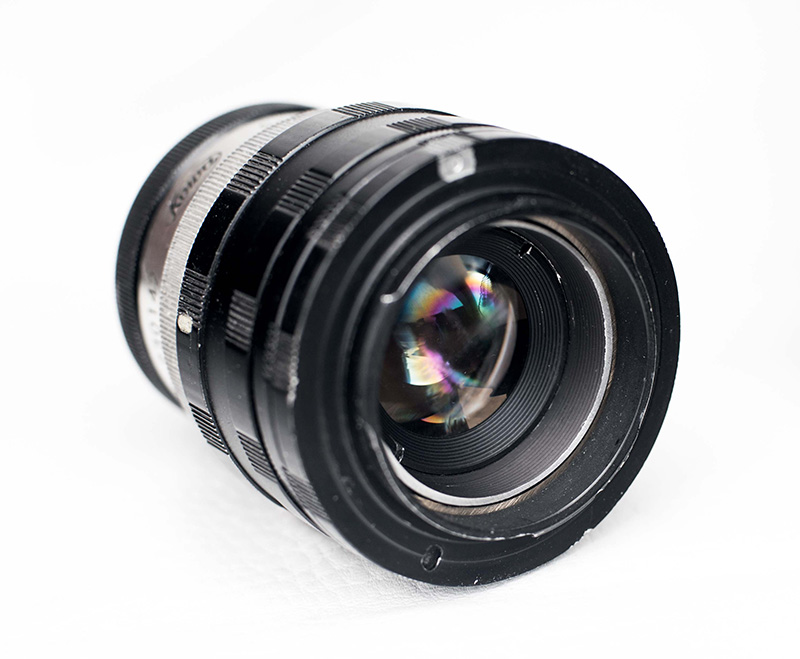
The lens shown in the following image is a Helios-103 rangefinder variant, but the mounting principle is universal: Find a sturdy adapter ring and fill it with putty. The lens will never sit perfectly perpendicular to the sensor, introducing a mild tilt effect, but it’s good enough for playing around.
Let There be Helicoids
I’m sure we all love a bit of in-and-out action for focusing our projector lens. With practice, it’s as fast and precise as manually focusing the helical focus units of photographic lenses. The only downside is having to fasten the set screw each time so the lens won’t fall off between shots.

An alternative is helicoid adapters. These are hollow tubes with a standard mount on either side, usually a thread mount like M42. The tube itself contains a smaller tube – a photographer’s Russian doll, if you will. Move the outer tube, and the inner tube moves out, pushing the two bayonet ends apart. The entire apparatus expands! This can be used to focus a lens.
These helicoid adapters exist in several thicknesses to accommodate different back focus distances as well as different extension travels.

Rathenower Optische Werke (ROW) Visionar 92mm f/1.6, later sold by Zeiss, has a back focus distance long enough to fit a helicoid when adapting to Evil. A thinner helicoid would make it fit SLRs as well, but would result in a disappointingly far close focus distance. 2-component epoxy made for a surprisingly sturdy connection despite no mechanical aids like threaded adapters. Just never forget to support both the lens and the camera!

To mount your lens to a helicoid, pick the best options for your specific lens.

If you 3D-print an adapter as described above, just design a shorter tube to make space for the thickness of the helicoid in its shortest (screwed-in, or, I suppose, flaccid) state. The lens then sinks into both the 3D-printed adapter and beyond that into the helicoid.
If you give the, ahem, rear end of your 3D-printed adapter the mount of your helicoid, like M42, you can even use several lenses on the same helicoid, as long as their barrels are all thin enough to fit into it. Print an adapter for each lens, with the correct respective tube length, and glue your lens into it. To change lenses, just unscrew one from the helicoid and screw in another. You’ve effectively turned your Evil into an M42 camera. Use residue-free glue like Pattex or Silicone and you can undo the entire build without sour remains.
freely. If you don’t have a historic mounting tube as depicted above, 3D-print a tailored
M42 adapter. Pair it with a purchased M42 helicoid, and the lenses fit your camera and
allow smooth focusing.
For thicker lens barrels, helicoid adapters with wider diameters exist – M65 is the next bigger standard, but Rafcamera et al has everything up to 130mm!
They also have clamps. These are shorter tube pieces that screw onto the helicoid’s end, receive the lens barrel, and provide three set screws to fix it in place. They are the non-tech alternative to 3D-prints.

Add spacer tubes as needed, and any lens in the world will find a home in such a setup of mounting pieces. Sadly, the costs do add up, and you may have to buy several pieces to find the best setup. Only experience will reveal if a setup truly works as intended, and if it’s ergonomic. A 100mm+ lens easily adapts to any camera, but the focus helicoid may sit nowhere near the natural tipping point of the lens, so it all feels unbalanced and requires a lot of force to focus. I’m aware that I’m writing this in an era of war, capitalistic oppression, police brutality and rampant political stupidity, so when speaking of a lot of force, please take that in context. But focus speed and precision may drop enough to miss sharp focus on a moving subject which, especially with a bit of practice, would have worked out on a conventional and balanced lens.

This is the rear view of the standard mounting tube fixed inside a set of macro extension tubes with a Sony E mount at the back. The Kowa 50/1.3, when touching the back wall of the tube as shown here, achieves infinity focus after sanding 2-3mm off the lens barrel’s rear overhang behind the rear lens. Without that invasion, it’s still perfect for portrait distance.
To mount the other end of the helicoid to your camera, you just need another thin adapter ring: from the helicoid’s screw mount to your camera’s bayonet, so something like M42 to Sony FE, or M65 to Nikon Z.
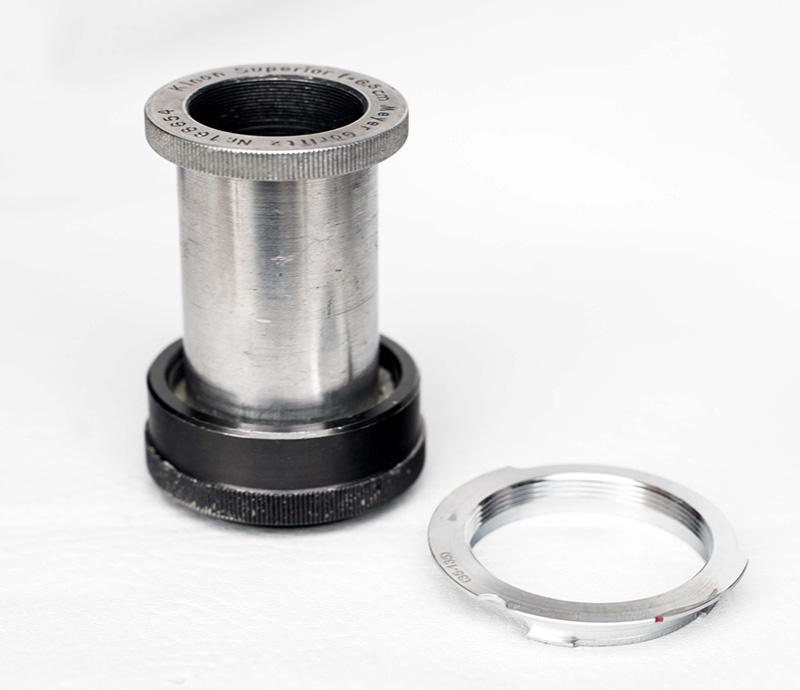
Most barrel versions of the Meyer Kinon Superior 50/2.2 are slimmer than the standard 52.5mm mounting tube shown above. Using any kind of adapter tube, like an M39 macro extension ring (left) or an M39 to Leica M adapter (right), the lens will directly mount to a helicoid adapter from Leica M to your Evil mount – with the benefit of added focus! To fixate the lens in the adapter, use a flat surface and either hardening putty like Milliput, or hot glue.
Note that M39 and M42 adapters exist in two versions: as thin rings of 1mm thickness, often erroneously called Macro Adapters (in fact, they do the exact opposite). You want those! You probably don’t want the thicker options with yet another tube in the middle. They are for adapting standard photographic M39 or M42 lenses with flange distance differences.
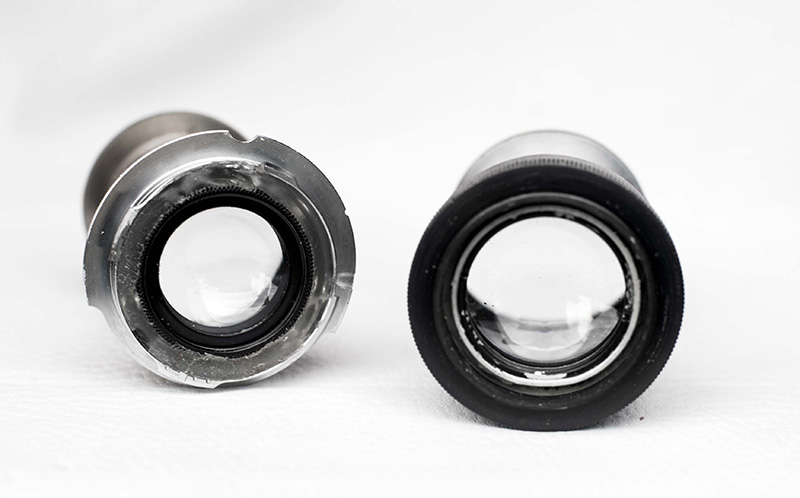
In the following image you can see a different view of the previous image and a classic example that more than one approach works.
There are also lens mount adapters with inbuilt helicoids, like Leica M to Leica L, or Canon FD to Sony FE. They do the same thing as a helicoid + adapter and are thus another option. Just ensure that their inner diameter is wide enough to receive your massive barrel. That of your lens, I mean.
Rangefinder Coupling
For rangefinder cameras, procure an optically broken, rangefinder-coupled lens with an intact mount and focus in a focal length close to your intended projector lens. Old Industars, FEDs, or Elmars are candidates. (If you have spare old lenses, this approach can also be used for SLR or Evil mount adaptations!)
Disassemble and remove the glass part. Secure a mounting tube to the remaining stud – either off a film projector, 3D-printed, or made from tubes and spacers. Your lens just needs to be able to focus to the intended distance once mounted to the stud. And the tube needs a set screw to fix the lens in place, but you can make space for one in any tube with a tapping drill bit.

The Leica M mount is also useful for evils, when adopting a principle established by Voigtlander and Experimental Optics: A thin and uncoupled M39 to Leica M adapter is fixed to the lens – then, a helicoid adapter from Leica M to your evil is used for actually focusing the lens. The lens achieves its farthest focus distance when the adapter is at its shortest, i.e. fully collapsed. For the Meopta Meostigmat 50/1.3 to reach infinity then, the rear of the lens barrel needs to be shortened by 2-3mm, as described above. If the resulting setup, as depicted here, were used on a Leica M camera, focus would be fixed at infinity.

For proper rangefinder calibration, you either need a digital rangefinder camera with live view or a film camera with an opening or removable back door. Leica M1-9 users are SOL.
With live view, focus your mount stud on an engraving around 2-3m. Measure the same distance with a tape measure in the real world (off of the sensor plane, not the front lens). Then pull your lens out of the mounting tube until live view shows it in perfect focussed at that same distance. Now screw it down.


The approach for film is identical, but you confirm focus with parchment paper taped across the film gate. You might still find small adjustments necessary, though, after a test roll of film: if all pictures are focused on the shoulders instead of the eye, the lens needs to come out of its tube by a fraction of a millimetre.
Of course, you can also seek the professional help of a fine mechanic or camera shop.
You can even buy ready-made conversions, but the cost is substantial: MS Optics had converted a simple Meyer Kinon Superior 5cm, a 50€ lens. It was recently offered in a Japanese auction for 2100€! So be reminded that foregoing the rangefinder route for adapted lenses and procuring a Sony a7r2 instead costs 400€ these days. With its failure-prone mechanical shutter disabled and switched to fully electric, it lasts nearly forever.


Let there be… Apertures?
Of course, you could modify a projector lens and add an aperture: cut a slit into the barrel, parallel to the front lens, as if turning it into a piggy bank. Aperture assemblies are sold as complete units on ebay et al, or can be extracted from a broken Canon FD lens or similar.
But is an aperture NECESSARY? No! The scope of scenarios where a creative Petzval look is desired, but its careful dosing through selective aperture setting of utmost importance, strikes me as so limited that I would never wish to undertake any effort to butcher a historic lens to equip it with an aperture disk just to provision for it. Your opinion may vary. If undecided, why not turn to the Bible for counsel? God said, “Let there be light!”, not “Let there be apertures.”

Moreover, as testified to by the new Lomo, no aperture setting tames the edge blur of a Petzval design to yield even vaguely sharp corners.
Historic photographic Petzval lenses had Waterhouse slot-in aperture disks (en.wikipedia.org/wiki/Waterhouse_stop). If you absolutely wanted an aperture mechanism, these are easier to build: cut a slit into the lens barrel, then shove a Waterhouse disk into it, which you cut out of cardboard. Cut a set of different aperture diameters as needed.
Most of us, however, will enjoy the full swirl effect and resort to shutter speed and electronic image amplification (ISO) to influence the amount of light gathered.
In A or Av mode, the camera sets the shutter speed and lets you choose the Aperture Value. Using a projecting lens, you have delegated that choice to the lens designer.

In M mode, you can adjust shutter speed and aperture manually. Since your aperture is fixed, when changing the shutter speed, the image will get brighter or darker if you leave the ISO value fixed.
Using the Auto ISO option of modern cameras, you can fix both aperture AND shutter speed, yet still obtain properly exposed pictures by letting the camera vary the ISO value for a correct exposure. This is nice for capping the slowest shutter speed in dim light or with fast-moving subjects to avoid motion blur (think kids or cats), but comes with increased noise.
In bright light, even the electric shutter speeds of modern cameras are too slow for fast lenses – the image would overexpose. A grey, aka ND, filter helps; an 8x or 3 stops type proves ideal.

Conclusion/s
If all the wars, capitalistic oppression, police brutality, and rampant political stupidity leave you enough mental freedom, I heartily recommend looking into such left-field ventures as adapting weird old lenses. They deepen your understanding of basic optical principles and will give you confidence and curiosity to slap anything onto your camera, from slide projectors to X-rays to home-made soft-focus lenses!
I also hope that all the franken-conversions (franconversions, I guess) here have reassured you that the charm of the result lies in the pictures, not the object.
Links
This video nicely illustrates adapting options and putting together different mount components:.
The principle of 3D-printing mount pieces is detailed here. instructables.com/3D-Printed-Focusing-E-Mount-Adapter-for-Ultra-Fast and here.

Donate
Did you learn something new, find this article useful, or simply enjoy reading it? Would you like to make a donation?
For this article, make your donation to Malcolm Cat Protection Society.

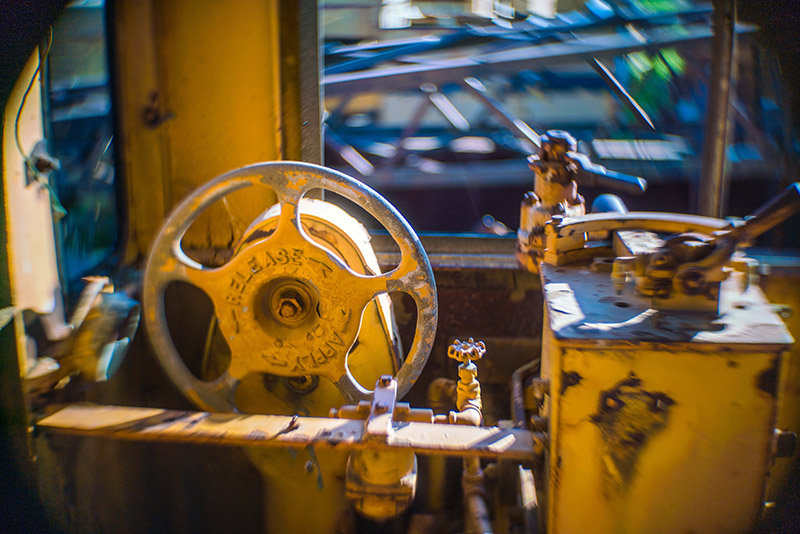
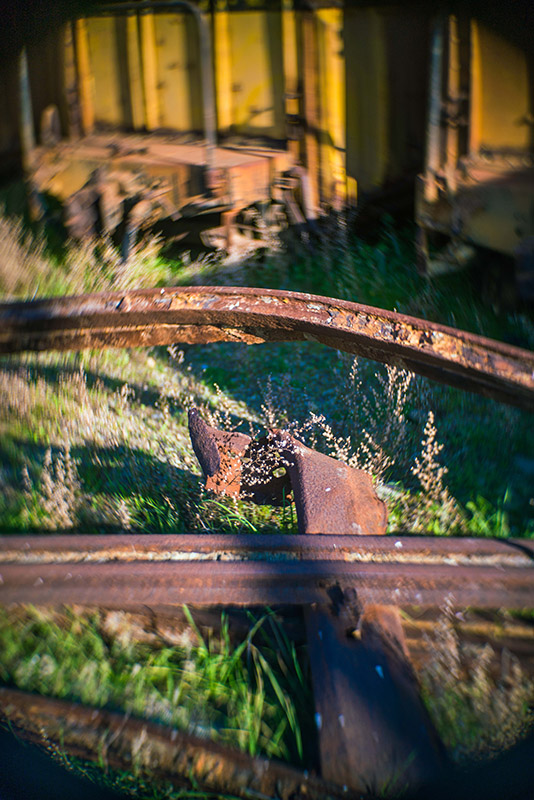
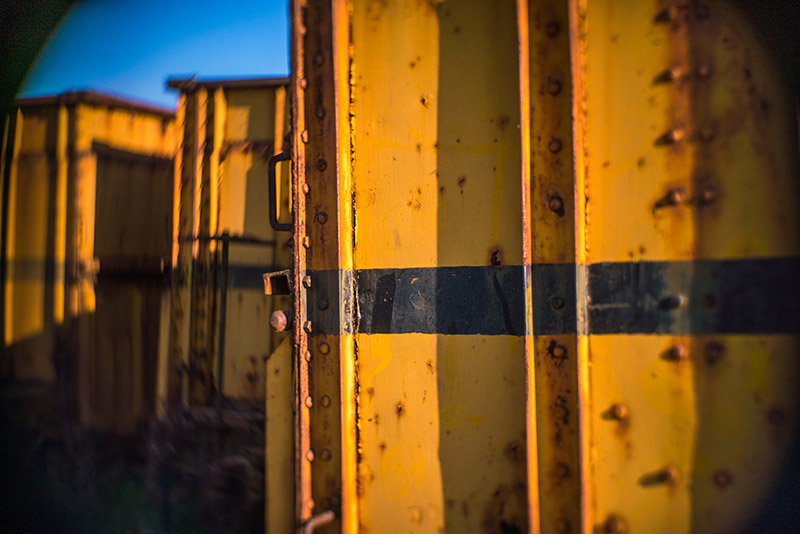
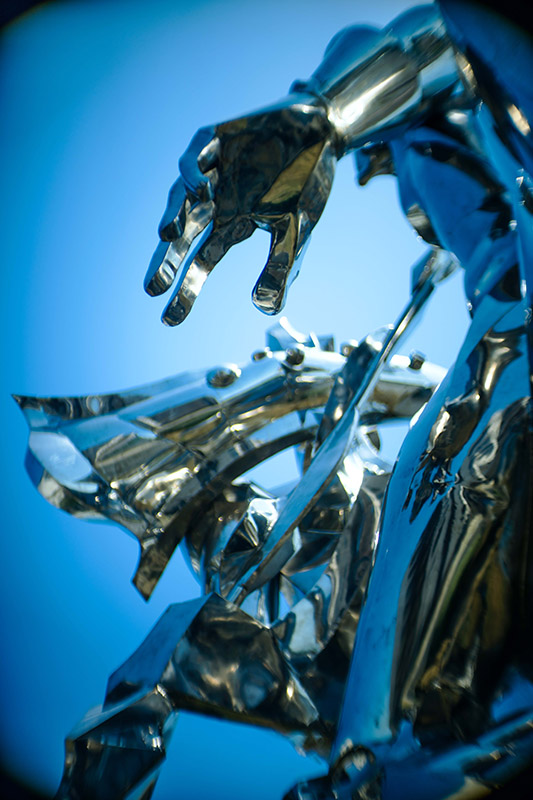
More Sample Images


About me
My background is in journalism. Attempting to battle severe, untreatable depression, I immerse myself in picture-taking. It’s a subconscious desire to literally see the world through different lenses and a faint hope of gaining a different perspective on life – with an acute awareness that any picture might be the last. Mark Stein is a nom de plume.
https://flickr.com/photos/hach_und_ueberhaupt
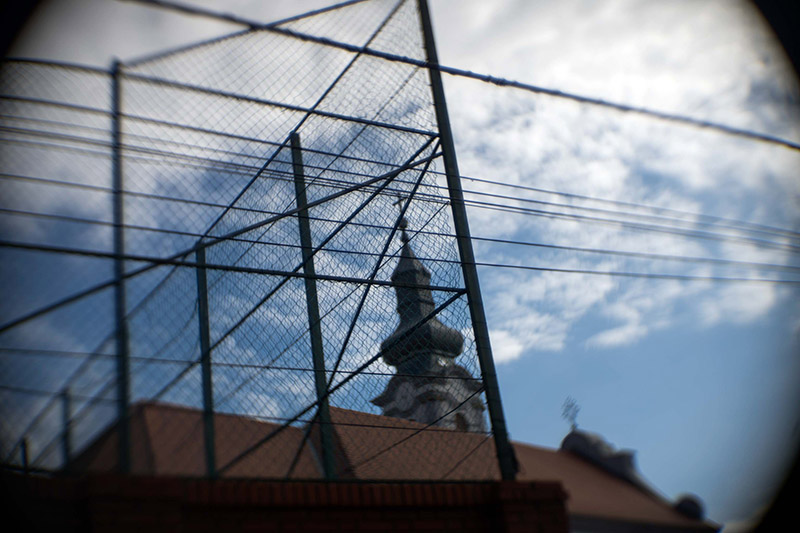
Photos from Hungary? : )
Thank Mark Stein for your contribution. These lenses and the photos are unique.
Hi,
i’d very much like to keep political opinions out of this otherwise great place on the net.
Never thought to write this under a article here but already thought about doing so under part 1.
Thanks.
-Niels
You and me both.
As this is a guest article I did not feel the need to intervene though.
Stopped reading when you went crybaby and talked about having to pay extra fees from buying from Belarus and all the pain you seem to feel about it.
…Seriously? Yeah, and leave the EU while your at it. Are you from Hungary yourself?
I have no problem talking or reading about politics, but this article was all over the place.
Sorry, love this page but this is the first article series that I can’t finish reading. Interesting subject but the execution was really not for me.
Well you can’t win the all. I bet there’s something here for others to appreciate though.
It’s understandable, and we always keep opinions out of our articles. These two, however, were guest contributions.
Even so, when I edited the format, I also asked Mark to remove any political remarks—or really, any comments not directly relevant to the technical or practical aspects. He did remove the strongest ones and those I specifically pointed out.
Obviously, not all of them were removed, and I didn’t want to intervene too much since it was just a guest article. Now I realise that perhaps I should have.
Mark shares his knowledge in two long, detailed texts. And all some people can do is point out what they’re unhappy with? And all the admins can do is chime in?! Laying out customs hurdles is not a political position. Nor is it an expression of “pain”, omg.
The only questionable thing I see is the moderators publishing these “cry-baby” comments. What do they add to the discussion? If you don’t like what you’re reading, quit reading. If you can’t appreciate someone giving their time to share their knowledge, that’s on you. Don’t poison the comments with y-o-u-r pain.
Mark, thank you so much for your work! I will probably never convert lenses myself, but I really enjoyed reading your journey!
He didn’t only share is knowledge about these lenses, so expect people to react to -all- what he shared. If you can’t handle that, you obviously got problems with the very same things yourself, so might pick up on your own advice and keep scrolling?
I did.
…What it adds? It’s obvious a reaction.
This article stood out.
Not pain, painkillers.
I have zero problem with articles taking opposite sides or mixing politics with whatever, but it’s the execution and the way that things are written that I reacted and oppose to.
Deal with it.
Thanks so much for taking the time to write this deeper analysis about how to mount and use projector lenses on mirrorless digital cameras. I’ve been curious and I feel like a good basic introduction to the process of both how to adapt such lenses, what to look for in finding such lenses, and how to use them. I’ve really enjoyed exploring vintage adapted camera lenses, and finding out what kinds of subjects are synergistic for their atmospheric flaws (i.e. hidden strengths). Exploring projector lenses seems like a natural progression.
Thanks, also, for letting your writer’s voice express your reality. Disregard the haters. Your writing is honest and affecting and it touched me.
Came for the interesting photography content, left because of the uninformed anti-EU bullshit I so often hear from people who live their lives through Facebook, Instagram and Reddit.