Introduction
Leica users where the first to discover that their old compact wide angle lenses with the rear element close to the film/sensor plane have some color cast issues on digital cameras. This is an issue that cannot fully be solved by the optical design – at least when following the quest to create compact lenses. But there is something we can do: fix this in post. How to do it? I will show you in this article.
Contents
What is color cast?
Some wide angle lenses will create a color cast in the corners and sometimes border regions of the frame when used on digital cameras. This mainly affects compact (rangefinder) wide angle lenses with their rear element very close to the sensor. That short distance between rear element and sensor means that light will hit the sensor at a very shallow angle which creates some problems like additional vignetting and also sometimes a color cast.
The same lens can show different color cast on different cameras. The later BSI sensor Sony cameras mainly show a slight symmetrical green color cast in the corners. The same lens can show a nasty asymmetrical magenta color cast on the Leica M10 though. The situation can get even worse when using a camera with older sensor technology like a Sony A7r, a Leica M9 or even APS-C cameras like the Sony Nex 7 or Leica M8 – these cameras are generally known to have the most severe issues with color cast.
There is also some good news though: no matter how bad the color cast is, it can be corrected.
Correcting Color Cast in Lightroom
a) Gradients
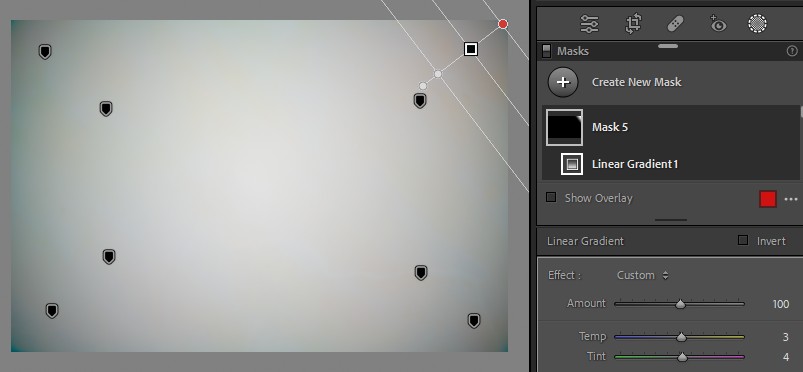
For lenses that show only a slight color cast this is usually my go to method. The benefits of this method: it works with any kind of image files (all raw files + jpegs) and the correction can be turned into a preset for very easy application
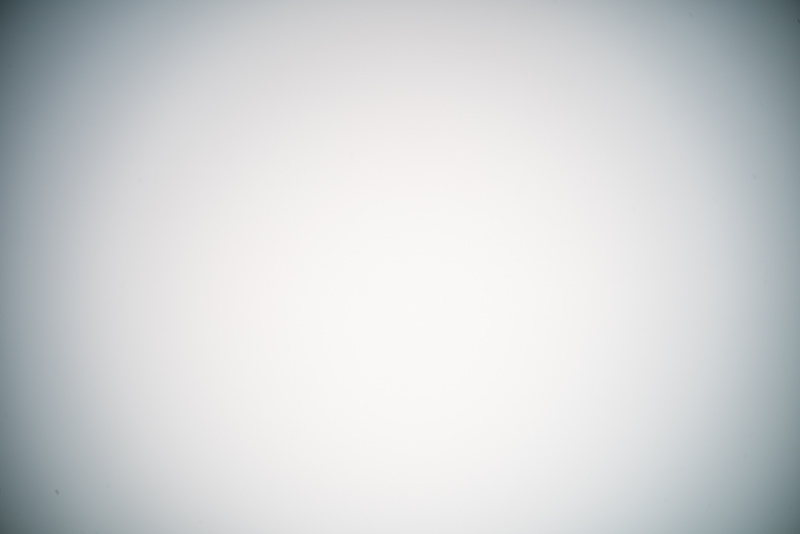
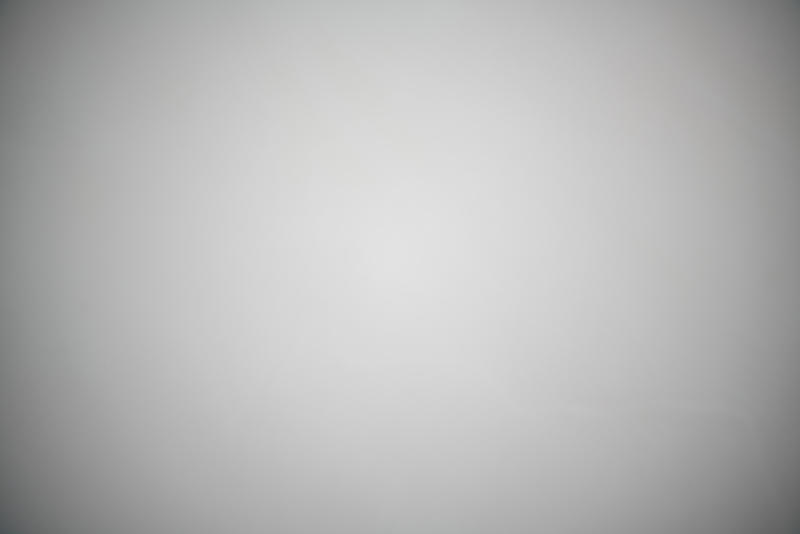
First thing you should do is take a picture of an evenly lit white surface. I was just using a white wall in the house for this. I set the lens to infinity, the camera to base ISO and took a picture. In this picture the color cast should be easily visible, if there is one:
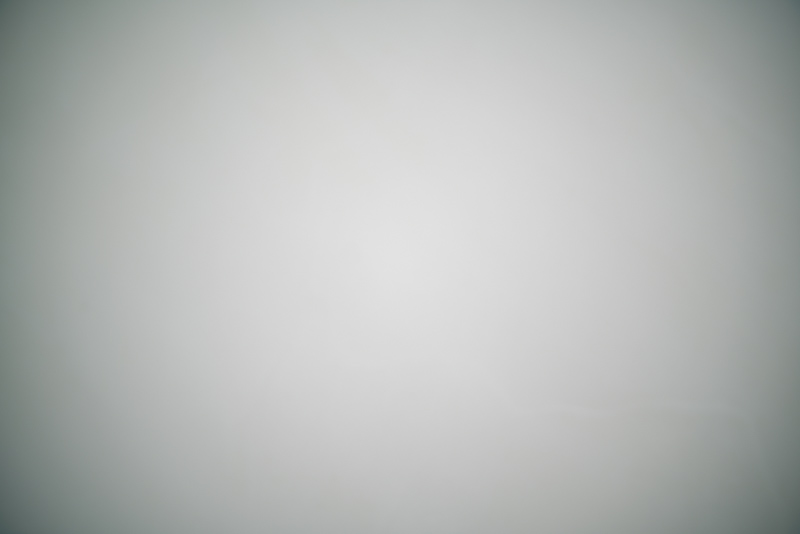
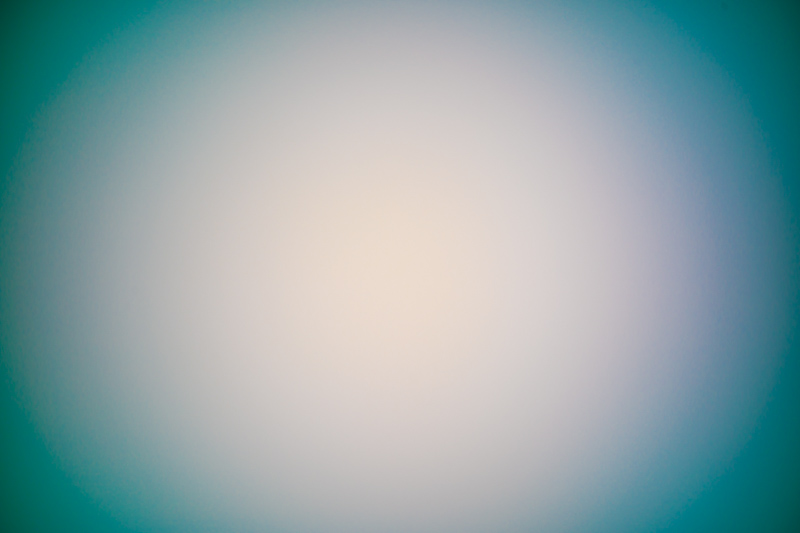
For the following steps in can be helpful to increase saturation and vibrance to 100, as it makes color cast more easily visible. The center of the frame should be neutral grey, even with those two set to 100. If that isn’t the case adjust the global white balance first.
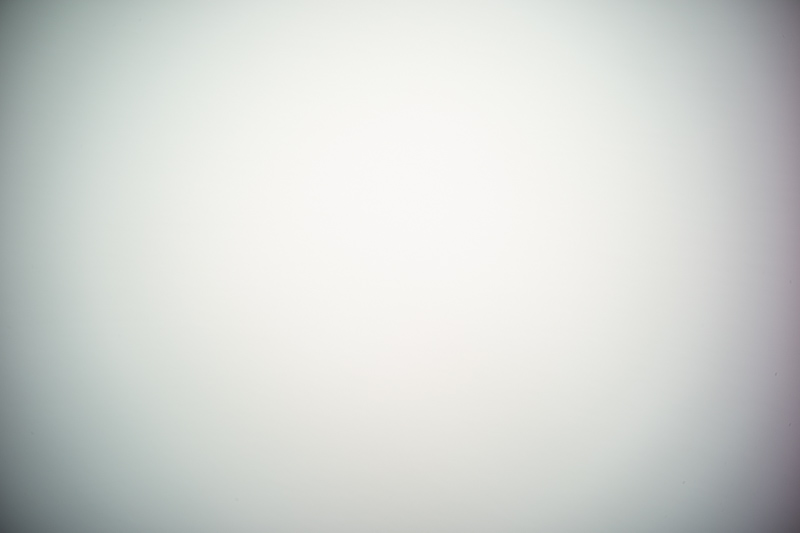
Now I start in one corner with one gradient. As the color cast is green I am increasing the teint to neutralize the color cast. The corners are also a bit too blue, so I increased the temperature as well.
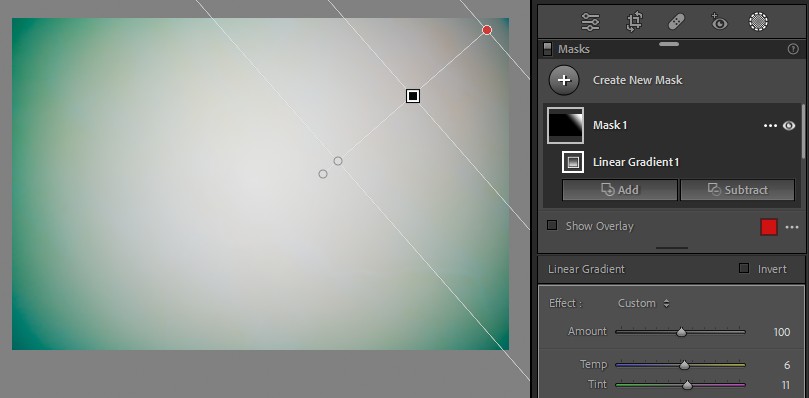
The next step is to copy the mask to all four corners:
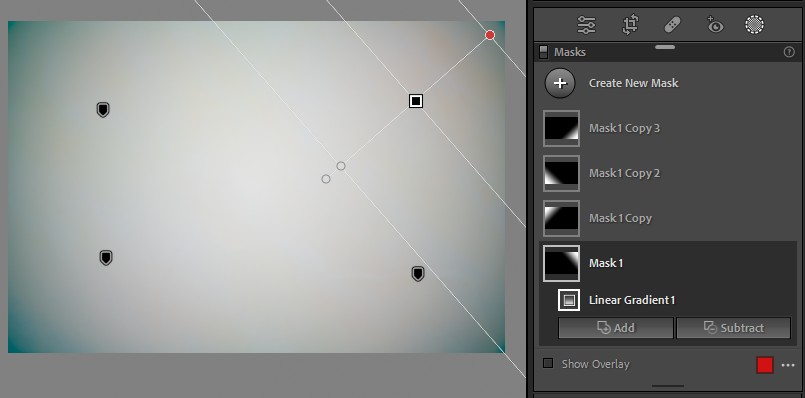
While the situation already improved greatly there is still a slight color cast in the very corners left, so I am adding another set of gradients in the corners, starting with one:
And then copying the mask to the others:
Now that we have done that the correction looks pretty good, also keep in mind vibrance and saturation are still greatly increased. When changing those back to zero all the visible color cast is gone:
You can now copy your masks to some real world pictures and see if the correction works well or if any further adjustments are needed. In this example it looks like it works very well:


When you are happy with the results you can also save your settings (masks) as a preset which makes them very easy to apply to any further pictures.
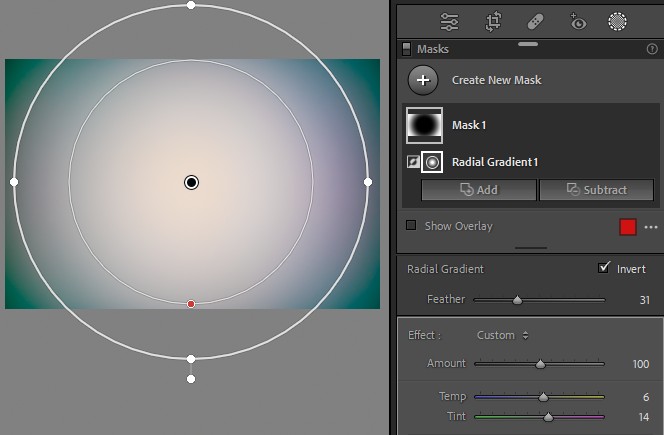
b) Radial Filters
This method is very similar to the aforementioned one but we are using radial filters instead of gradients. I find radial filters a bit trickier to set up, but you don’t have to deal with every corner separately. Obivously radial filters work best with symmetrical color cast like we usually see it on the later Sony cameras.
We will use the Funleader 18mm 8.0 as an example as it creates a very strong green color cast on the Sony cameras.
Also here we need a picture of a white evenly lit surface like described before:

I am again increasing saturation and vibrance to 100 for the color cast issues to be more easily visible:
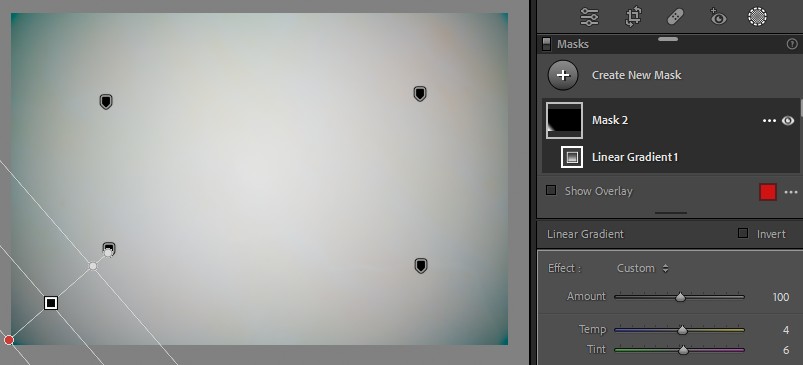
As the color cast is (mostly) radially symmetrical I set up an inverted radial filter that only affects those corners:
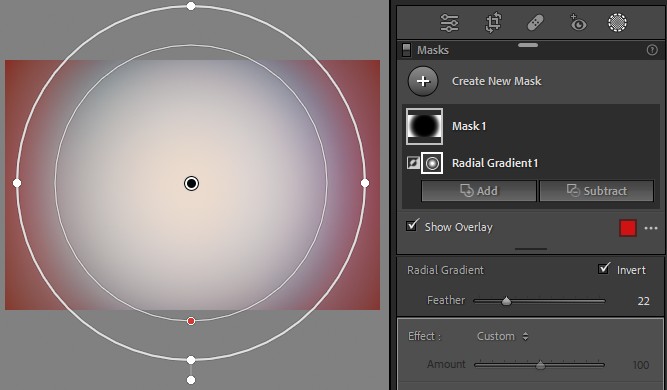
I increased the tint to neutralize the green color cast. I also increased the temperature a little as the corners were more blue than they should be.
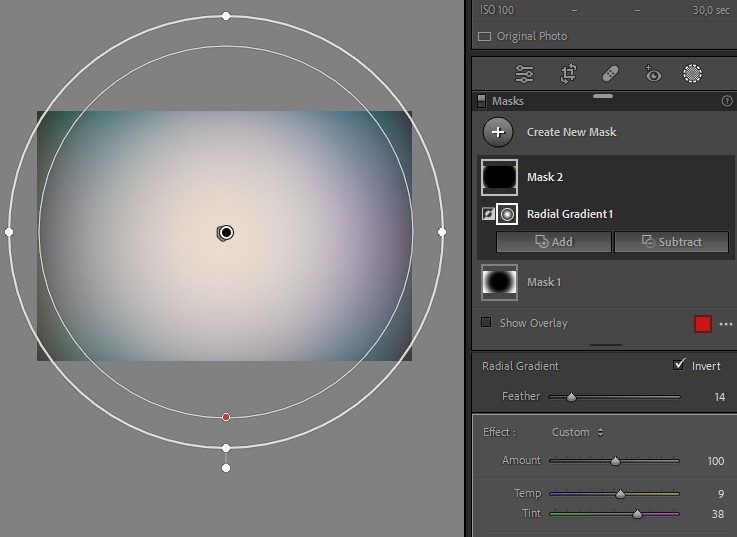
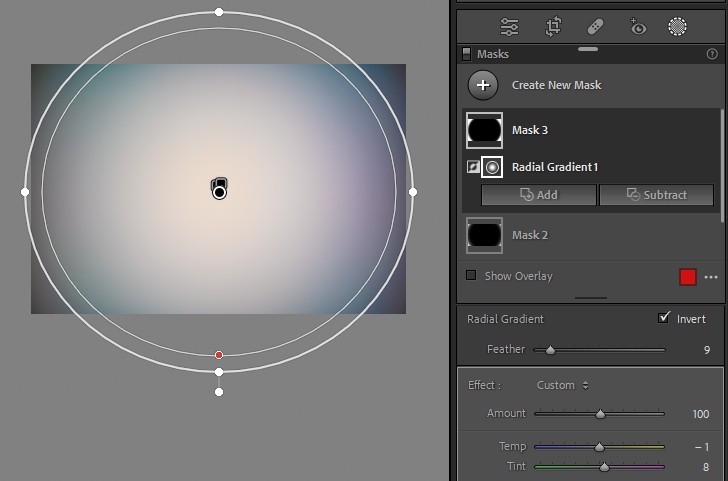
Depending on how bad the color cast is it can be necessary to use more than one such digital filter. Here I used three radial filters of slightly different size with different settings for hue and temperature:
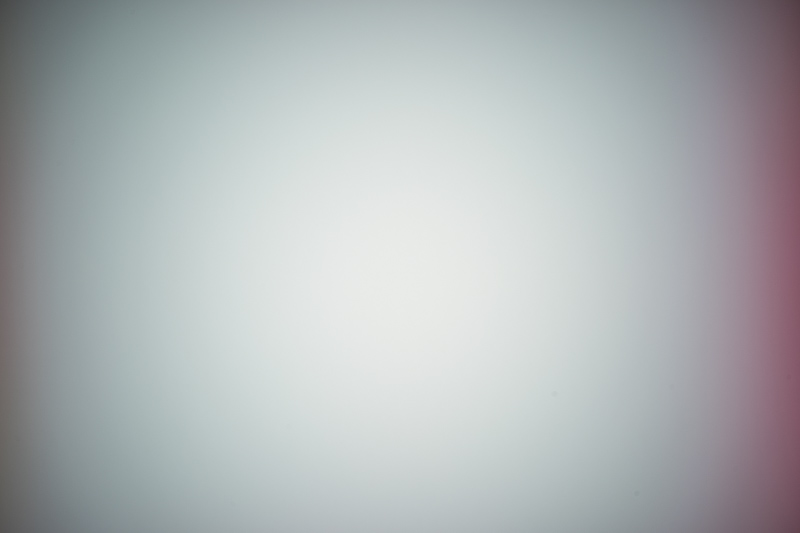
You may think this still looks bad, but remember we greatly increased saturation and vibrance. If we set those to zero again the result looks pretty good:

Keep in mind the correction does not have to be perfect. Even if it only looks like 90% good it should be totally sufficient for most cases. Also keep in mind that I was using a rather severe example here, for most lenses that show a color cast a single radial filter is sufficient.
Again it is a good time to see how the correction works for some real world pictures:


c) Flat Field Correction
Lightroom features a “Flat-Field Correction” that can yield even better results than the aforementioned methods and you also don’t have to deal with setting up gradients or radial filters yourself. Unfortunately it comes with two disadvantages: it only works with DNG files and you cannot turn the correction into a preset.
We will again be using the Funleader 18mm 8.0 as an example, but this time when used on the Leica M10 where it creates a horrendous asymmetrical color cast:
What you also need here is a picture of a white evenly lit surface like a white wall. The lens should be set to infinity, the camera to base ISO. This picture is very important here, as you will always need it to correct others. We will call this the subtraction image.
What you do now is select that subtraction image as well as a picture you want to correct and run the Flat-Field Correction (Library -> Flat-Field Correction). You can even choose to also correct the vignetting if you like (uncheck “Only correct color cast”). I often found the vignetting correction too strong though.
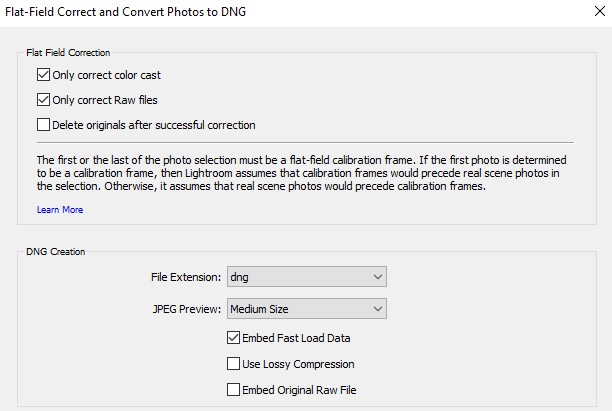
Lightroom will now create a new DNG file with the correction applied. The original DNG file will be removed from the catalogue, you can re-add it manually if you like.
If your subtraction image looks like the one above the correction should yield really good results, I was honestly surprised how well it works:
You can use this method with any kind of digital camera, but you need to convert your raw files to DNGs first. Luckily this is also possible within Lightroom these days, but it does add additional work, so I wish it would also work directly with any kind of raw files.
Conclusion
Color cast issues can make an otherwise well performing lens look unusable, but not all is lost. As I showed you in this article there are several ways to fix this. This allows you to enjoy your legacy rangefinder lenses on digital cameras or to further improve the performance of some of the latest and smallest modern ultra wide angle lenses.
Further Reading
- Review: Laowa 9mm 5.6 – The World’s widest lens
- Review: Samyang 10mm 3.5 XP
- Review: Voigtländer VM 15mm 4.5 II
- Review: TTArtisan 50mm 2.0 Pancake
Support Us
Did you find this article useful or just liked reading it? Treat us to a coffee!
![]()
![]()
![]() via Paypal
via Paypal
This site contains affiliate links. If you make a purchase using any of the links marked as affiliate links, I may receive a small commission at no additional cost to you. This helps support the creation of future content.
Latest posts by BastianK (see all)
- Review: Sigma 85mm 1.4 EX DG HSM - July 22, 2026
- Review: Mandler 35mm 2.0 7e - July 18, 2026
- Review: Viltrox AF 26mm 2.8 Evo FE - July 15, 2026
No need to reinvent the wheel.
This problem was solved a decade ago.
Try CornerFix.
Was using it back in the day with the Kodak DCS Pro 14n with literally every lens wider than 50 mm.
The workflow with corner fix is so bad, who wants to deal with that?
Hello Bastian,
i am really wondering, why there is no response for your very interesting and useful article.
I am very thankful for getting informations how to fix the nasty color cast, when using uwa-rangefinder lenses on my Sony A7.
Now I am able to get the maximum out of my beloved uwa lenses. Thank you!
Best regards,
Christian
I guess it is more fun to buy new lenses than to improve the output of existing ones 🙂
Like many photography content creators say, talk about gear and your viewership will vastly increase… Probably goes the other way round too. I was already familiar with the technique (but I still have no lenses that really require it), and when I think about it, it’s probably your reviews that gave me the idea.
Like I always say to people, I often used to learn from reading them, and expand my technique and photographic vision. That’s why I appreciate these “non-review” articles as well, be they tutorials or blogs (I guess?) about taking certain photos (like recent series about film which I really enjoyed, and I wouldn’t mind seeing more similar content if it happens).
After all, home page here is one of the first things I check in the morning… The only reason why I don’t comment on every post (and I read them all) is out of fear or repeating myself. Keep up the good work!
Feedback is always appreciated, but no pressure to comment on anything. Analogue Adventures will also continue.
Thank you for writing this tutorial! It saved my Hologon 16mm from being only usable in B&W on digital sensor to useable in color.
There will also be a review of the Contax-G 16mm 8.0 Hologon soon.
Thank you for your detailed explanation of how color cast occurs when using very short focal length lenses such as RF wide-angle lenses and your tips on how to correct it.
My favorite full-frame camera is the Sony A7R because of its compactness. Unfortunately, as already mentioned, the sensor produces particularly strong color shifts not only at the corners and edges, but also in the center area as soon as wide-angle lenses from rangefinder cameras are used via an adapter.
These color artifacts can only be eliminated with a flat field correction.
While in Lightroom, which I don’t use, the RAW files have to be converted to DNG format (as with Corner Fix), this works without detours with Capture One Pro (not with C1 Express) and with the free RawTerapee. I’ve been using the latter for a few years and the results are appealing with e.g. CZ Biogon G 2.8/28 or CV 4.5/15.
Have you ever tried RawTherapee for a color cast correction? It would be worth a try in my opinion and I would be interested in your review.
Haven’t used that one as I try to limit the number of different programs I am using to as few as possible.
But I will have a look how it works there.
Does RawTherapee have a way to only correct color cast but not vignette? I briefly tried RawTherapee and didn’t see an option for that. Like LR, I find the flat field correction corrects vignette a bit too heavily than I prefer.
Can a lens develop color cast?
I have an 7artisans 35 1.2 mk1 for my eos m, it didn’t use to have color cast, now it has it on one side.
I tried a similar method to correct it in post but its a bit sad to have to do it nowadays.
Generally I would say no, but maybe you can share a picture?
I would like to have a look at the situation.
Hi
Hope you find it interesting.
https://flic.kr/p/2o6Q5PY
This does look a bit odd.
You are not using some UV or Variable ND filter on that lens, right?
Dear Bastian, thank you very much for your article, that has make me aware of the flat field technique! It is impressive the improvement that one get once one have a flat field file. With a single click in Rawtherapee, one click, and all vigneting and color cast is gone. It is not perfect, but the improvement is impressive. Thanks a lot for the article!!!!
You are welcome as always 🙂
What an insightful and essential article- this addresses the cast issues with vintage lenses and probably needs to be bookmarked by vintage lens lovers and digital users those have shunned or feared analogue lenses due to their cast producing tag.
This beautifully rhymes with the CG Hologon article too!
Hi Bastian, have you found a way to solve this problem on mobile? I have a lens I want to use while traveling but won’t have access to regular Lightroom. Only the Mobile version.
Have you found a tool for this on iOS or Android ?
I don’t do any editing on mobile devices (except for notebooks with LR classic), sorry.