Introduction
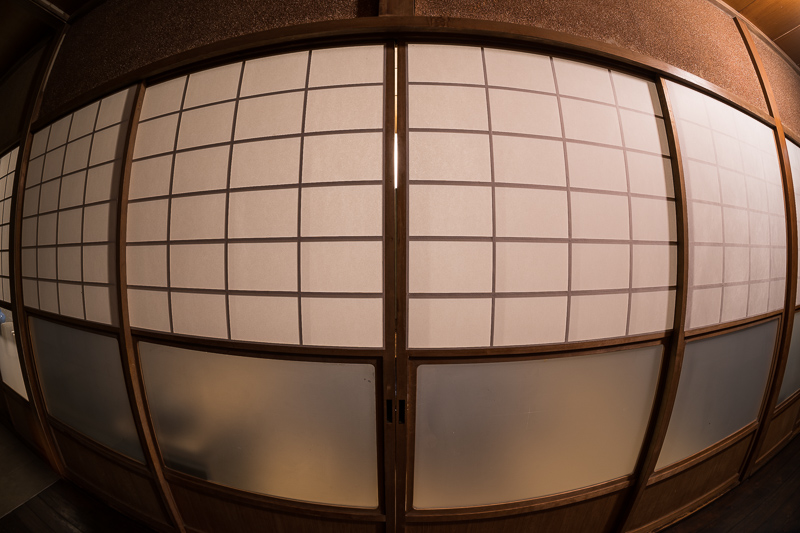
Distortion is one of the classic lens aberrations and comes in various forms. We will have a look at them, see which ones are easy to correct and how to create correction profiles for those lenses with complicated wavy distortion patterns.
Contents
Different types of distortion
Generally there are three different types of distortion: barrel, pincushion and complex/wavy. The latter is usually a mixture of the other two and the problem is, that it isn’t uniform across the frame.
Correcting uniform distortion
Uniform distortion is pretty easy to correct, as you need only one value (to adjust the strength of the correction) to fix it perfectly. There are many lenses with uniform distortion, for example the Sigma 35mm 1.2 Art:
How do you correct uniform distortion? It is really easy. You can find a single slider in Lightroom or CameraRaw in Photoshop to do it:
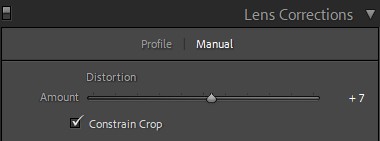
With a new lens I always take a picture of a building with a lot of straight lines to determine whether the distortion is uniform or not and if it is uniform what value is needed to correct it (you usually find that value in my reviews).
Most lenses show the highest amount of distortion when set to infinity, so you may need slightly different values for different distances.
Correcting complex/wavy distortion
With complex/wavy distortion the situation is more complicated though, as hardly two lenses are the same. Therefore lens specific correction profiles are needed. With the latest modern lenses with electronic contacts these profiles are sometimes even embedded in the lenses themselves.
For some other lenses you can already find correction profiles in Lightroom and CameraRaw. What is important here is that most correction profiles are only available for Raw files.
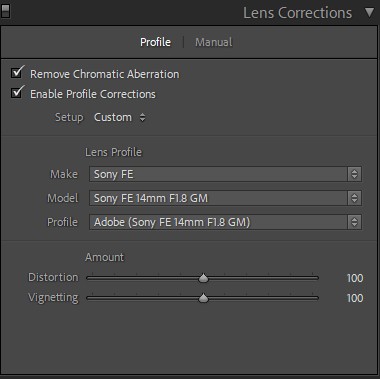
But what if you have a lens that is not on the list? In that case you can create such a correction profile yourself.
Creating a correction profile
What you need
- DNG Converter
You can download the Adobe DNG Converter here. - Adobe Lens Profile Creator
You can download the Adobe Lens Profile Creator here. - Print ouf of Calibration Chart or a Big Flatscreen (e.g. TV)
The calibration charts are included in the aforementioned download. - Tripod
How it is done
Taking the Pictures
The distortion pattern of lenses changes with the focus distance but with non-macro lenses I am usually most interested in correcting the distortion for subjects situated close to infinity, so this is what we will have a look at.
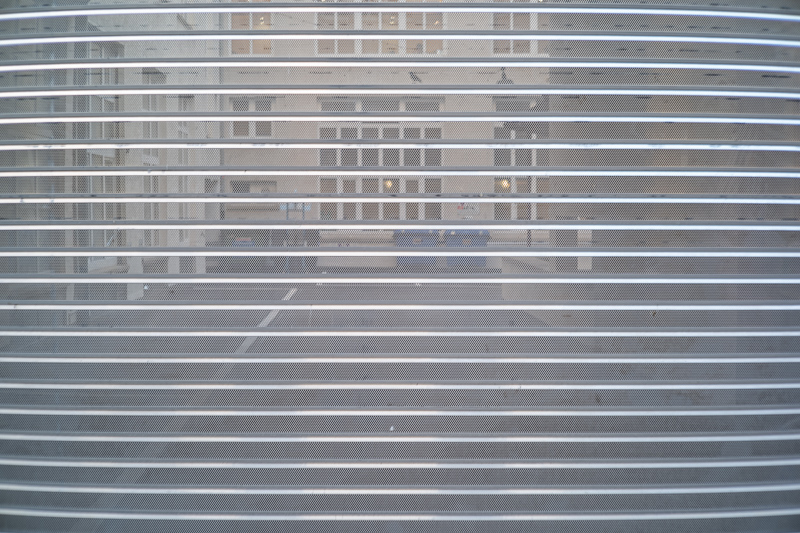
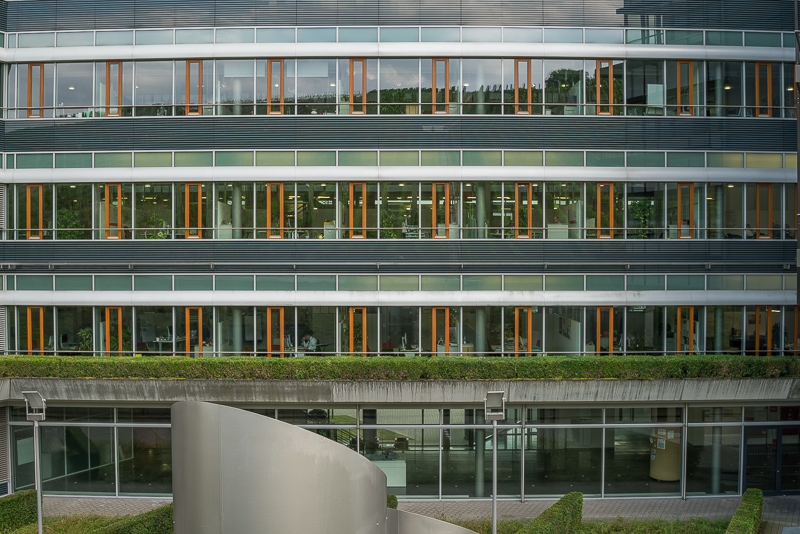
As example we are using the MS-Optics 50mm 1.3 Sonnetar. It has an interesting distortion pattern as over most of the frame the distortion is close to zero whereas it becomes very noticeable in the corners of the frame. This means the distortion pattern isn’t uniform and cannot easily be corrected with the slider shown above.
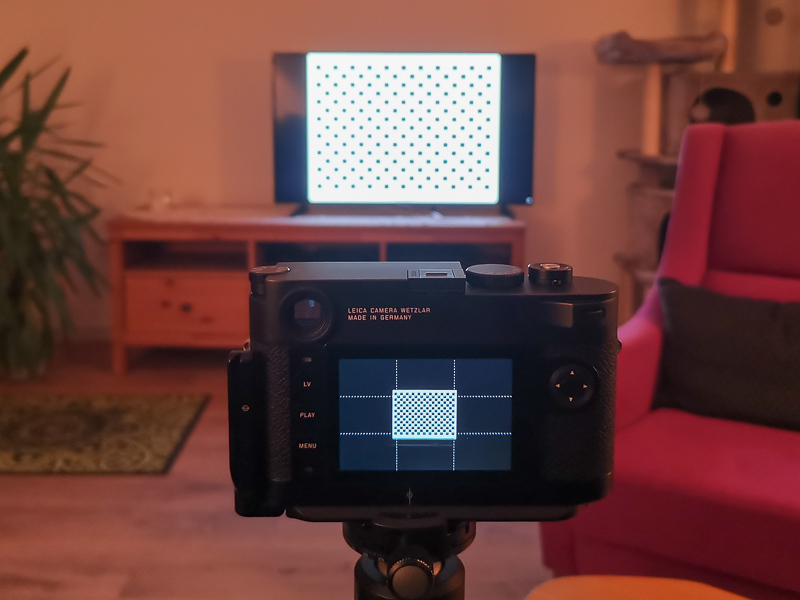
I don’t have access to a huge printer for printing out one of the calibration charts, so what I do is using our TV in the living room for that. There are a lot of calibration charts included, I always pick one with a higher amount of boxes like this one:

With a long focal length around 85 or 135mm a few pictures will usually be sufficient to create a decent profile, but I always needed these profiles for wider lenses, so the setup and process with more than one image is what we will be looking at here.
Your camera should be on a tripod and I always stop the lens down to f/16 to f/22 so that even with a 50mm lens that TV screen is still in focus from a ~4 m distance when the focus ring is set to infinity (you can also set the lens to its hyperfocal distance if that is what you are using in the field). In the case of this 50mm lens the distance to the TV was ~4 m and the focus ring set to infinity at f/16. Even at f/16 the TV wasn’t super accurately in focus, but this is not what is important here.

Your goal is to cover all of the frame with that checkered pattern. I made good experience with this 9 picture pattern, but depending on focal length, TV/print size and distance you may need more – or get by with less. Like for our decentering test the camera stays in the same position and you are just using the ballhead movements to cover all of the frame, this is what the underlying algorithm expects you to do. I also use Auto Exposure Lock, so that all the single pictures have the same exposure (alternatively set your camera to Manual). With ultra wide angle lenses with super high vignetting I overexpose the center a bit, otherwise the corners are too dark for the algorithm to work properly.
Creating the Profile
Now if you are using a Sony/Nikon/Canon camera you have to convert your Raw files to DNGs first, you can use the Adobe DNG converter for that. For this example I was using the Leica M10 though, which is already using the DNG format for its Raw files.
With the M10 there was another step necessary though: the M10 is “guessing” the f/Stop you are shooting at. Despite the lens being locked at f/16 for those 9 pictures above, the M10 came up with different values between f/3.5 and f/9.0. This confuses the Lens Profile Creator, so I had to first delete the aperture value information in the DNG files with the help of Exif Pilot. Now I could finally load the DNG files in the Adobe Lens Profile Creator.
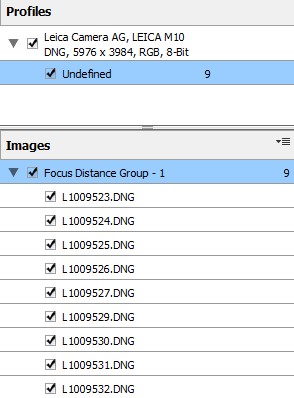
Here you need to make sure that all the files are in the same Focus Distance Group like in the picture above (with different f/Stops this wasn’t the case).
In addition to correcting the geometric distortion you can also add CA and vignetting correction, but I didn’t make really great experience with that so I will solely focus on the geometric distortion here.
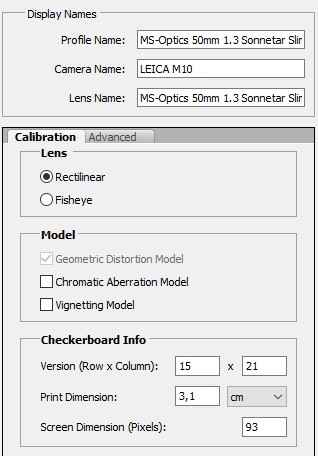
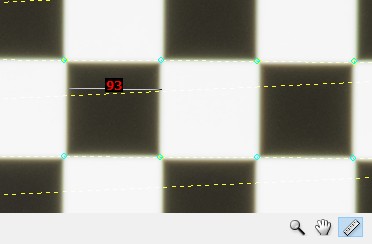
You also have to fill in the details at the bottom. You have to tell the programme of how many (black and white) boxes the grid you chose consists. The Print Dimension is the width of one square box in the real world (yes, I was holding a ruler to the TV screen) and the Screen Dimension is the width of one square box in pixels (I always use a box in the center frame). You can use the digital ruler tool to measure this width:
I also recommend to give the profile a proper name so you will be able to find it later:
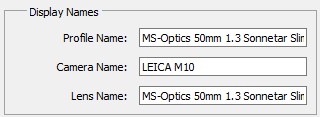
Now all you have to do is press the Generate Profiles button in the top right corner and wait for the algorithm to do its work. If you set everything correctly you will be awarded with a save prompt for the profile.
If you get an error that your computer ran out of memory you can try increasing the cache size under Calibration -> Preferences. If that doesn’t work try to come up with a setup where you need less pictures.
Using the Profile
After restarting Lightroom the profile was already available. It could be found it directly under the “Leica” category. The profiles I made with Sony cameras are to be found under the “Sony” category. You can still use the profiles with Raw files from any camera though.
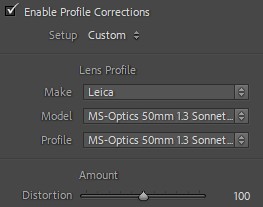
But does it work? Let’s try with one of the pictures I took with this lens:
There is also a slider to adjust the strength of the distortion correction profiles. The picture I used to show you this lens’ distortion pattern at the beginning has not been taken at true infinity, so the profile I made for true infinity is a bit too strong. With a value of 90 instead of 100 it looks better to me:
Conclusion
I know many of you are using old sometimes exotic legacy lenses where there are no distortion correction profiles available. Creating a correction profile sounds like something difficult and time consuming to do, but as I have shown you in this article you don’t need special equipment and it doesn’t take a lot of time either, so just give it a try!
Further Reading
Support Us
Did you find this article useful or just liked reading it? Treat us to a coffee!
![]()
![]()
![]() via Paypal
via Paypal
This site contains affiliate links. If you make a purchase using any of the links marked as affiliate links, I may receive a small commission at no additional cost to you. This helps support the creation of future content.
Latest posts by BastianK (see all)
- Full Resolution Pictures getting fixed - July 4, 2025
- Analogue Adventures Part 42: A wedding with Eastman Double-X 200 - July 2, 2025
- Vivo X200 Ultra – The Death of the compact Camera - June 29, 2025



Very useful and well presented. Thank you!
Excellent and well explained article. Thank you!
I used exactly that method since about 2010 with lightroom and since that time nothing has changed regarding the workflow and also the profile creator is more or less the same. Very interesting! I always wondered why that extremly powerful method is not mentioned elsewhere. Thank you very much for the presentation!
One thing has changed since then: there used to be an online database to download profiles other users created, that one is gone.
I don’t think it is a huge loss though, as I wasn’t happy with the profiles I downloaded there even once.
Good stuff. Thanks, Bastian!
Thank you very much for this detailed tutorial. Following your tutorial I was able to create a correction profile for the ultrawide lens on my phone (Oneplus 8 Pro) and a defisheye profile for my Insta360 One R.
On my phone I prefer to use GCam to capture multi-frame stacked DNG which gives way better result than the stock camera. However, the ultrawide lens has some strong and unusual distortion in the corners, kind of like the MS 50/1.3 but way more extreme. With the custom created correction profile, it works really well!
Glad to hear it was useful!
Very nice! Any chance you can do something similar but for a vignetting profile?
I will consider it 🙂
can you use this profiler for remove colour cast vignieting for VM 21 f/4 lens?
Have a look here.
When I did profile in Adobe Lens Profile Creator 1.0.4 and save them next I add to catalog C:\ProgramData\Adobe\CameraRaw\LensProfiles\1.0 where I have another lenses profiles. Next open Camera Raw 12.4 and I don’t see my new custom profile?
Why my camera raw doesn’t see my new profile?
Did you check the category according to the camera brand as I described?
You will find the profile under “Sony” if you have used a Sony camera to create the profile, not under “Voigtländer”.
Yes, Now, I made photos with EOS R + VM 28/2.0 II. My profil (Canon EOS R (Voigtlander 28mm f2.0) – RAW.lcp) put into catalog C:\ProgramData\Adobe\CameraRaw\LensProfiles\1.0\Canon
In this catalog I have 192 another Canon profiles.
But my Camera Raw 12.4 doesn’t see this profil. Maybe this profil need to be instaled instead copy to catalog?
I used Adobe Lens Profile creator v1.0.4 way back in 2012.
(A more recent version was never released.)
I tried to use it again today, but it no longer worked.
I can start it, but it crashes when loading images (DNG files).
The program just disappears without any error message.
I’ve tried it on three different PCs: 1x Windows 10 and 2x Windows 11. They all showed the same behavior.
Since this post is just a few months old (January 2023), this means the program should still work.
I searched Google but I didn’t find anything even remotely matching my symptoms.
Any clue what might be wrong and where to look next?
Apparently, my DNG files at native resolution (21 Mpx) were too big. The DNG convertor allows to enable lossy compression, and then you can also specify a maximum pixel size of the DNG output files. I went for 15 Mpx, and that did the trick.
Why native resolution was acceptable 10 years ago, but not any longer, I have no clue.
Good news is: the profiles work regardless of resolution
Hi Sebastian,
ich verstehe nicht, dass eine ganze Reihe chinesischer Hersteller günstiger Objektive keine Profile bereitstellen. Ich habe nach Deiner Anleitung heute für das TT-artisan 21 mm für Sony ein Profil geschrieben, das sehr gute Dienste leistet. Gerne stelle ich es auch anderen Nutzern zur Verfügung. Gibt es eine Austauschplattform? Das würde sicher viel Arbeit ersparen.
Hi Sebastian,
I don’t understand why a whole range of Chinese manufacturers of inexpensive lenses don’t provide profiles. I wrote a profile today for the TT-artisan 21 mm for Sony according to your instructions and it works very well. I would be happy to make it available to other users. Is there an exchange platform? That would certainly save a lot of work.
Hi Eric, there actually was a platform for this, called the “Adobe Lens Profile Downloader”.
Unfortunately it had been cancelled.