Introduction
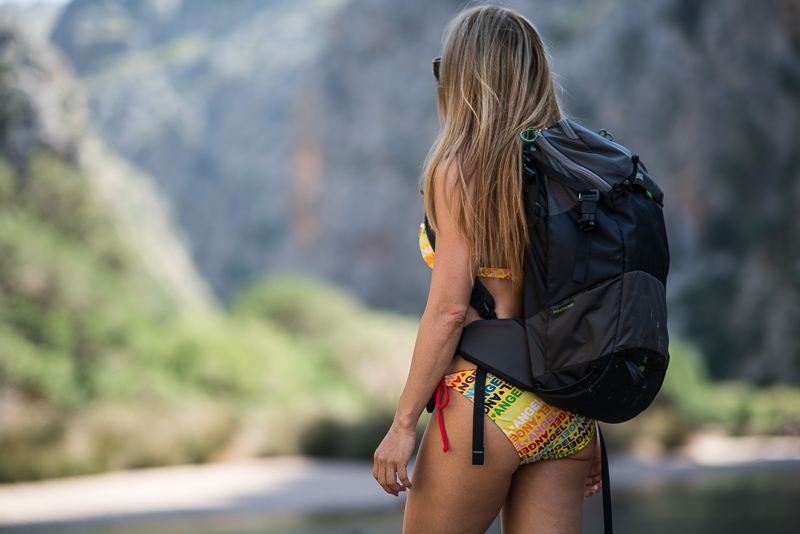
I already told you about my favorite shoulder bags, but this backpack is the camera bag I use most of the time when out with my camera. It has travelled with me to many destinations all over the world, so let me tell you what I like about it.
Disclosure: I never received anything from Thinktankphoto or Mindshiftgear for free, ever.
Versions
There are three notable versions of the Rotation 180° backpack (Trail and Travel Away are too small):
- Mindshift Gear Rotation 180° Panorama (Volume: 22 l, $199)
- Mindshift Gear Rotation 180° Horizon (Volume: 34 l, $259)
- Mindshift Gear Rotation 180° Professional (Volume: 38 l, $389)
The Professional is the “original” Rotation 180° backpack and hit the market in 2013 via Kickstarter. I still have one of these from my DSLR days and while it is an amazing backpack with lots of room and pockets I rarely use it nowadays as it is simply too big (38 l) for my current kits.
The Panorama was the second backpack in the series and still the one I use most. This is the bag being reviewed here.
The Horizon sits in between in terms of size and was released after the Panorama. In terms of design it is closer to the Panorama but offers more room, see Jannik’s review.
Specifications
Backpack exterior:
9.8″ W x 19.7″ H x 8.3″ L | 25 x 50 x 21 cm (fits carry on)
Beltpack interior:
9.4″ W x 7.5″ H x 4.7″ L | 24 x 19 x 12 cm
Beltpack exterior:
9.8″ W x 8.2″ H x 5.1″ L | 25 x 22 x 13 cm
Weight:
Backpack 2.0 lbs (0.9 kg)
Beltpack 0.9 lbs (0.4 kg)
Total 2.9 lbs (1.3 kg)
Colors:
Charcoal (light and dark grey with green accessories)
Tahoe blue (light and dark blue with orange accessories)
Price: 199$/219€
Get it on amazon.com | B&H | ebay.com | amazon.de | ebay.de (advertisement/affiliate links)
The Rotation Mechanism
The rotation mechanism is the heart of this whole series of backpacks. It allows easy access to your gear without having to put the bag down or worry anything will drop. I used it even while standing more than knee deep in sea water.
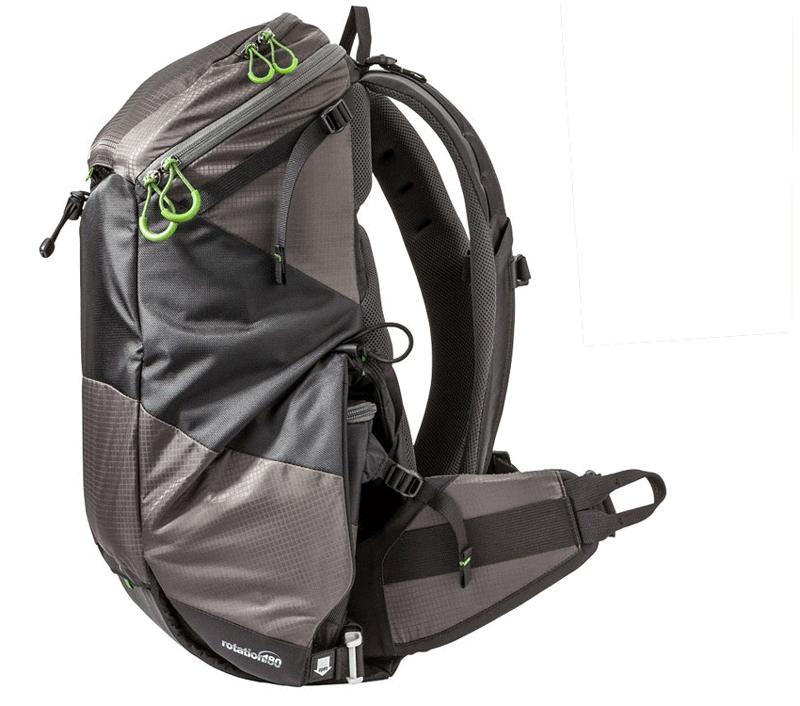
The buckle is a patented design: there are magnets inside and you have to push the white buckle down before the side door opens and you can move the beltpack. This is pretty secure as you cannot just pull to open the latch, it won’t work.
The latch will stay open waiting for you to put back the beltpack.
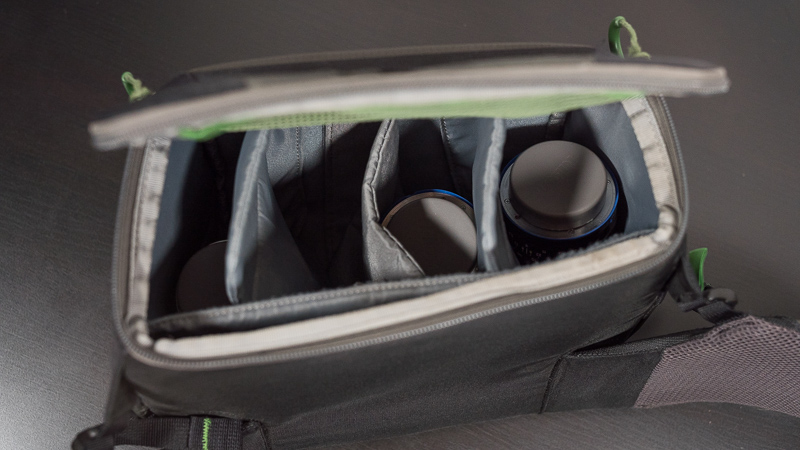
The Beltpack
The beltpack is where you are supposed to store your camera gear to have it readily available. In the following sections I will show you different kits that fit and that I usually use it for.
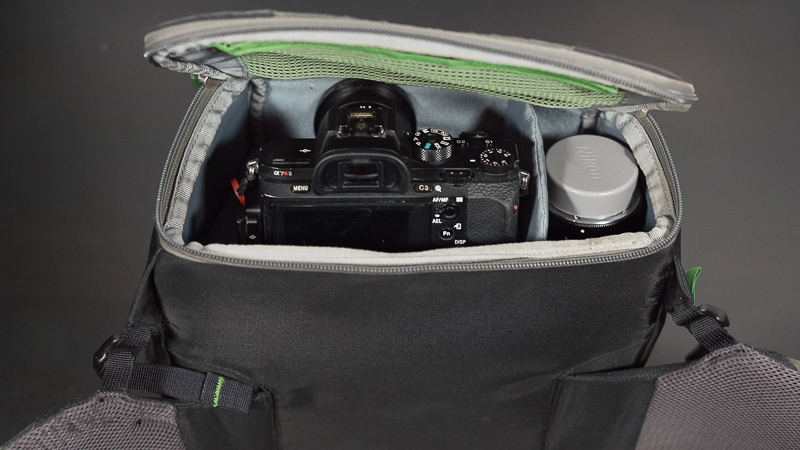
4 prime setup

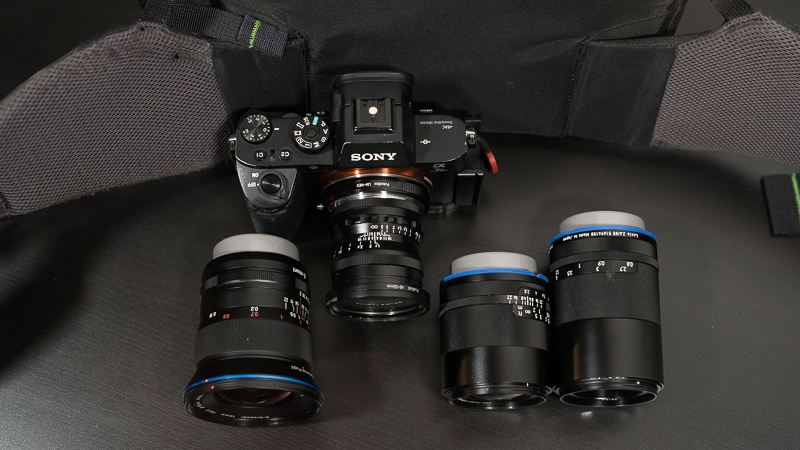
I usually have my A7rII+L-bracket with 4 small lenses (Voigtlander, Loxia, Laowa primes) in the belt compartment. When you take the camera out you also have some space left for changing lenses.
5 prime setup
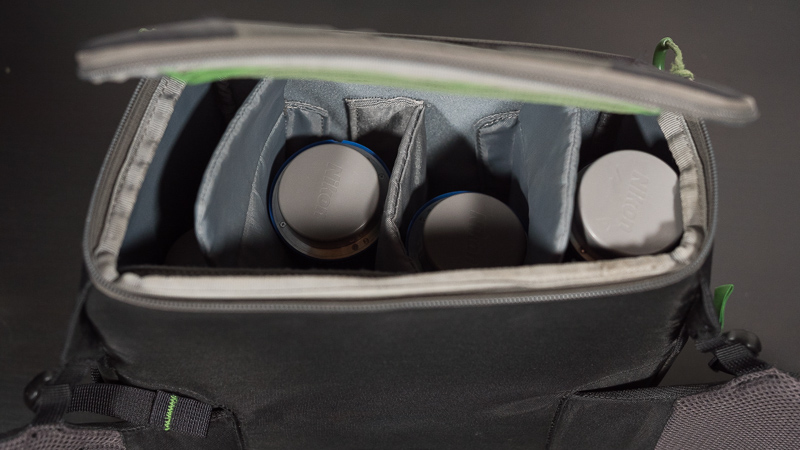
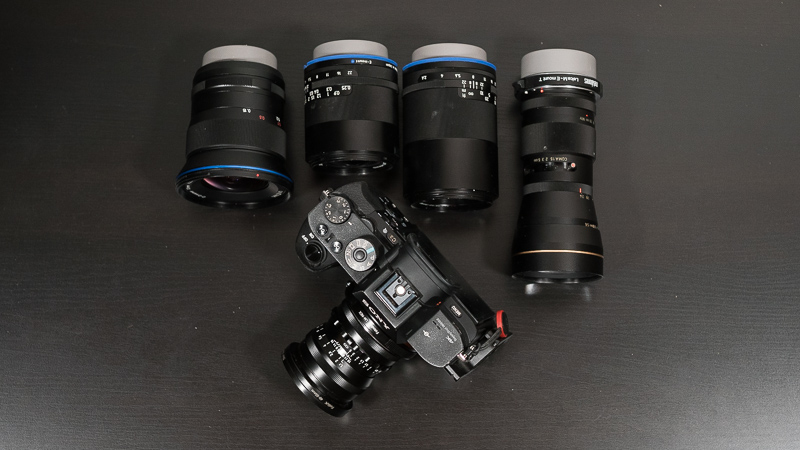
If you don’t mind a tight fit you can even have 5 small lenses in the beltback. 4 lenses at the bottom and the camera with another lens on top of that. The main disadvantage of this setup is that you don’t really have space to put a lens when changing them.
2 zoom setup
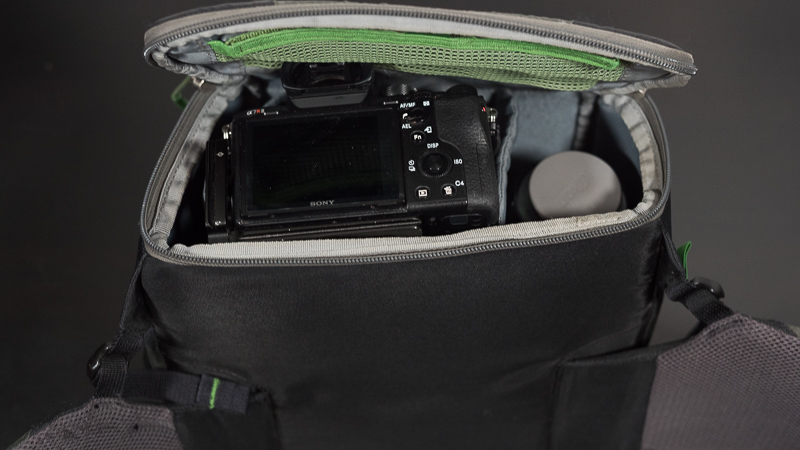


In case you have bigger lenses and you also want to use their big hoods you might only be able to put the camera with 2 lenses in there. When leaving the hoods at home you could also fit a Sony FE 24-70mm 2.8 GM and the Sony FE 16-35mm 2.8 GM in there.
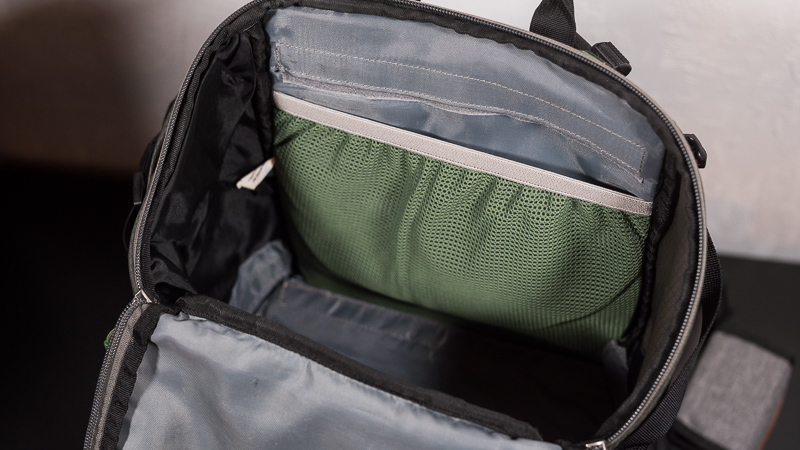
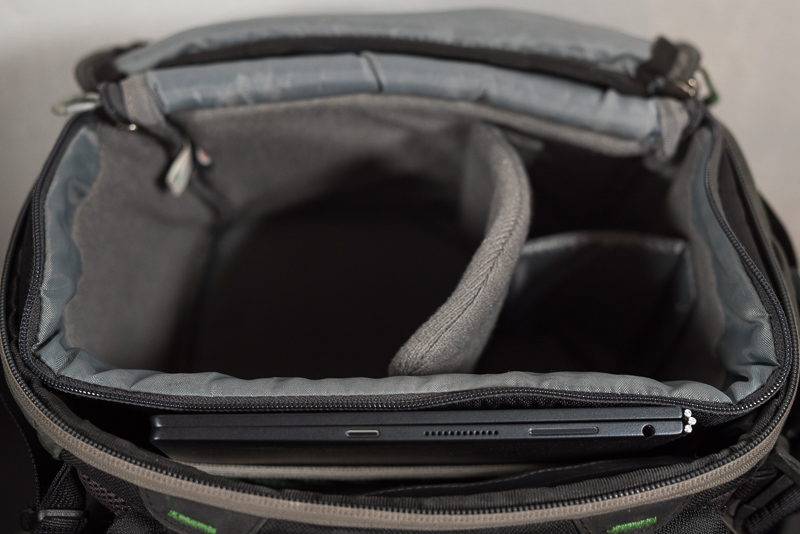
Tablet compartment
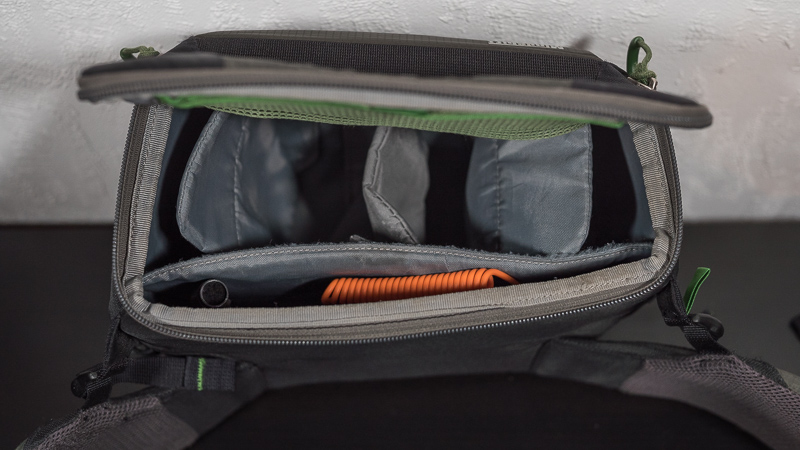
There is also a small compartment for a 10″ tablet, I usually use that to store a lenspen and remote or a filter.
Attaching a modular pouch
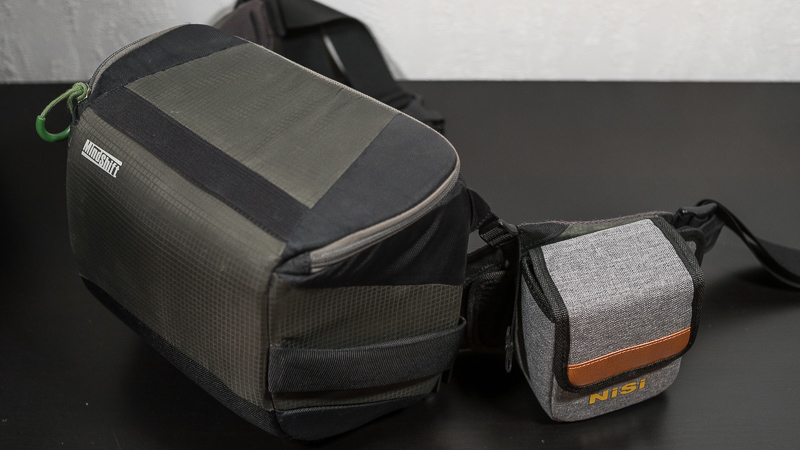
The belt features a loop where you can put some of Thinktank’s modular pouches or a filter bag. This is very useful, when out shooting landscapes I always have my filter bag ready there.
The Backpack
Main Compartment/Daypack
As shipped from factory there is just one big compartment with no dividers (just a small net at the back). Therefore I recommend getting the Photo Insert even if you don’t intend to put camera gear in this compartment.
It will make organizing your stuff much easier and the main comparment will be significantly more useful. Sometimes I even carry a small tripod like the Velbon UT-43DII or the Leofoto LS-223C hidden in here.
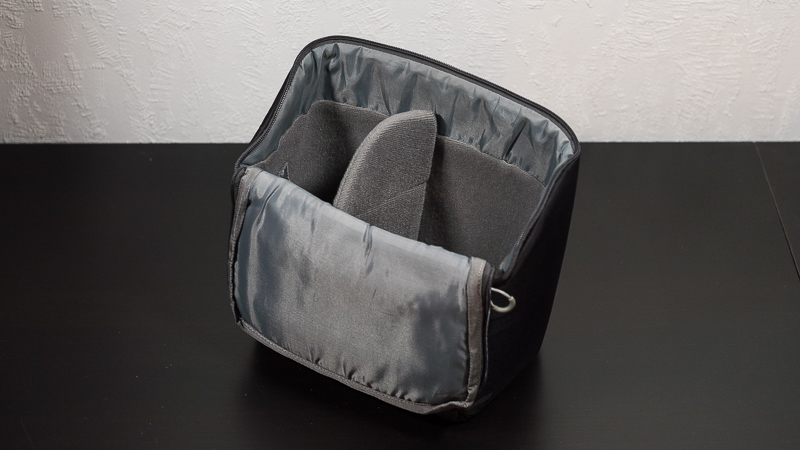
You can also use the space between the insert and the wall of the backpack to store a smaller 10″ notebook or a tablet.
Top Compartment
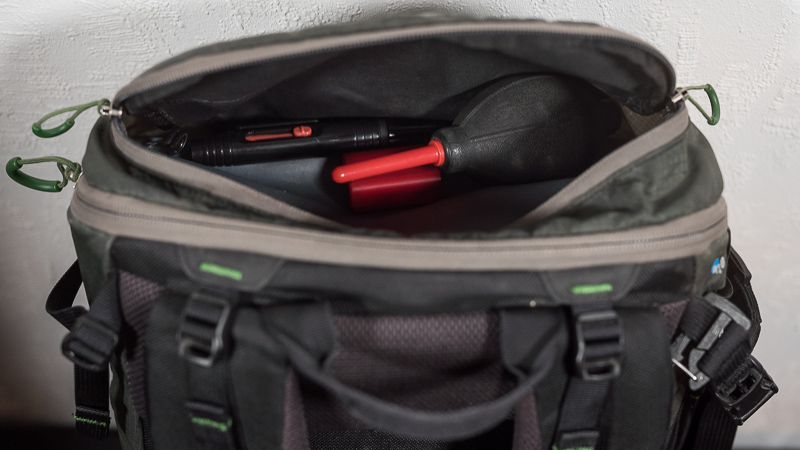
There is a small top comparment, I usually put blower, lens pen, spare batteries and sometimes a mini tripod here. There are no dividers, so things in this comparment will move around freely.
Attaching a tripod
On the back
This is where you are supposed to put your tripod by the designers. There are hidden straps and a hidden tripod foot pouch to secure your tripod.
When putting your tripod here it is pretty far away from your body which makes it rather uncomfortable to carry. Chances are also high you will hit things or people with your tripod when you put it here, so this is not my preferred option.
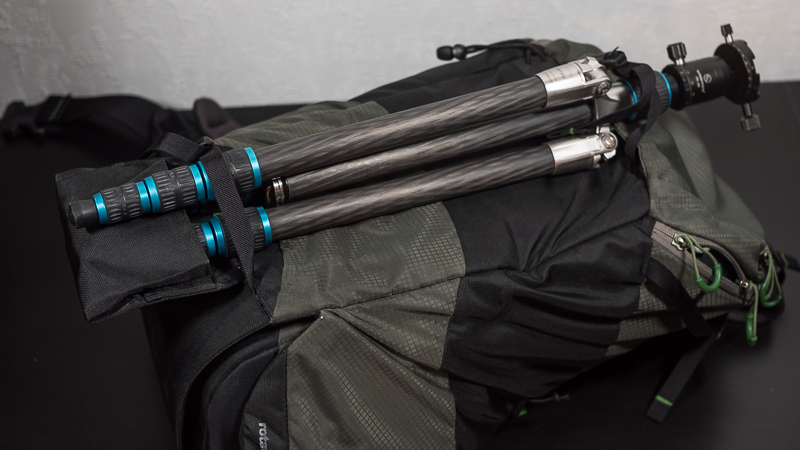
On the side
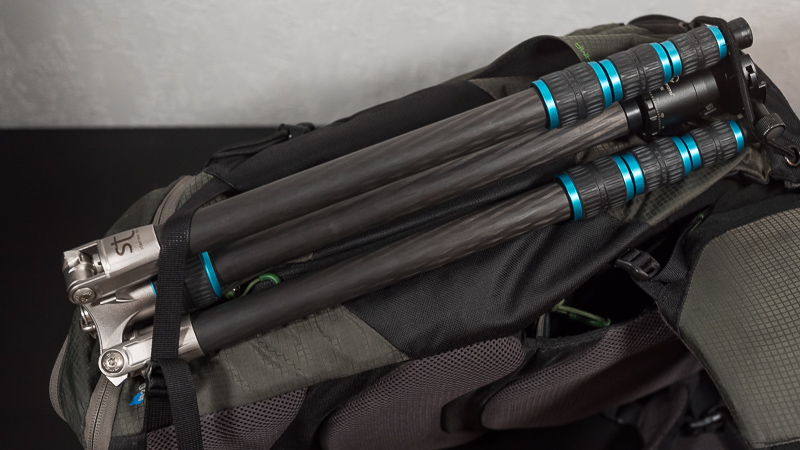
There is a loop on the side with that you can secure your tripod but it is not very handy. So instead I used an attachment strap (they come with some of the Thinktank/Mindshiftgear bags or can be bought separately) to have a quick release buckle.
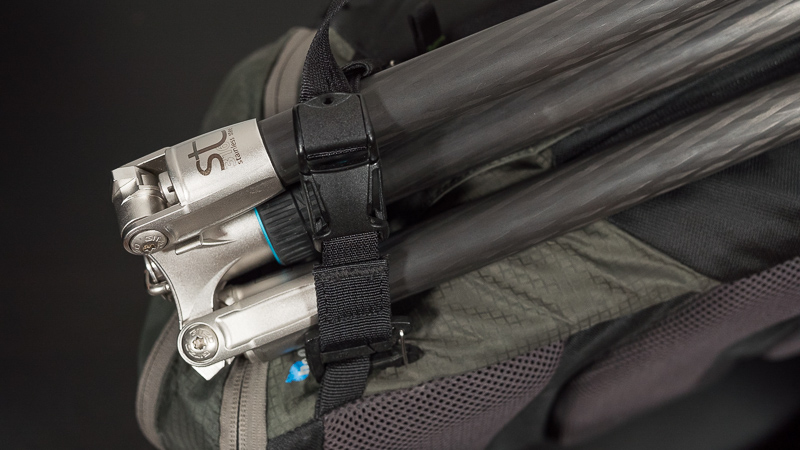
The side attachment works best for tripods up to 50 cm, for longer ones you may have to resort to the back attachment.
Hydration bladder

There is a side pocket for a hydration bladder, but as this is where I usually put my tripod I rarely use it. One can also just put a hydration bladder in the main compartment, this is what I usually do.
Comfort
Shoulder straps, belt strap and the back are well padded and all the straps are adjustable. While the padding is breathable it is no comparison to pure hiking backpacks that come only with a net at the back.
So if it is hot outside your back will get wet.
Accessibility
Having your camera gear readily available in the beltpack is what puts this bag above all the others for me.
But I can also get to the tripod and stuff in the back comparment without taking the bag off. I keep the belt strap on and rotate the whole bag to the front (similar to the Mindshift BackLight or Lowepro Flipside series). This may take some practice and it might not work as well when you are significantly smaller than I am, but it will save you lots of time when you have figured it out.
Durability

I have been using this bag for several years now, it has seen cities, deserts, sea water, ice and snow.
Some of the writing peeled off but that’s it, still works like it did on day one.
Weather resistance
For $20 you can buy a rain cover that comes in two pieces so the rotation mechanism will still work. As the backpack is already made of water repellent fabric I never bought this raincover and never missed it. The weather protection the backpack itself offers is good enough for me.
Conclusion
I have been using other backpacks before but in terms of usability this is so far ahead of everything else. It made the combination of travel and taking pictures much more enjoyable for me and also for my travel mates, as it takes less time taking the camera out or changing lenses.
For me it is the perfect size, I rarely travel with more than 4 small lenses and if I wish to bring a larger one I can still put it in the main compartment. On top of that it meets all the carry on restrictions.
When attaching a travel tripod to the side it is close to the body and carrying it won’t wear me down as much.
If I don’t visibly carry a tripod on the outside it doesn’t even look like there is camera gear inside.
I have several camera bags, but if I were to keep only one this would be it, without hesitation.
You can find this backpack on amazon.com | B&H | ebay.com | amazon.de | ebay.de (advertisement/affiliate links)
If you want to support this blog you can always use one of our affiliate links before you buy anything, we will get a small commission, and it won’t cost you anything extra.
Other Articles
- Sony FE lenses for A7 series – The honest guide
- Tripods for mirrorless cameras
- Review: Sony FE 85mm 1.4 GM
- Review: PocketPano Vario XL pano adapter
Support Us
Did you find this article useful or just liked reading it? Treat us to a coffee!
![]()
![]()
![]() via Paypal
via Paypal
This site contains advertisement/affiliate links. If you make a purchase using any of the links marked as advertisement/affiliate links, I may receive a small commission at no additional cost to you. This helps support the creation of future content.
Latest posts by BastianK (see all)
- Review: Samyang 100mm T2.3 V-AF - July 25, 2026
- Review: Sigma 85mm 1.4 EX DG HSM - July 22, 2026
- Review: Mandler 35mm 2.0 7e - July 18, 2026
Literally !! Bought the 180 pro today !!!! Ordered it at 4:00pm
Found your earlier report elsewhere on the web site & it helped me decide !!
Trialled the panorama for a few months !!! Looked at a separate waist bag & small back pack – but it wasn’t worth it !!!
I have had a heart attack & have heart failure so being able to avoid bending & not having to take a back pack on & off is a godsend !! I can steady myself as I walk / no camera banging around or to carry / hands free with immediate access via the swivel of the rotating back – brill !!!
I am genuinely more inclined to quickly stop & get a shot !!!
Great when stood in water / mud / bog – as you don’t have to put anything down & I take more pictures because I can get to my camera & yet I don’t have to have it hanging round my neck or in my hands when I walk !!!
They are really well made – aren’t they !!!! Lots of thoughtful touches – the waist bag opens away from the body !!! A lens cap elastic on the shoulder strap
I also like that the access to the inner pack is against my back & so more secure !!!
Sorry – I’ll stop !!!! ?????? getting carried away !! Like an advert !!
Could you let me know the make of a water bladder that fits – I suppose the bladder balances the weight of the tripod on the other side
I can only endorse what you have written – a quite unique approach to a camera bag !!!!
Just an update – I paid £229 €250 – for the rotation 180 pro
A very good local offer !!! I wonder if the range is to be upgraded soon !!
I’m very happy with this generation !!!!
Hi Bastian very nice review as usual.
I have both the panorama and the horizon.
I quite like them and the rotation system is probably the best way to have quick access to your gear while wearing the pack. However to me there are two major downsides worth to be noted :
– the system becomes very impractical if you don’t wear the pack and want to put it down for tripod use or to access gear in the top compartment for example.
– the torso height cannot be adjusted (most of the photo backpacks are missing this feature though). So if you are a tall person they will be definitly too short and unconfortable after a while.
Cheers
Hi,
Nice review.
I’ve been using the Rotation Trail for more than 2 years now. I would definitely not consider it as small. I always use it for daytrips. And in the UK you can get it for £99 which is really a steal for it.
FY (and others’) I , what you can stuff into it:
Lens compartment:
– A7ii with L-bracket
– Loxia 21/2.8
– Voigtlander 40/1.2
– Sony FE 85/1.8 or Zeiss 55/1.8
– spare SD cards
Main compartment:
– NiSi 70mm system in its leather case
– Waterproofs (over trouser and pack-away jacket)
– Powerbank
– a sandwich + a 0.5l PET 🙂
– wallet
Top small compartment:
– Remote cable
– Spare batteries
– Any other small items
Water bladder compartment is also perfect for maps or tablets.
Small travel tripod attached on the side.
On the front there is a stretch pocket you can stuff a jumper or light jacket into it.
Cheers
I am seriously surprised you managed to get a gen2 camera with L-bracket and 3 lenses in the belt compartment, nice to know that works!
3 compartments evenly set with 2 dividers. One lens attached to the body and two on the sides. 85/1.8 even has its hood on reversed. It’s just fit. 🙂
And one more thing which is very useful with the Rotation bags and literally saved me and gear from an injury. There is this (probably) plastic plate built in the front side of the bag which forms the hole for the beltpack. This is very useful. Once downhill on a hike I slipped. I fell backward onto rocks but this flexible plastic swallowed all the energy of the impact keeping all the gear and most importantly my back safe. Thanks for that Mindshift! 🙂
I got it a year ago. Great pack. No issues so far. the only thing is the water back placement. if you do not have anything to balance it out it drags a little to one side.
Part of the reason why the Panorama is so good could be due to the fact that the internal dimensions of the belt pack are pretty much identical to those of the ThinkTank Retrospective 5, which is an excellent choice for FF mirrorless cameras using small primes. Mine works fine with 5 lenses and a body.
I’ve switched to backpacks due to a bad back and the Trail works well for street photography in that regard.
It’s belt pack easily fits my A7r with an L-bracket and three primes e.g. Voigtlander 15/4, Zeiss ZM 35/1.4, and Contax G 90/2.8 with hood.
Another possibility is to keep my camera on a clip, and stack 4 small primes either side of my Minolta MD 135/2.8 on its own in the centre.
P.s. my Minolta MC 200/4 also fits on its own in the centre.
Just a quick update which may be useful for readers interested in this backpack:
In the meanwhile new versions of the Rotation backpacks have been produced, the names and also the exact measurements have changed (and also the design: today all sizes seem to be available only in black+silver with some green accents).
The successor of the “Mindshift Gear Rotation 180° Panorama” which has been reviewed here by Bastian is the
Think Tank Rotation 22L
Model number: 520206
Backpack exterior: 12.6” W x 20.5” H x 8.7” D (32 x 52 x 22 cm)
Backpack interior: 11.2” W x 11.4” H x 5.9” D (28.5 x 29 x 15 cm)
Belt pack interior: 10.6” W x 6.7” H x 6.1” D (27 x 17 x 15.5 cm)
Weight: 3.9 lbs. = 1.8 kg
As before you can still buy an additional raincover for the backpack and belt pack. For the two bigger backpacks of the Rotation series, you can buy a dedicated photo insert which allows you to store more camera gear securely polstered in the upper/main compartment/daypack section; but for the 22L version, there is no such insert available from Think Tank.
Hope it helps!
Hello Bastian,
The grey back covers for the lenses seem really nice and confortable. What are and where do you buy them?
Thanks and Best Regards
Sadly, they cannot really be bought.
You got those from the Nikon service point when they returned a repaired F-mount lens.
Thanks for the info, but this imply that F-Mount rear cap fits also for sony e-mount?
The slip-on ones yes. The normal ones no.