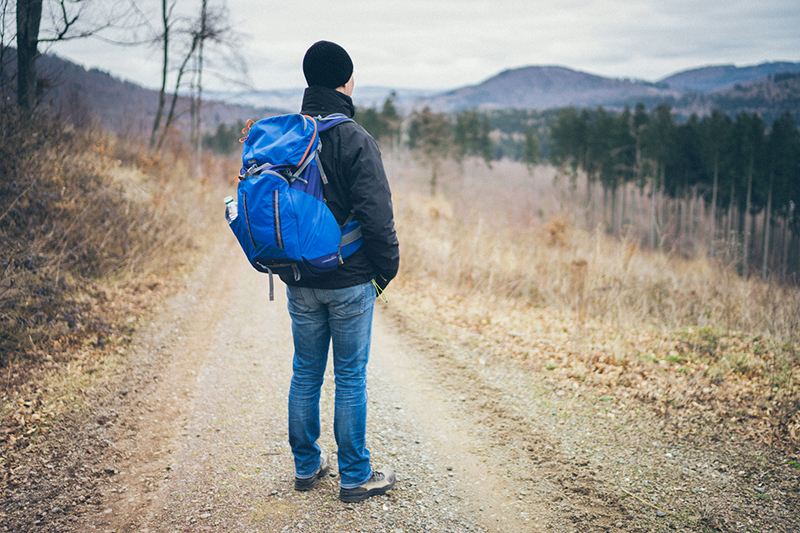
Before I continue my lens reviews, my heart’s wish is to introduce my backpack to you. This little blue marvel changed my attitude towards photo backpacks and also my photography behavior when I travel. Want to know why?
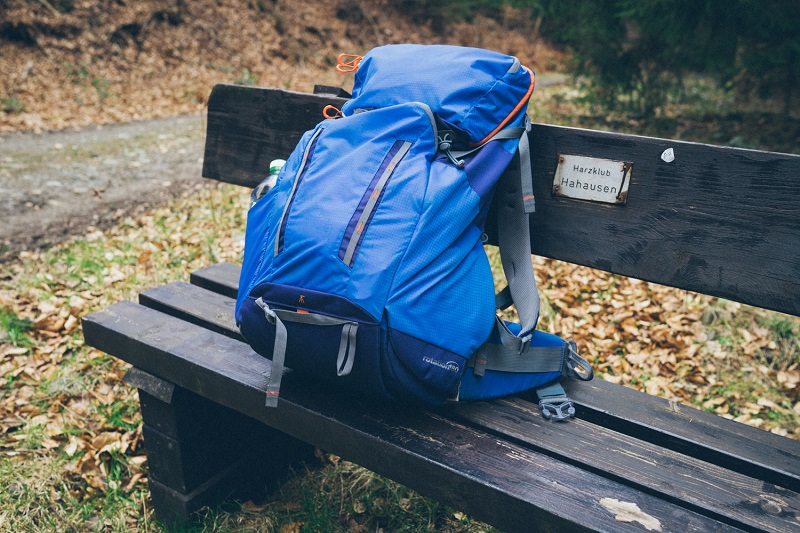
Introduction
I’d like to begin that review with the reasons, why I hate the classic photo backpack concepts:
- You have to put them down before you can access your gear
- Lenses can fall out of the backpack. You have to be very careful when you open the backpack or even have to lay it down to the ground to access your gear
- Many photo backpacks are not comfortable at all. There are exceptions, but especially the low-end backpacks are awful for your back when you put more than a nifty-fifty and a camera into them.
- You are always slow when you travel in a group with non-photographers.
- Most classic photo backpacks don’t have a daypack for food, clothes and other stuff.
- You have to unmount the Tripod to access the gear inside
As you can see, I found many reasons to dislike classic photo backpacks. During city trips and short excursions, I worked around that problem by carrying a normal (non-photo) backpack and a messenger bag for my camera. For longer hikes and holidays, I had to bite the bullet and took a photo backpack although I felt very limited by it.
Before we visited Indonesia last summer, I did some research to find a solution for these problems. The only backpack concept, that really convinced me, was the Mindshift Gear Rotation 180°-concept.
This is my own backpack, I didn’t have any contact to Mindshift.
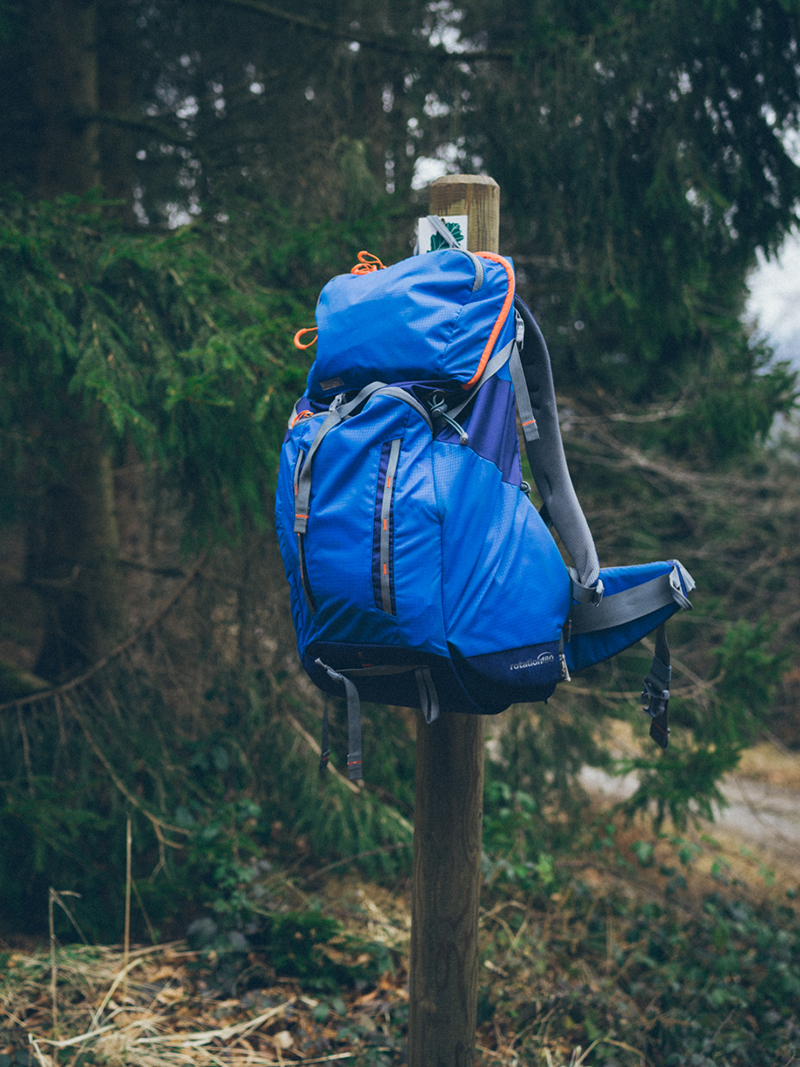
Specifications
- Exterior dimensions: 28 x 62 x 23 cm
- Daypack interior dimensions: 22 x 28 x 18,8 cm
- Belt Bag interior dimensions: 25,5 x 20 x 14 cm
- Weight combined: 1,8 kg
- Total volume: 34 liters
You can buy the Mindshift Gear Rotation 180° Horizon for 289€ at Amazon.de (Tahoe Blue or Charcoal) and for $259 at Amazon.com (Affilate links)
Versions
There are three versions of this backpack:
- Mindshift Gear Rotation 180° Panorama (Volume: 22 l,$199)
- Mindshift Gear Rotation 180° Horizon (Volume: 34 l, $259)
- Mindshift Gear Rotation 180° Professional (Volume: 38 l, $389)
The Professional is the “original” Gear Rotation and hit the market in 2013. It has the largest space and some additional accessories like a photo insert for the daypack, an additional top pocket or a tripod suspension kit (to carry a very large tripod next to your body). It has a very discreet design.
The Panorama is the smallest version and offers space for a camera with 1 or 2 lenses in the belt bag. Colors are a bit funky and it looks more casual. I’d recommend that one for people who travel with a minimalist setup. Have a look at Bastian’s review.
The Horizon is a Panorama on steroids. It looks as stylish, but has nearly the same belt bag size as the Professional and also a very large daypack. Choose this one if you don’t need the accessories of the Professional or look for a more stylish backpack.
For me, the Horizon hits the sweet spot between size, cost and design. It was also important to me, that my backpack still looks a bit like a normal, stylish backpack. On the other hand, I needed a large belt bag to cover a few focal lengths. This review is about the Horizon.
Workmanship
The build quality of the backpack is impressive. The used materials are very sturdy and scratch resistant. I hardly see any wear, even after one year of normal use, mountaineering on a dusty volcano and traveling to Indonesia for three weeks.
I cleaned the backpack in a shower after it was very dirty and the daypack was still dry inside. Although Mindshift doesn’t officially claim weather resistance, there is at least some protection for occasional rain without the rain cover.
The zippers work fine, but they don’t have smoothest feeling compared to the best zippers.
The Gear Rotation
The clue of this concept is the integrated belt bag, which contains the camera and lenses. This belt bag is usually stored in the lower third of the backpack.
The following image shows the locking mechanism. You just have to push a clamp downwards to release the rotation mechanism. This clamp is held by a magnet. This works securely and does not show wear over time.
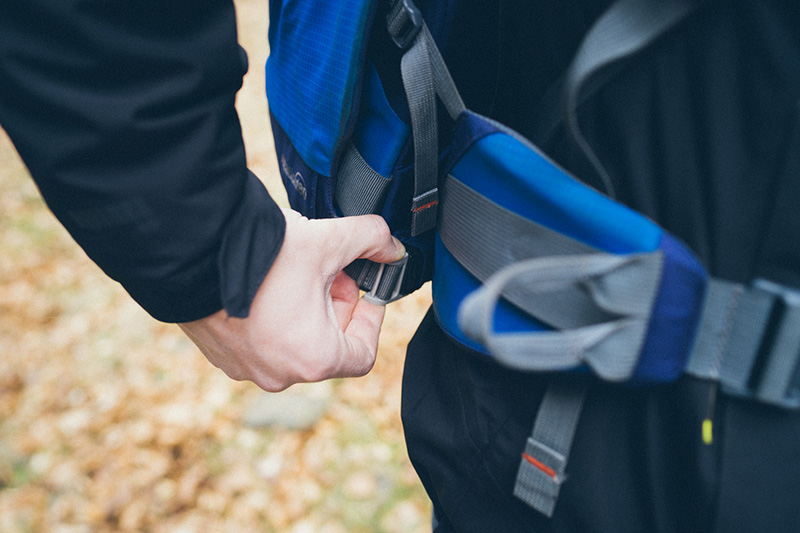
You can pull the belt bag forward with the belt itself and a grip on the belt bag (grey stripe on the following image). This works very well. When you get used to this mechanism, you can rotate the bag forwards and backwards within seconds.
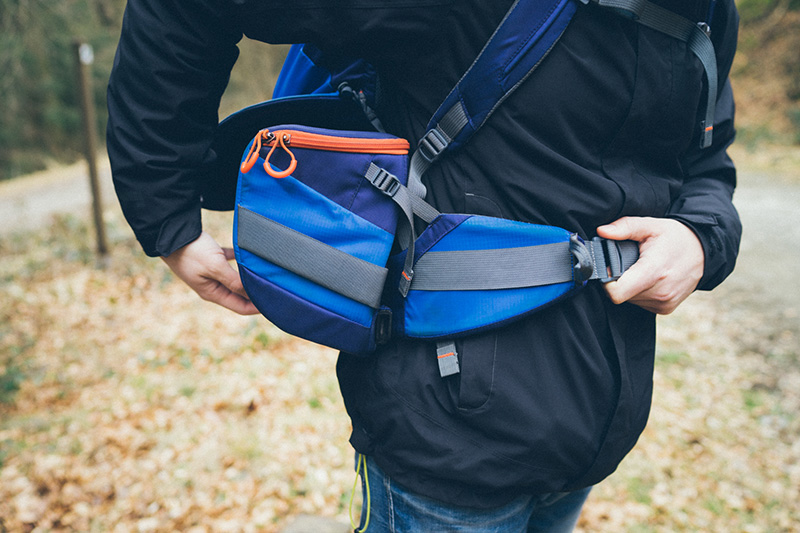
When the belt bag is in front of the body, the gear can get accessed very easy. It is possible to walk with the belt bag in front of the body when the situation requires fast lens switching. It is also possible to carry the belt bag without the rest of the backpack, for example when you go out in the evening or shoot around the hotel during holidays.
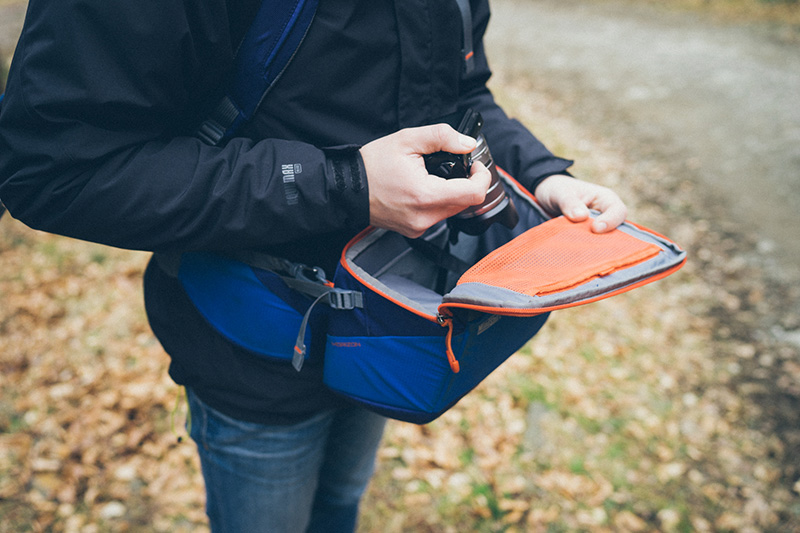
After the use of the belt bag, it can be rotated backwards in the same way as it got rotated forwards. The disadvantage of the rotating mechanism is, that the belt bag has to be pulled out every time when you want to access your gear, also when you don’t wear the backpack. It takes some time to get used to it.
The belt bag
The most important part of the Horizon is the rotating belt bag. It is built to the same high standards as the rest of the Horizon.
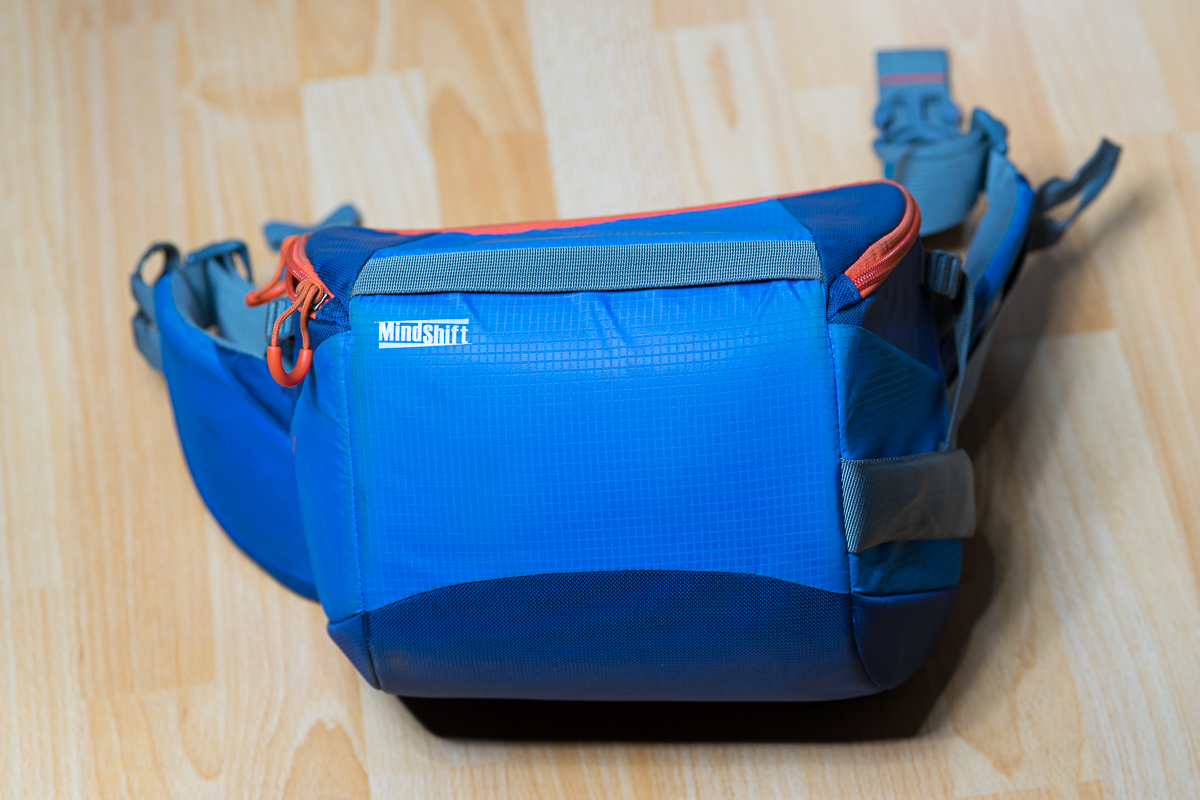
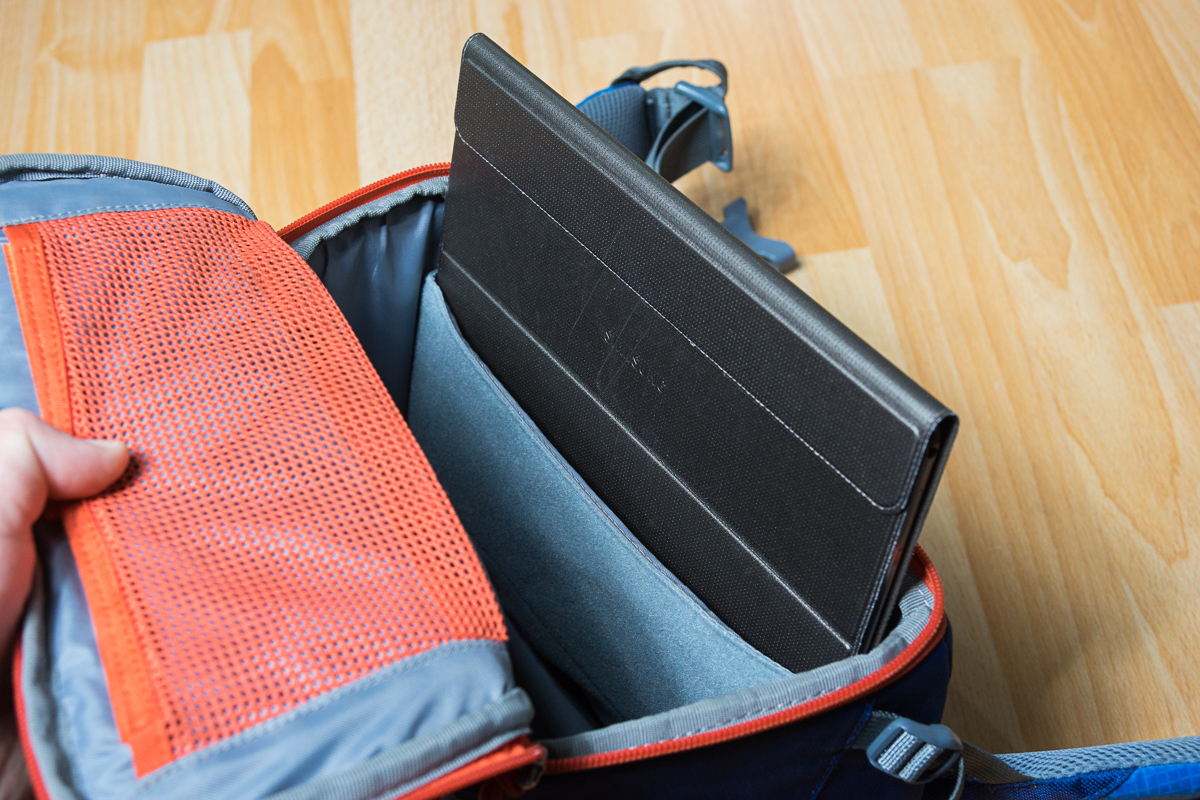
The interior of the bag can be adjusted flexibly by using two insertions for horizontal seperation und two insertions for vertical seperation.

There is also space for a Tablet PC or for maps inside the belt bag. My Samsung Tab S 10.5 for example fits perfectly.
How much fits inside the bag?
The bag is more spacious than it seems at first sight. I packed a sample configuration to give you an impression of how much gear you can fit inside:
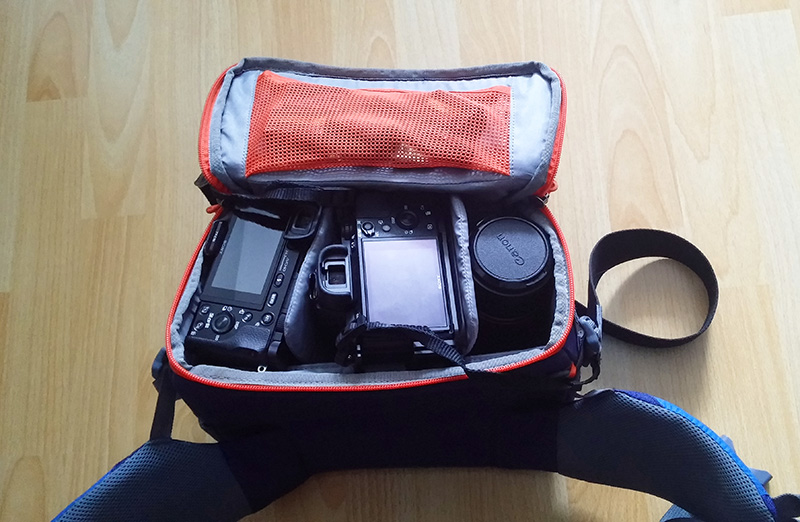
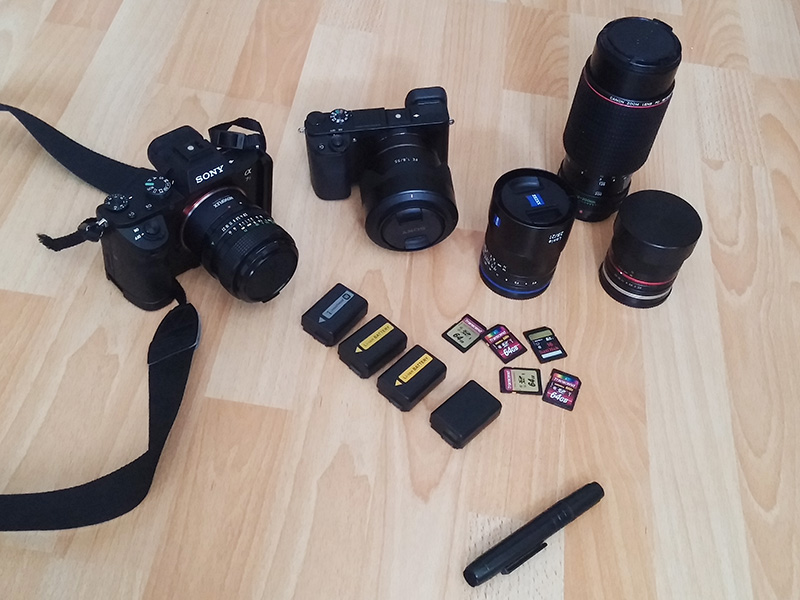
Now, let’s have a look what I put inside:
- Sony A7II with L-Bracket, Canon nFD 2.8/28 and Novoflex Adapter
- Sony A6000 with FE 1.8/55
- Zeiss Loxia 2.8/21
- Samyang 2.8/8 Fisheye CSC II
- Canon nFD 4/80-200 L
- 4 Batteries
- 5 Memory Cards
- Lenspen
My Indonesia configuration:
- Sony A7R with L-Bracket
- A6000
- FE 1.8/55
- FE 4/16-35
- Samyang 2.8/8mm
- SEL 4.5-6.3/55-210
- SEL 3.5-5.6/16-50
As you can see, that is a decent amount of equipment. It is possible to cover many focal lengths. The height of the belt bag limits the size of the lenses that fit inside. For example: the Sony FE 4/70-200 G OSS fits into the bag, a Canon nFD 4/300 L is too long. Longer lenses fit into the daypack but I recommend to use a lens case then.
Tripod Mounts
One very important aspect for photographers is the possibility to mount a tripod. The Horizon has two option here:
For big tripods, I prefer to use the central mount. There is a foldable pocket which is normally hidden, in this pocket the tripod holds securely. Two straps are used to keep the tripod in the position. The central position on the back helps to keep the balance while walking or climbing.

Furthermore there is the possibility to mount a tripod on the left side of the backpack – the opposite side of the rotation mechanism. There is a pocket where the tripod fits in and a strap to fix it. When only the central tripod mount is used, water bottles etc. fit into the side pocket.
Using the side position has the advantage that the mass is closer to the body, so it is carried easier.
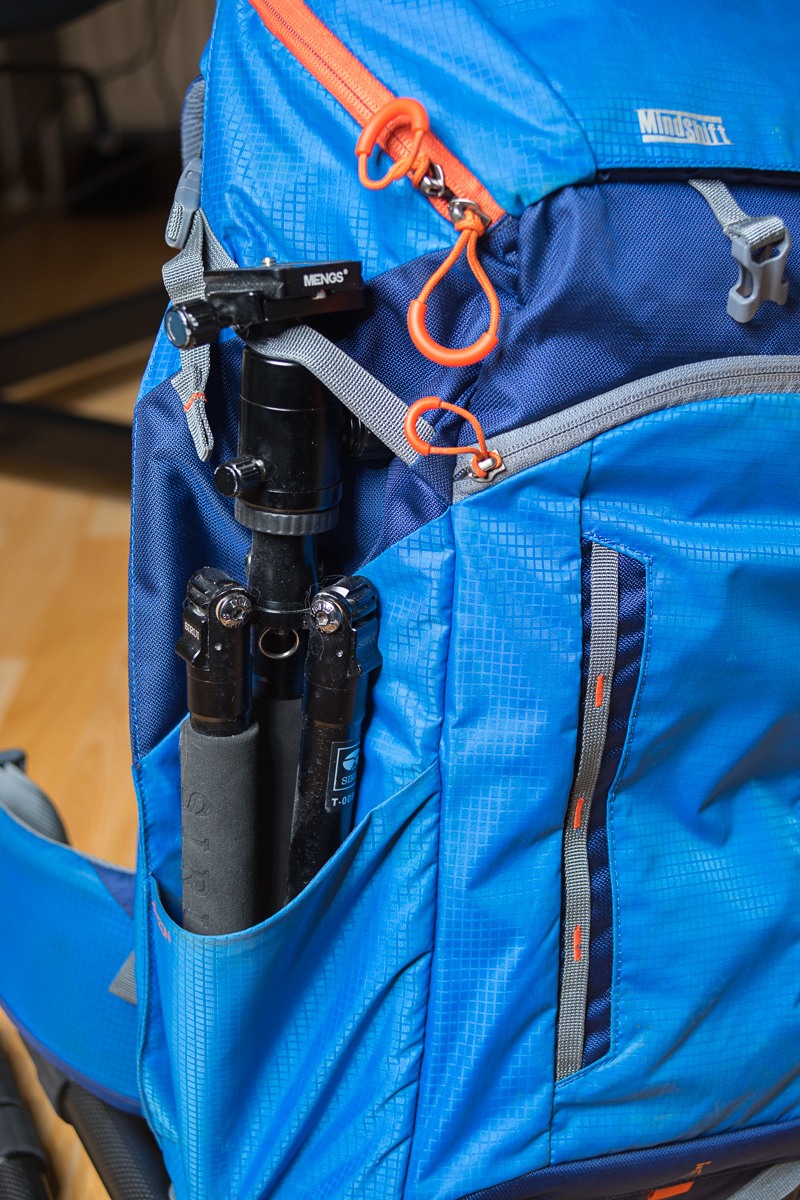
One big benefit of this backpack is the rotation mechanism of the belt bag, which still works with the tripod attached in the central or the side position.
Daypack
One very important aspect of the “Mindshift Gear Rotation 180°” to me is the daypack. More than half of the total space belongs to the daypack. This space can be used for clothes, more lenses, food or water. At my use I could fit all the stuff my partner and I needed for a daytrip.
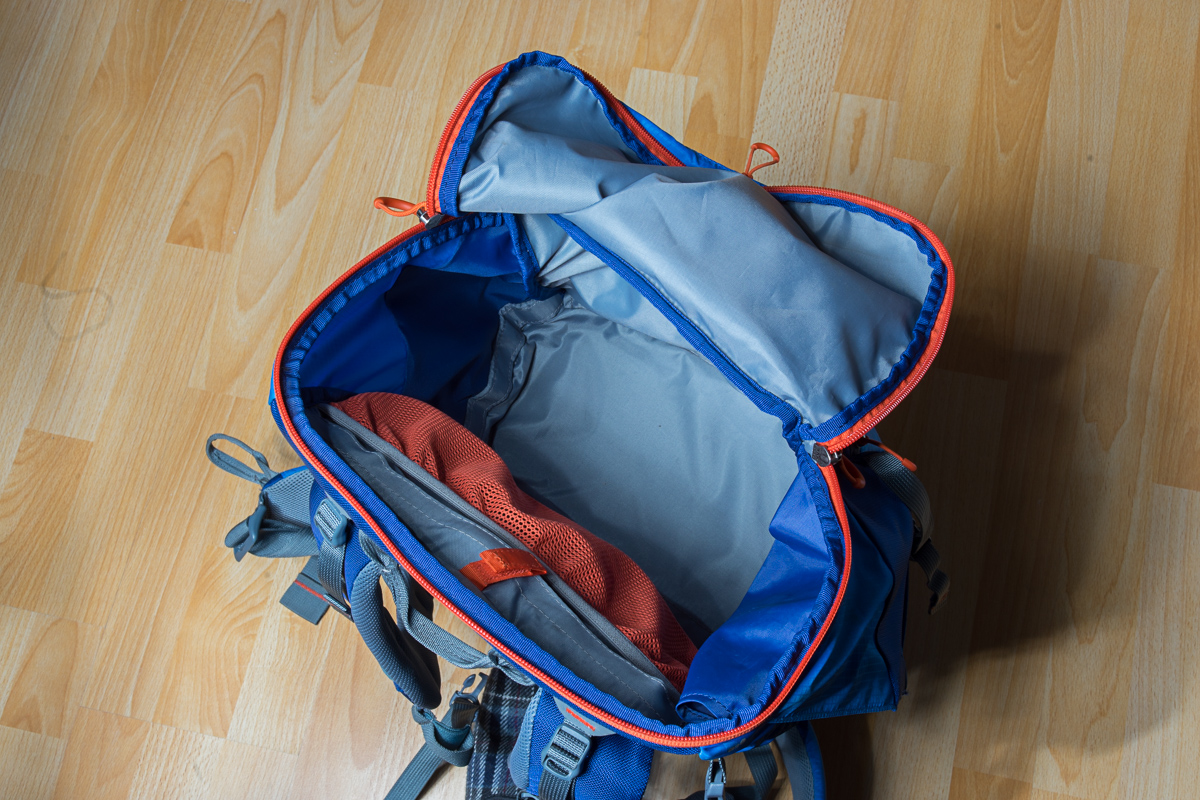
I tried to show this, but the dimension is tricky to capture. I like the net for a computer, tablet PC or just to seperate important things. There is an additional quite big pocket on top of the backpack which I use for Filters etc.
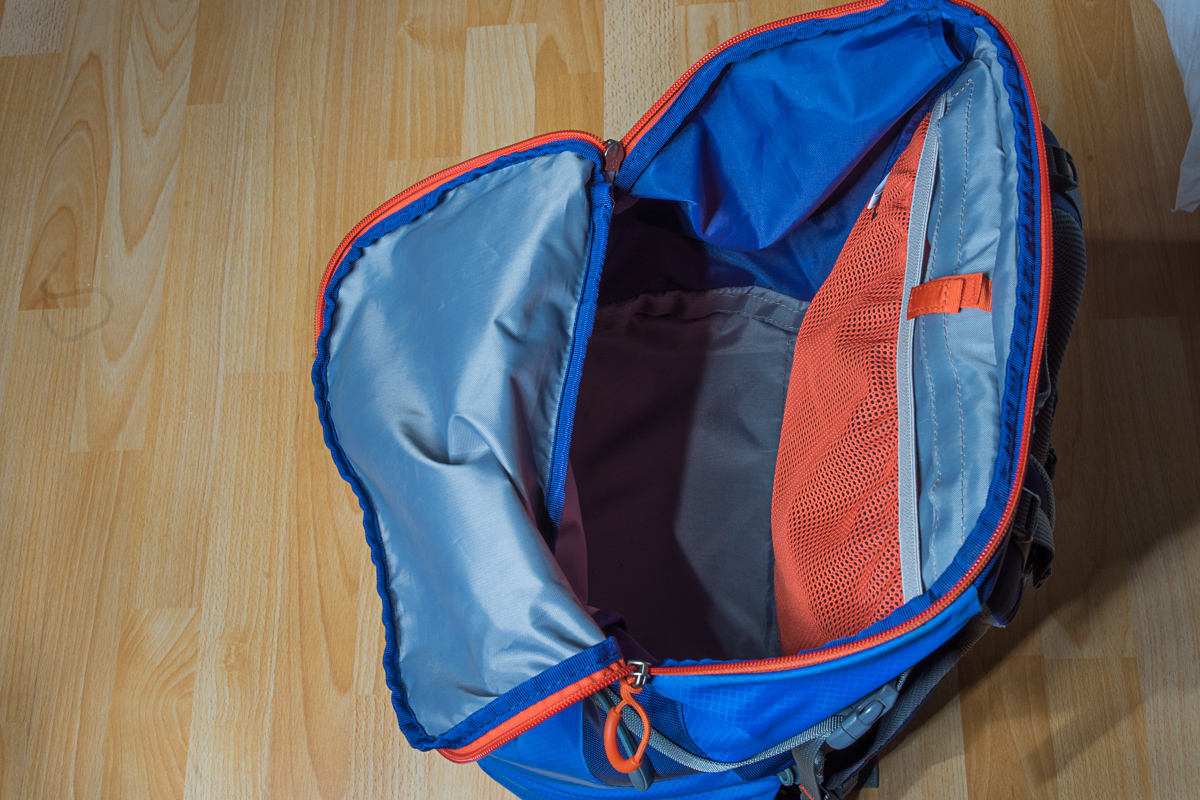
It is also possible to install a drinking bladder, although I don’t have one to show that.
Rain Cover
Most backpacks have a integrated rain cover. This is unfortunately not the case here, the rain cover is stored in a little pocket and has to be bought seperately. It costs 27,99€ at Amazon.de and $24.99 at Amazon.com
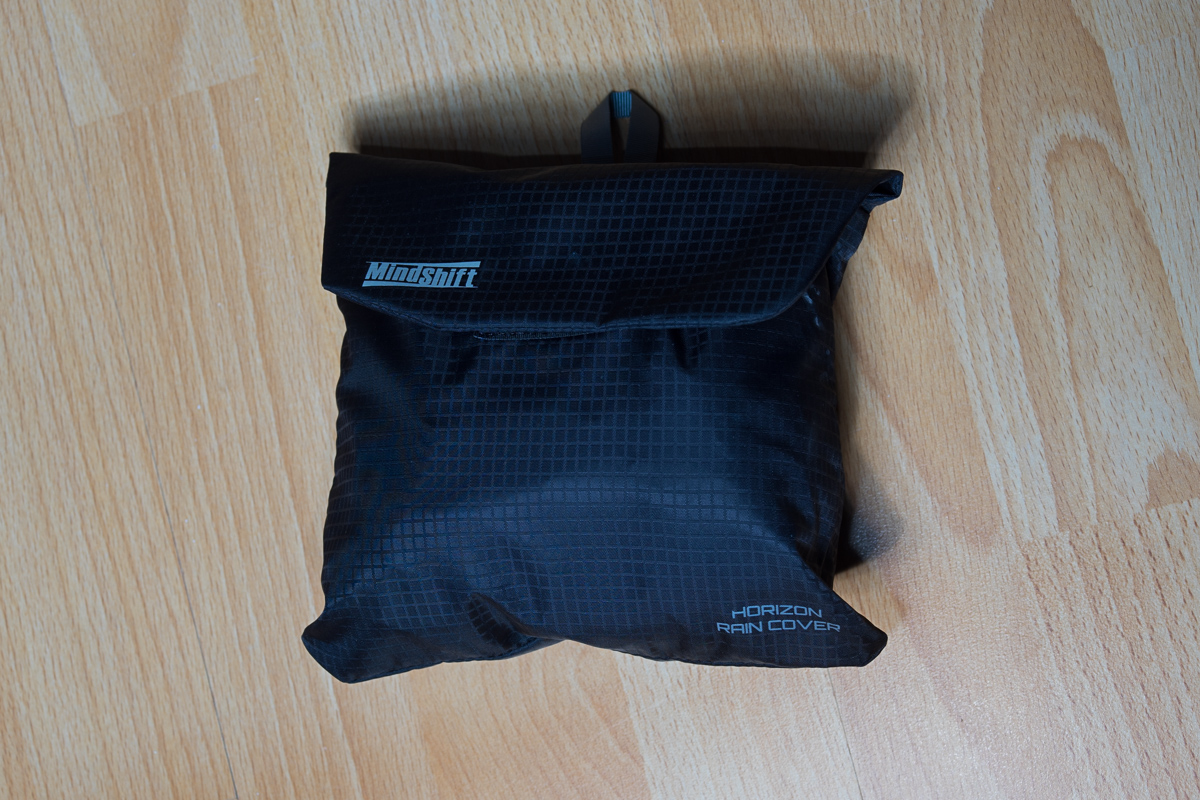
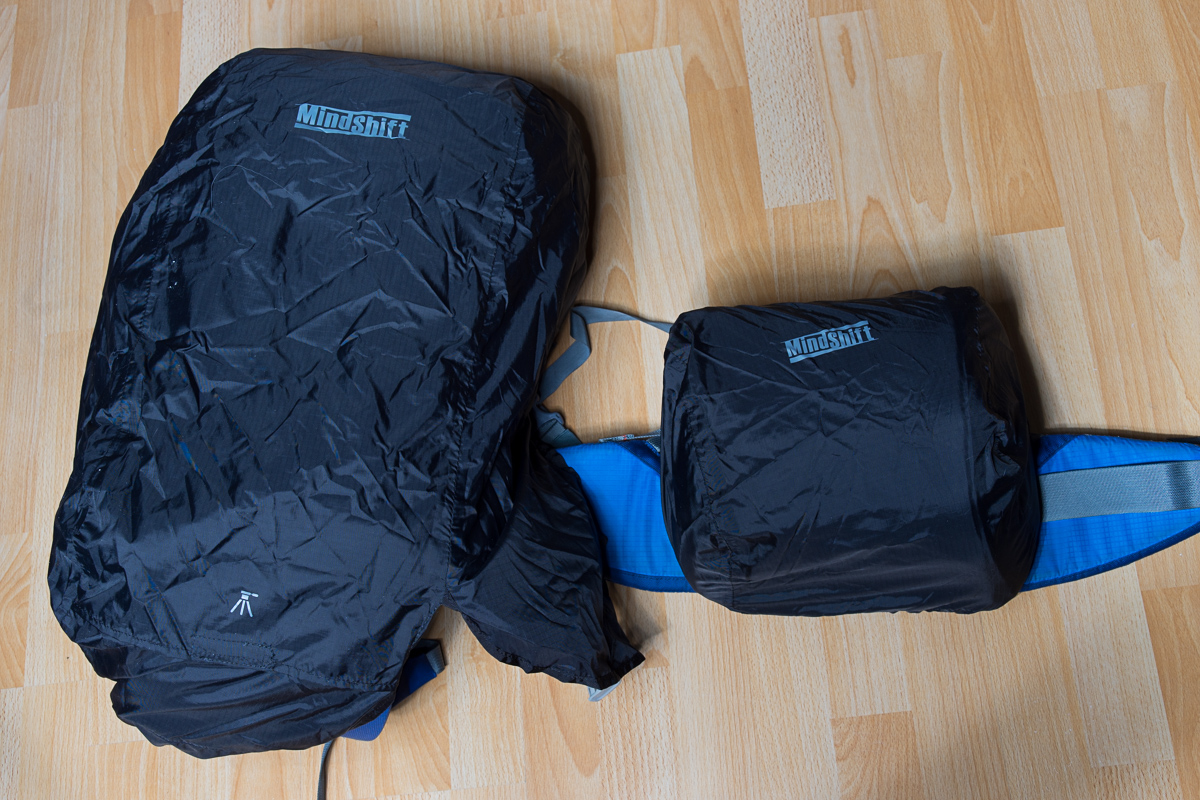
The mounted rain cover looks like this. It fits perfectly and I think that it is effective. The rotation mechanism still works with attached rain cover. There is also a small rain cover for the beltbag. So you don’t lose any functionality when you sue the rain cover.
Comfort
Last but not least, let’s talk about the most important feature of every backpack: It’s comfort features. The image below shows the rear side of the backpack. There are three big memory foam pads which fit to the individual back form. These pads are also found on the belt and on the shoulder straps. They are very comfortable.
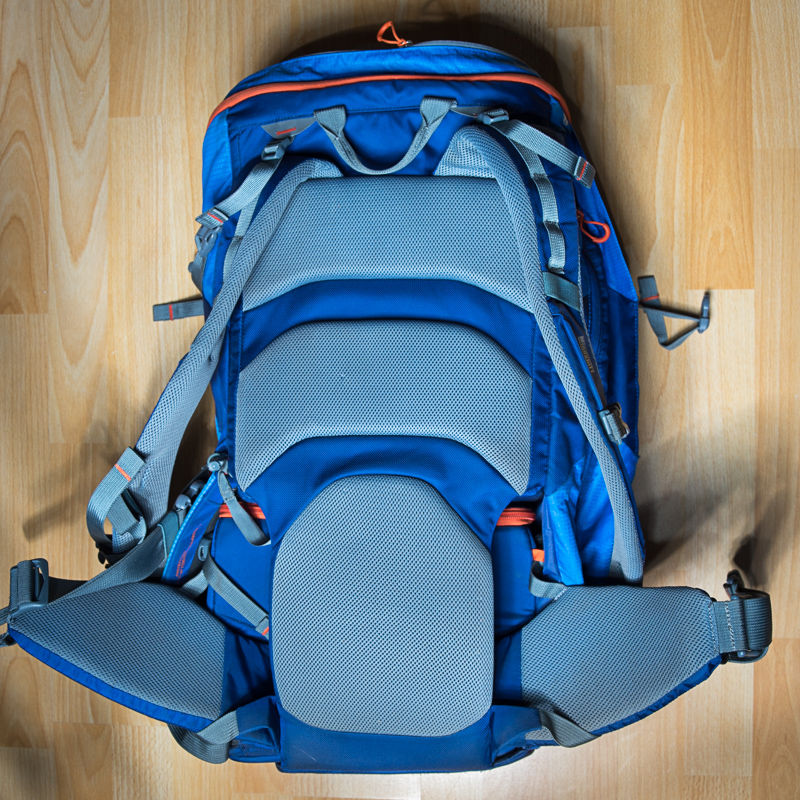
The position on the back can be adjusted with the straps on top of the shoulder straps. At least on my back the backpack fits perfectly once it’s adjusted.
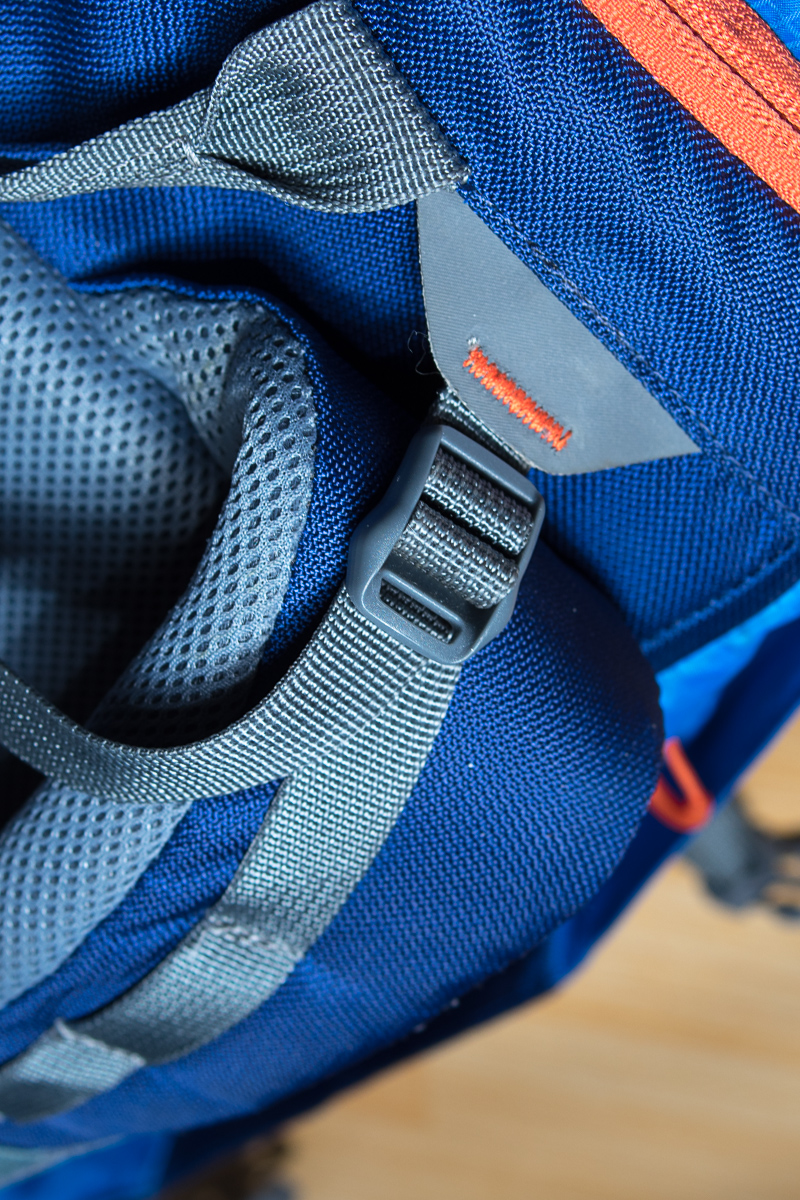
The belt is quite wide and comfortable. Trekking backpacks sometimes have air between the backpack and the back of the person who wears it. This is not the case here which causes worse ventilation of the back but a better use of the backpack volume. This leads also to a very well balanced weight on the back and a perfectly fitting backpack. The downside is, that your back can get pretty warm and sweaty. This never disturbed me, but if you are sensitive to this, consider that for example the Jack Wolfskin ACS Photo Pack Pro (Amazon.de) has a net in the back but it lacks the handy rotation mechanism.

I really enjoyed to carry this backpack. It is the most comfortable backpack that I have, even my trekking backpacks are not as comfortable to wear. I carried this backpack for three days up to the summit of Mt. Rinjani and my back didn’t hurt at all (or at least not as much as my legs 😛 ).
Conclusion
This backpack changed the way I use my gear when I travel.
The rotating mechanism is super handy and works very well. I don’t hesitate to change my lenses anymore and I can even change them when I am walking in a group. Only this fact is enough to make this my favorite backpack, but there are even more advantages.
The backpack is very comfortable. There were hiking days I didn’t put the backpack down a single time during 6-7 hours, just because I didn’t need to. The important gear can be accessed easily by rotating the belt bag and it is also possible to access a bottle of water without taking it down.
The daypack is quite large, there is even enough space for stuff for more than one day hiking. At planes it could be used as hand luggage which is important to me. The belt bag has enough space for all the lenses I need, I even could carry two cameras, memory cards, batteries and a lens pen in the belt bag. There are two possibilities to mount a tripod.
Finally, the disadvantages: The rain cover works fine, but it is not integrated and must be bought seperately. I had to get used to handling of the belt bag when I was packing my bag or just wanted to get my things out of it quickly in the hotel. The belt bag always needs to be pulled out.
The price is steep, but reasonable in my eyes because the bag is unique and the build quality is great.
In my opinion, these minor gripes are nothing compared to the advantages it offers. If you always hated camera backpacks and lost time or shots because of them, have a very close look at the Mindshift Gear Rotation 180° Horizon. It is by far my favorite photo backpack.
Big thanks to my friends Anja & Michael (Flickr) who took the beautiful outdoor pictures of the backpack during their trip to the Harz.
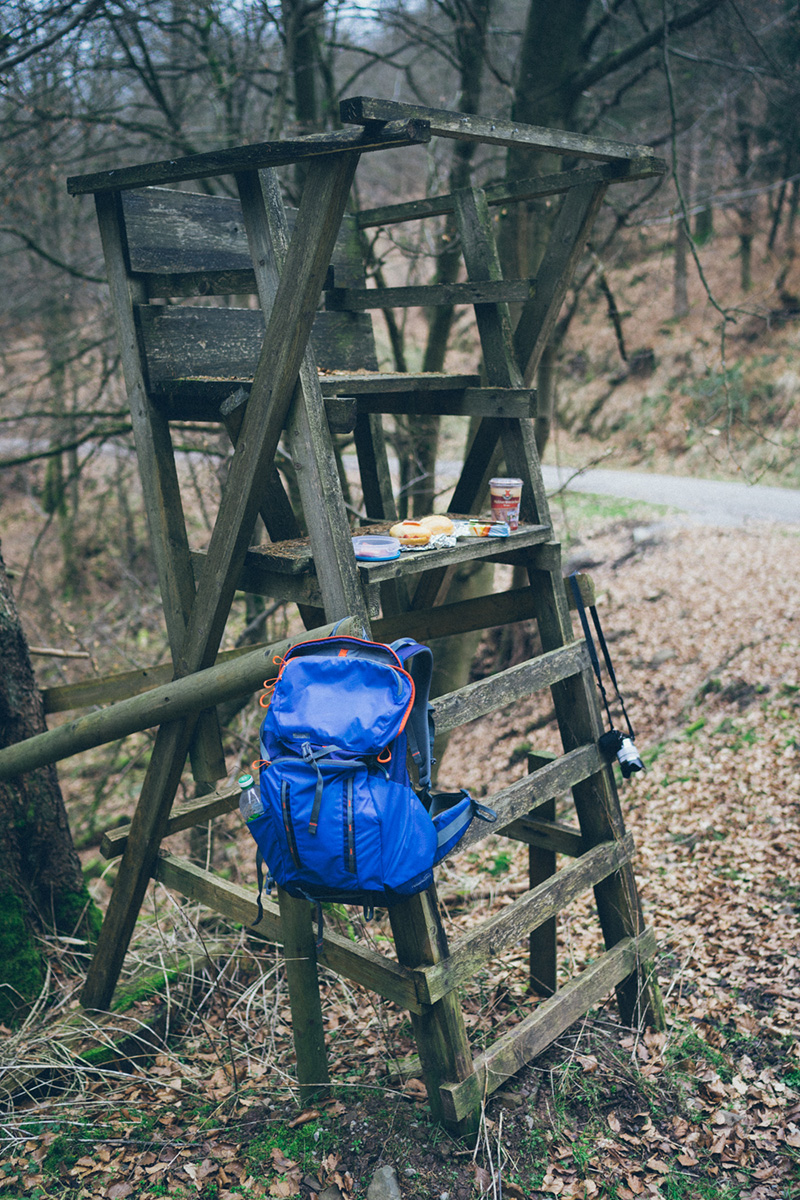
Michael’s first impression:
“It is the best photo backpack, that I have ever used. If I will ever buy a new photo backpack, it will be this one. I can only criticise the haptics of the zippers and I would prefer to have an additional softer inlay for the belt bag for sensitive lenses.”
If you enjoyed to read the review, consider to buy your gear with these links:
You can buy the Mindshift Gear Rotation 180° Horizon for 289€ at Amazon.de (Tahoe Blue or Charcoal) and for $259 at Amazon.com
This site contains affiliate links. If you make a purchase using any of the links marked as affiliate links, I may receive a small commission at no additional cost to you. This helps support the creation of future content.
Jannik Peters
Latest posts by Jannik Peters (see all)
- A beginner’s guide to bird photography – Episode 1: Sharpening your senses - August 3, 2021
- Review: Tamron 35mm F/2.8 Di III OSD M1:2 - March 8, 2020
- Review: Zeiss Batis 2/40 CF after the Firmware Update - August 16, 2019
Nice review. Sound like a good backpack. I think I would buy one, but I already have a different backpack, which is quite similar to use and really good. The name is Lowepro Versapack 200 AW. Just wanted to name it to give the reader an alternative. 😉
Hi Matt,
thanks for your comment! The Versapack looks decent too, but the concept is quite different.
Greetings,
Jannik
Hi Jannik,
well, I don’t see that much difference. The main difference is that you rotate the lower part of the bag and the Versapack need to be rotated and tilted by having it on one shoulder. The main point, walking and changing lenses in front of you, is the same, but of course different. Everything else seems the same (big daypack, weather proof, …). Of course the Mindshift has vastly improved the way to do it.
Cheers, Matt
Hi Phillip, thank you for the review – we always appreciate it. If you have any questions or your readers have any questions, they’re welcome to contact me directly – simon at mindshiftgear dot com.
Thanks again!
Simon
Hi Simon,
you’re welcome! I am really convinced about the concept and it really helps me when I am traveling. Therefore, it was easy for me to write that article and to recommend it to our readers.
Greetings,
Jannik
I totally agree to your nice review. I have the Panorama since I am using µFT.
I made the same experience – this back changed the way I am taking pictures. Before, I was sometimes just to lazy to change lenses. Now it can be done fast and safe.
My wife appreciates the back as well. I don’t have to stop that often 😉
I nice addition is that you can add a lens container to the belt on the right side, giving you even more space to store lenses without obstructing the rotation mechanism.
Thanks Jannik – I’m curious if the Canon 80-200 FDL fits when attached to the body in any configuration (perhaps horizontally) – I have the Mindshift Rotation Panorama, and my only frustration is that some lenses must be removed from the body before placing in the bag in order to fit. Maybe you are biting me with the upgrade bug;)
On another note, I’m curious about your choice of the 80-200 FDL when the EF-mount 70-200 L (non-IS) is a relatively inexpensive option.
Thanks!
Hi Jordan,
the attached 4/80-200 L fits into the belt bag horizontally. Other lenses are below the lens then but there is not too much space. If you prefer that, this could work for you although it’s not perfect in my opinion.
For manual focusing and landscape work, i prefer the handling of the FD lens. The focus throw is much longer which makes the focusing much faster and more precise. So far, I can’t really get used to the AF with the EF lenses. It works ok in bright light, but it is not that reliable and precise (at least with my Commlite). I’ve read that it is sharper than it’s EF counterpart, but I did not compare them yet.
I’d probably take the Sony 4/70-200 if I wanted to have reliable AF. I own also a Contax 4/80-200 and I plan to compare it to the FD when I find some time.
Thanks for the review. I have been looking at getting another back pack ( like I don’t have enough in my closet) for carrying my photo gear but one of my biggest beefs with most of them is that they are meant to only carry the photo gear and give you no functionality as a hiker, water, food, essentials, extra clothing etc…I usually only carry my camera with a 14mm ultra wide attached and hanging from straps on my chest which makes it convenient but doesn’t give me any choice of changing lens, so this is intriguing. Did you only use water bottles with this backpack or did you trying using a hydrosleeve inside as well ? I sweat like its going out of style so I always carry more water then I think I need.
Thanks for the great review! I’m leaning heavily towards getting this bag and just asking around now to try to confirm that I might be able to squeeze a 15″ MacBook Pro into the top part.
Hi
Nice review. Since you’ve been (at least) to indonesia with this bag:
the official size on their website is
28 x 62 x 23 cm
(11” W x 24.4” H x 9.1” D)
which is a bit more than the usual carry-on allowance of most airlines (about 40 x 55 x 25cm)
have you ever encountered a problem with this? or is the height “flexible”? So 62cm is the maximum? and it can be “compressed” to the 55cm?
Thanks
I concluded that the pack was within the limits for most airlines and used it as hand luggage for a trip last year which involved 10 flights with a number of different airlines and had no problems at all.
One more point which might be helpful. The removable daypack part (with camera and lenses inside) will fit into a standard hotel room safe!
Hi Jannick !
I used the Mindshift Gear Rotation 180° Horizon on a 14 day hike in the Khumbu (Everest) region of Nepal and it worked out really well.
However there are number of areas where I find my LowePro Flipside Trek BP 350 AW (and smaller and lighter bag with at least equal carrying capacity) is it’s equal or even superior.
1. Size. It’s much smaller and lighter yet still carries the same amount of gear (or more) as well. Much more manageable around town or on planes (though I never had a problem with the Rotation in that regard).
2. It ‘flips’ around my waist and like the Rotation doesn’t need to ever be put down.
3. A tripod can be attached down the centre or on either side ( I usually put it on one side so I still have instant access to the front pocket where I keep my iPad).
4. The two stretchy pockets are great for water bottles (the single pocket on the Rotation is not), headgear or storing anything else of reasonable size. Two water bottles can be put side-by-side into a single pocket.
5. The interior top pocket isn’t as large as the Rotations but still easily takes my Arcteryx rain jacket and pants and a plethora of other small stuff (inc. 2 power chargers).
6. The other front pocket on the Flipside Trek has within it a dedicated pocket for my iPad Air 2. I’ve used it all over China and Europe, and on many planes, and the iPad has been, surprisingly, well protected. This pocket gives me quick and easy access to it as well. Despite this space being taken up there remains lots of space at the bottom of this front pocket for other stuff (usually headphones, sunglasses, toilet paper and other bits and pieces I usually won’t need access to more than once or twice a day).
7. It has a dedicated rain pocket (whereas the Rotation uses it’s front pocket, making that space unsuitable for other gear.
8. The Flipside Trek can be squashed flat if needs be, the Rotation can not.
9. The Flipside Trek is much much cheaper than the Rotation.
I love both and there’s room in my cupboard for the pair of them (and many others) 😀
However more often than not I now reach for the Flipside Trek 350 (also available as a 250 or 450) in preference to the Rotation.
Hello,
does a 15.6″ Laptop (363x255x26.9mm) fit in there or in the Professional?
Maybe in the pocket on the front?
If not do you know of any Backpack that has this rotation system and also fits a normal size Laptop 15,6″ or even 17″?
Thank you, big fan of this site!
Alexander
You might manage to fit a 15″ notebook in the Professional.
On a personal note: I have no idea why anyone would want to hike with such big notebooks.
Thanks for the fast reply.
I am looking for a new backpack that will also serve as my main backpack in “normal” life. So I need a laptop space. Not really for long hikes. But i still often carry my normal gear with me.
Currently I use the “Tamrac 3385/01 Aero Speed Pack 85” witch has a side access system.
I have had this ever since it was released and I can confirm all the findings. A great backpack for walking and bicycling. I also had the original Pro model but sold it because it was too bulky for my purposes.
When travelling with a small child the rotating pack makes life a lot easier.
I have the optional padded insert for the top compartment when I want to have longer or additional lenses. It is not difficult to access the top compartment while wearing the pack. The side pocket works well with a tripod. The pocket will not tire and stretch into uselessness like some cheap net side pockets. My Horizon is the bright blue version and it is not my go-to solution for business travel.
One small downside is this: Obviously, the camera is usually in the rotating waist pack. Accessing the camera is not that handy when the backpack is lying on the floor or sitting next to you on a bench etc. The pack becomes top-heavy once the rotating pack is removed from its ‘nest’. These are minor nuisances compared to the hassle-free operation on the go and quality you get.
To make a great product even better, an ability to convert the waist pack to a shoulder bag would be more versatile. I will not be caught wearing a waist pack in public… 🙂 I was curious and tried to fit a Retrospective #5 into the waist pack space and lo! It fit rather nicely. Too bad they cannot be swapped.
All in all, an excellent day hike and travel backpack if you are able to fit your main kit into the waist pack.
Thank you very much for this detailed and practical review! Searching for a new camera backpack, I came about your review again and ordered the 34L version.
In the meanwhile new versions of these backpacks have been produced, the names and also the exact measurements have changed (and also the design: AFAICS today all three sizes are available only in black+silver with some green accents). I hope it helps other readers when I quickly list the current models together with their measurements (compiled and compared from several sources – the inside measurements differ between different websites, so please take the exact measurements with some caution):
Think Tank Rotation 22L
(a.k.a.: Think Tank Mindshift Rotation 22L)
Outside: 32 x 52 x 22 cm
Inside: 28.5 x 29 x 15 cm
Belt bag inside: 27 x 17 x 15.5 cm
Weight: 1.8 kg
Think Tank Rotation 34L
(a.k.a.: Think Tank Mindshift Rotation 34L)
Outside: 34 x 58 x 26 cm
Inside: 28.5 x 34 x 18 cm
Belt bag inside: 28 x 19.5 x 18 cm
Weight: 2.2 kg
Think Tank Rotation Pro 50L+
Outside: 35 x 61–81 x 30 cm
Inside: 30 x 36–49 x 22 cm
Belt bag inside: 31 x 19.5 x 18 cm
Weight: 2.8 kg
So AFAICS all three backpack models have become a bit heavier, wider and deeper, but a bit less tall.
For all three models you can still buy an additional raincover.
For the 34L and 45L model you can get a dedicated photo insert which makes it easy to store additional gear there in a save manner. The names of these inserts are:
* Think Tank Stash Master top load for 34L
* Think Tank Stash Master Pro for 50+
When I get my copy of the 34L model, I will measure up the compartments and report the exact sizes, and also report if there are any other important changes from the version described in this review.
To avoid misunderstandings, the dedicated photo insert is intended for the upper/main compartment/daypack section of the backpacks. The belt pack comes already prepared for cameras and lenses and can still be adjusted by using insertions for horizontal and vertical seperation, just as described in the review.