
In this article I talk about how I use my camera in the field, so it is rather focused on the Sony Alpha 7, but I think that it holds some interest for users of other cameras as well.
This post ist part of a series:
HOW I CREATE IMAGES – PART 1 : THE SEARCH FOR GOOD LIGHT
HOW I CREATE IMAGES – PART 3: POSTPROCESSING
My current camera is a Sony a7, I think it is the best camera for my style of photography because of several reasons:
- it is great for manual focusing
- it has a sensor with a large dynamic range
- it has good high Iso performance
- nearly all lenses can be adopted to it
- it is smaller than all other cameras with similar image quality.
At the moment I only own manual lenses (I tried the SEL2470z but was quite disappointed by it), for my kind of photography I don’t need the speed of an AF-lens but I like the better control over the point of focus, manual lenses provides. And I enjoy the process much more.
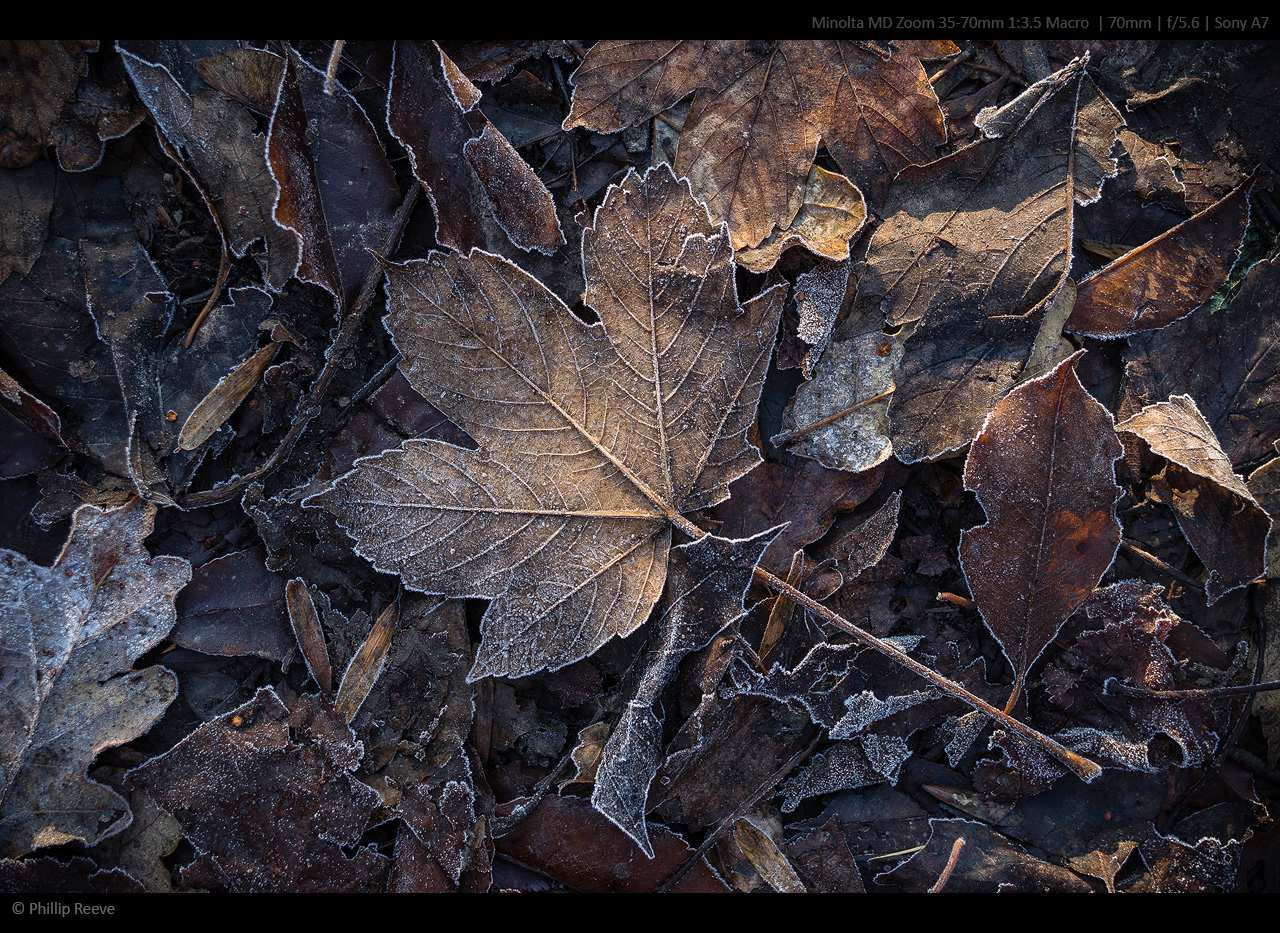 this image was taken with one of my favourite lenses, a 30€ Minolta MD 3.5/35-70 which can’t be used on any othe full-frame camera
Display and EVF
I often have the 3×3 grid enabled (not so much because of the rule of thirds, but mostly to avoid oblique angles).
As I shoot raw only I can use the image styles to optimize what the EVF displays, I have for example set sharpness to +3 which makes it a bit easier to judge sharpness with the EVF (more about that in this article).
In very contrasty situations I also use DRO to anticipate how much I can lift the shadows when I post process the image, if my shadows are totally black despite having used DRO 5, I will have a hard time to recover them in Lightroom. This does not affect the raw, I just use it to see better.
Focusing
I have focus magnification placed on the AF/MF button which I find much easier to reach than the C1 button and magnification time is set to “No Limit”.
The best focusing technique for me depends on the setting, whether I photograph non moving objects or moving ones.
There are three different focusing techniques I commonly use:
- for landscapes and other non-moving motifs I usually use focus magnification, because it is absolutely reliable, but it is also rather slow.
- for slowly moving objects I look for flickering in the EVF, flickering will only occur in really sharp areas. It is more sensitive than the focus peaking and much less distracting.With this technique I usually get critically sharp images without using magnified focus
- focus peaking is most useful when one is working with small DOF or faster moving objects. It is in my eyes totally useless when the DOF is bigger, because it will often highlight parts of the image which aren’t sharp but have high local contrast. I find it much more useful in combination with the magnified view, but too distracting in unmagnified view, so usually I don’t use it. I wished Sony would give us the possibility to use it in magnified view only.
For a more detailed discussion of these techniques please read my manual lenses beginners guide.
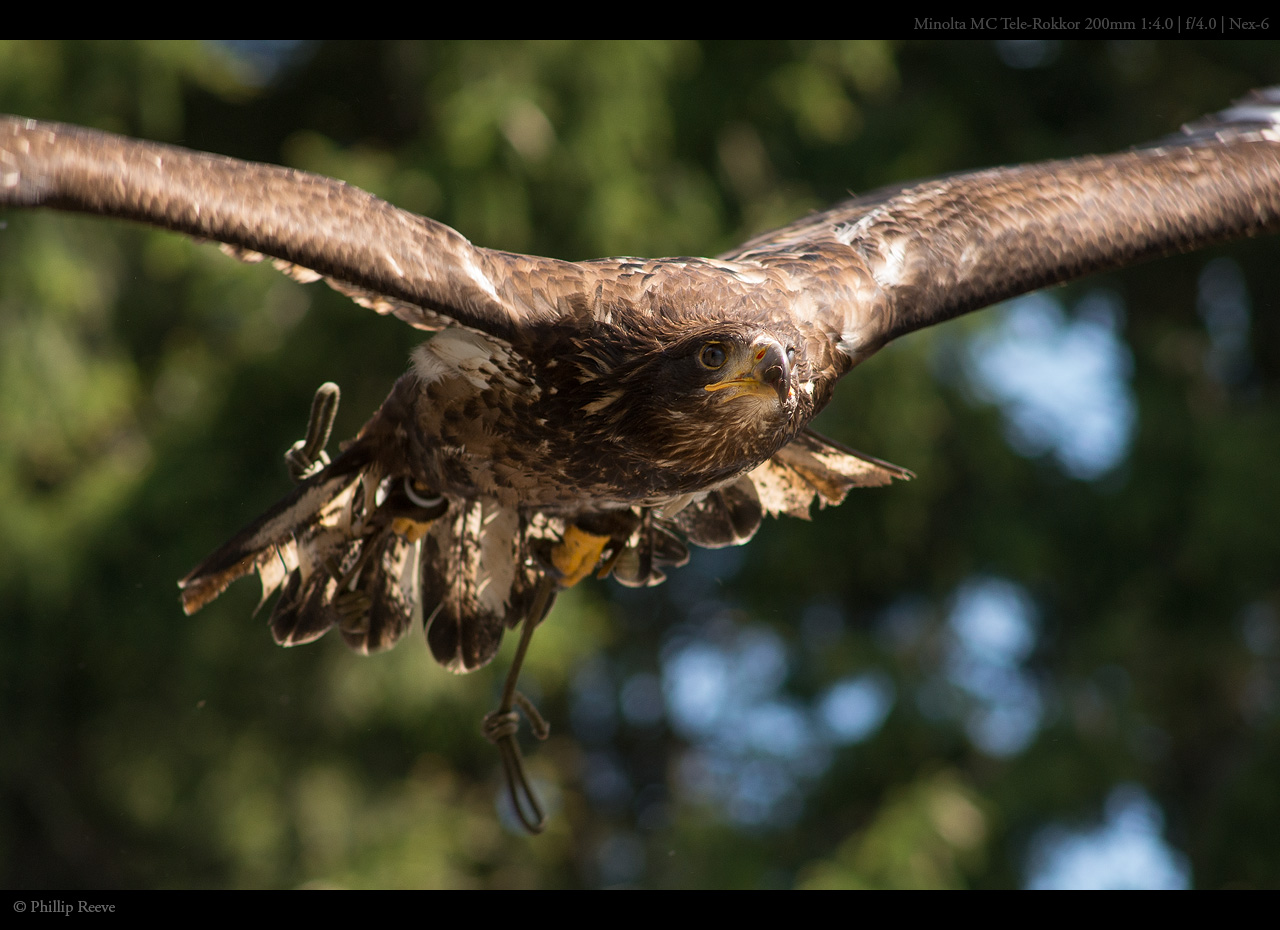 for this action shot I used focus peaking
Exposure
I usually try to expose the image so that I have details in even the brightest highlights and often end up with rather underexposed looking raw files. Because the a7 has such a great dynamic range I can push the shadows in LR up to 4 stops I end up with a gentle highlight roll off and good shadow detail.
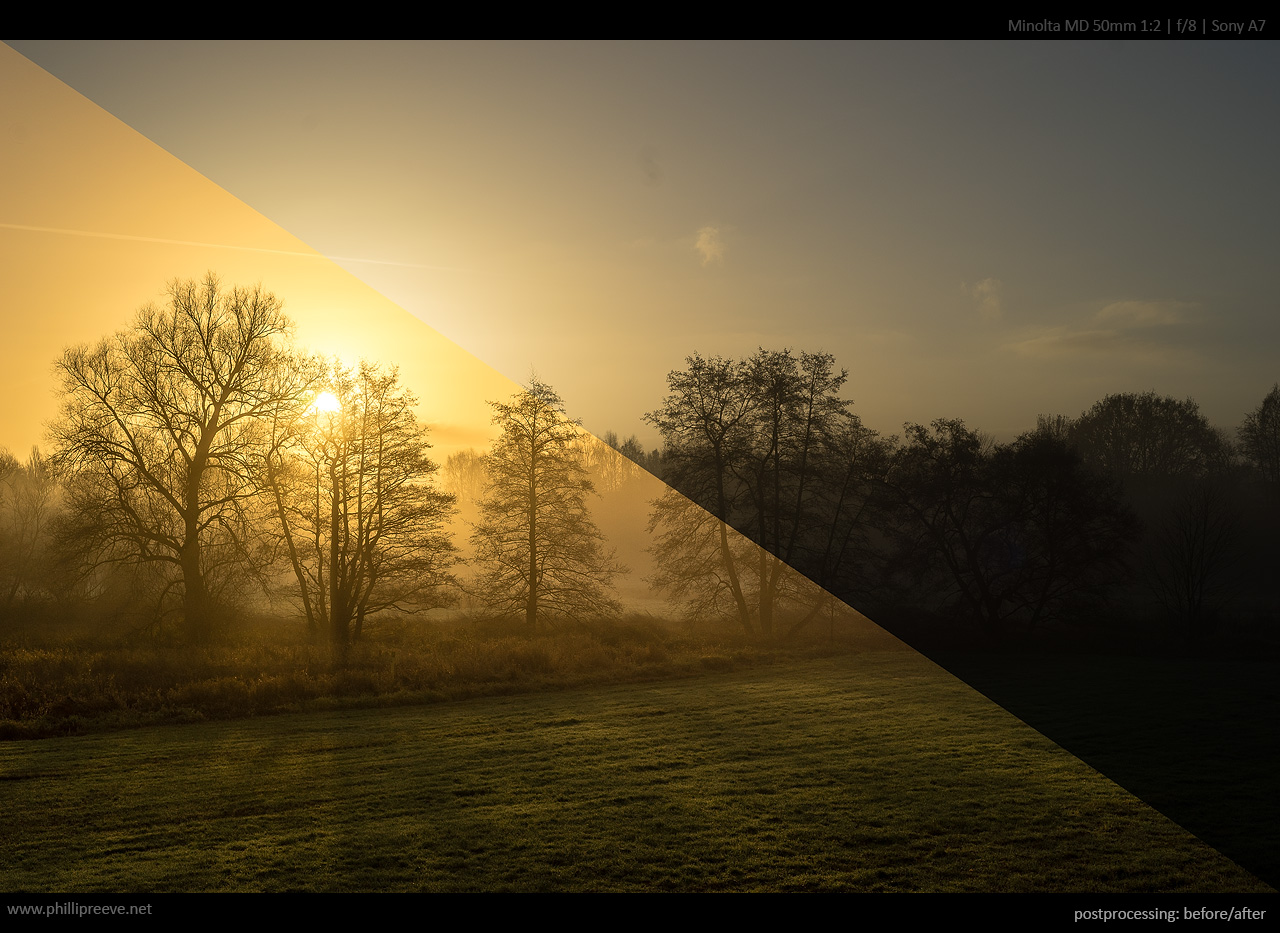 to save detail in the highlights I exposed for the lights and lifted the shadows in Lightroom
This technique works because the A7 has much more headroom in the shadows, than in the highlights, if highlights are blown, they are blown and nothing can be recovered.
If the shadows of the image appear black, one can in fact push them 3 or even 4 stops before most detail is lost to noise.
To make sure that the highlights are correctly exposed I use the a7’s zebra function (Settings/Submenu 1/Zebra), which in my eyes is a great tool which is too often overlooked.
I have set it to 100+, at this setting white stripes will appear in those areas where at least one color channel has clipped. Because Zebra is based on the jpg you have a little more headroom than the camera thinks.
Im my eyes the Zebra function is superior to the live-histogram because the histogram doesn’t show individual color channels and you won’t nice if only one color channel is clipping while the other two are not.
The a7’s dynamic range is largest at ISO 100.
ISO 50 is pulled from ISO 100 so you have a little less noise in the shadows and a much less gentler highlight roll off.
We loose dynamic range as we move away form ISO 100, therefore I try to avoid using anything but ISO 100 for scenes with a lot of contrast and carry a tripod with me so I can shoot my landscapes at ISO 100 and f/11 even in the fading light.
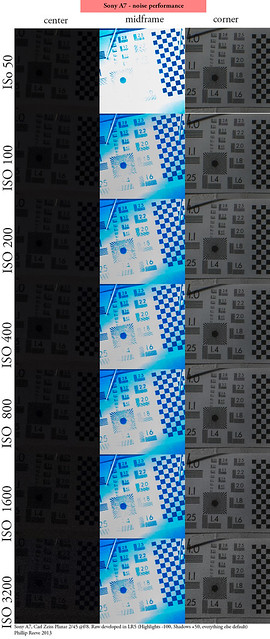
this test shows, that the a7 has much less highlight headroom at ISO 50
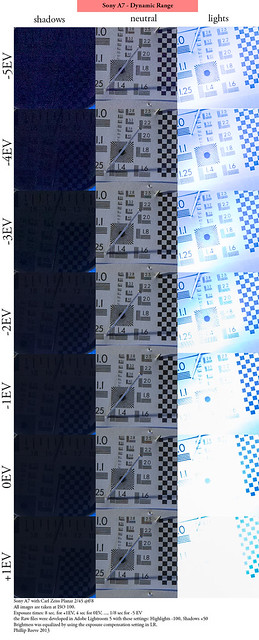
this test shows how much the shadows can be pushed in postprocessing
Exposure Modes
Most of the time my camera is set to A-mode and ISO 100, in this mode I can change the aperture or my composition and the camera can choose the best exposure time.
I leave A-mode if I am working handheld and it gets darker so that the shutter speed chosen by the camera drops below 1/(2*focal length). So if I am working with a 50mm lens and the camera would use a shutter speed of 1/80s, I switch to S-mode and Auto ISO and set the shutter speed to 1/100s .
I use M-Mode either for panoramas were I compose many images into a single one or when the camera’s logic is failing which sadly is rather often the case.
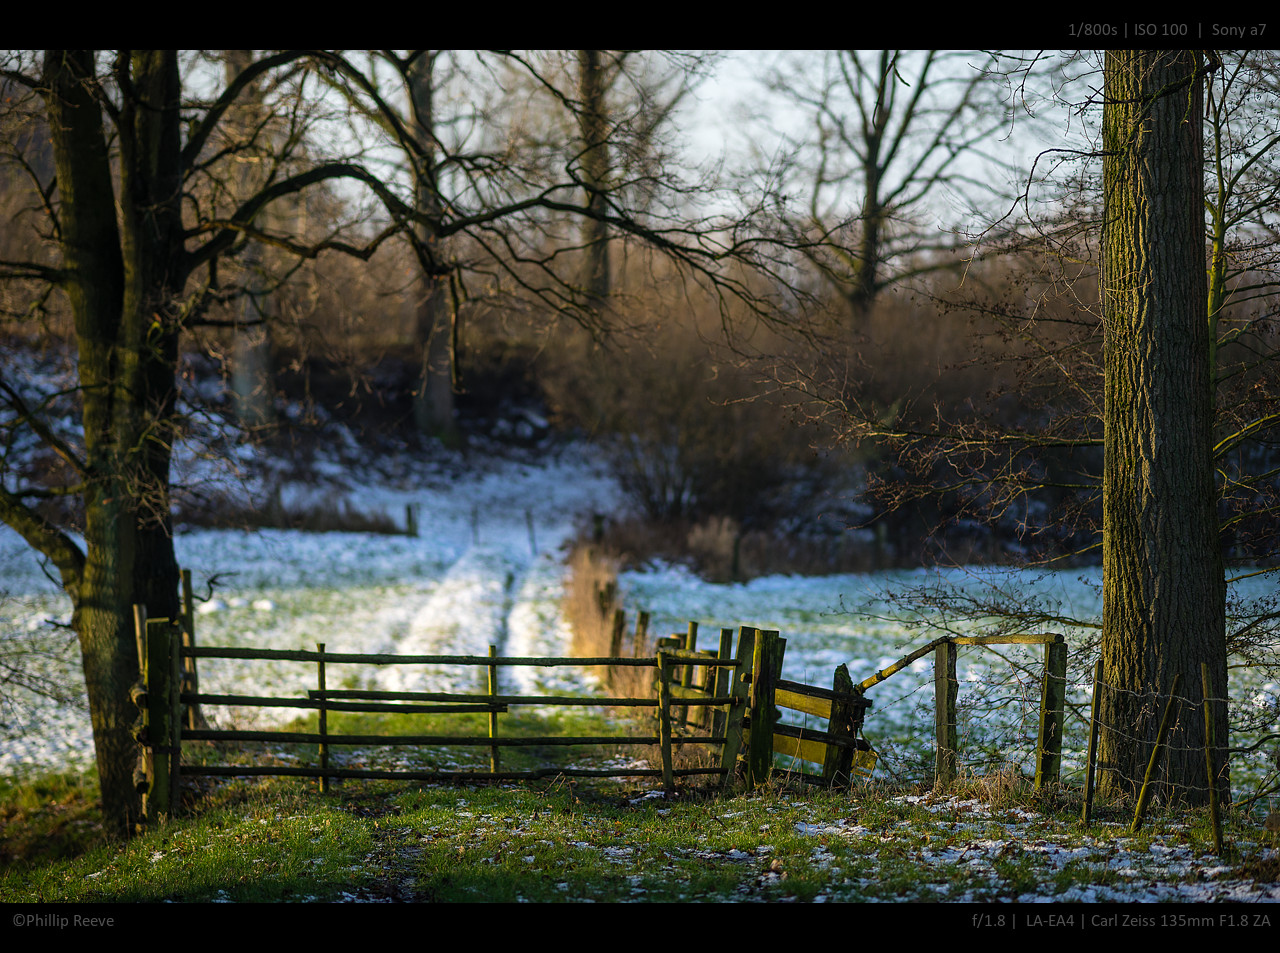
For example I have been using the ZA 1.8/135 ZA quite a bit an whenever I use this lens in S-Mode the camera wants to stop it down to f/4. To use it wide open (why else would I want to carry such a heavy lens?) I switch to M-Mode, dial in my desired aperture and shutter speed and let the camera choose ISO-value accordingly.
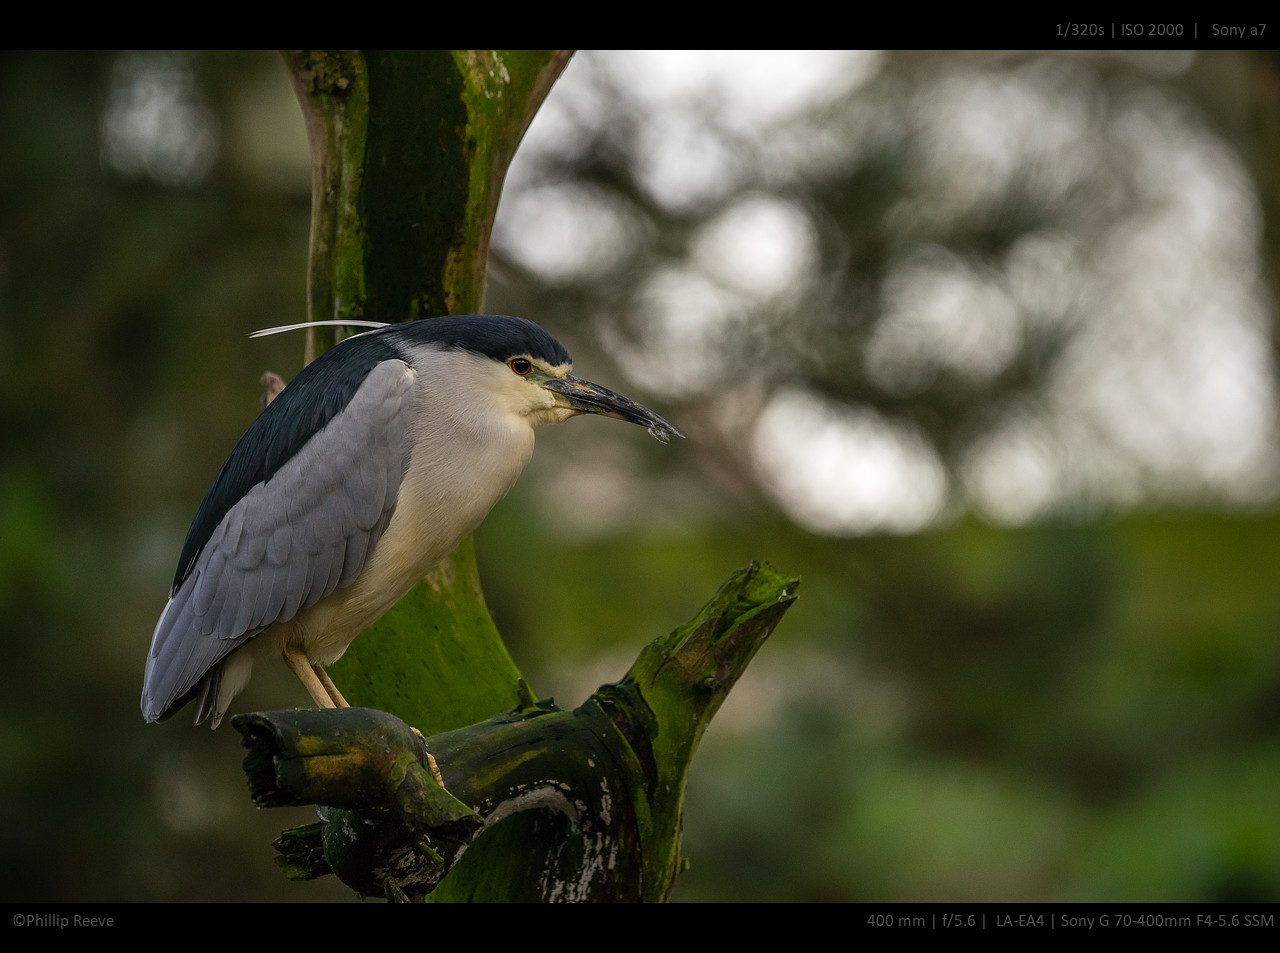 the camera couldn’t know that I was using a monopod, so I used M-Mode: 1/320s | IS0 2000 | 400mm
The a7 has two programmable modes on the dial, you can set them by setting up the camera to the desired settings, then go to Menu/Camera/Submenu 7/Memory and select either register 1 or 2 by pressing the middle button. Form now you can access these settings by turning the mode dial to 1 or 2.
Because I use the two settings describe above 95% of the time I have set 1 to S-Mode Auto ISO and 2 to A-Mode ISO 100.
Framing
One thing I really like about the A7 is the tiltable display, it gives me more freedom for compositions. I normally couldn’t have done.
I use the display about as much as the EVF.
I prefer the EVF for longer lenses because I can hold the lens more stable with the EVF which leads to easier focusing.
In general prefer the display for wider lenses and for tripod use, but I also use it with longer lenses, if I am working close to the ground or above eye level.

When I took this picture I was close to the water and leaning down, I couldn’t have composed it trough the EVF.
Hand holding technique
A good technique is important to keep the camera steady, bad technique will result it blurred images.
In general it is to have as many contact points with the body as possible.
When I am using the display I support the camera or lens with my left hand and operate it with the right one. Both my arms are rested on my hips to minimize shake.
When I am using the EVF I rest my elbows on my chest, again to minimize camera shake.
A less better stabilized image will make focusing easier as well, especially with longer lenses.
Final Words
Thanks for reading, if you have any question, just leave a comment!
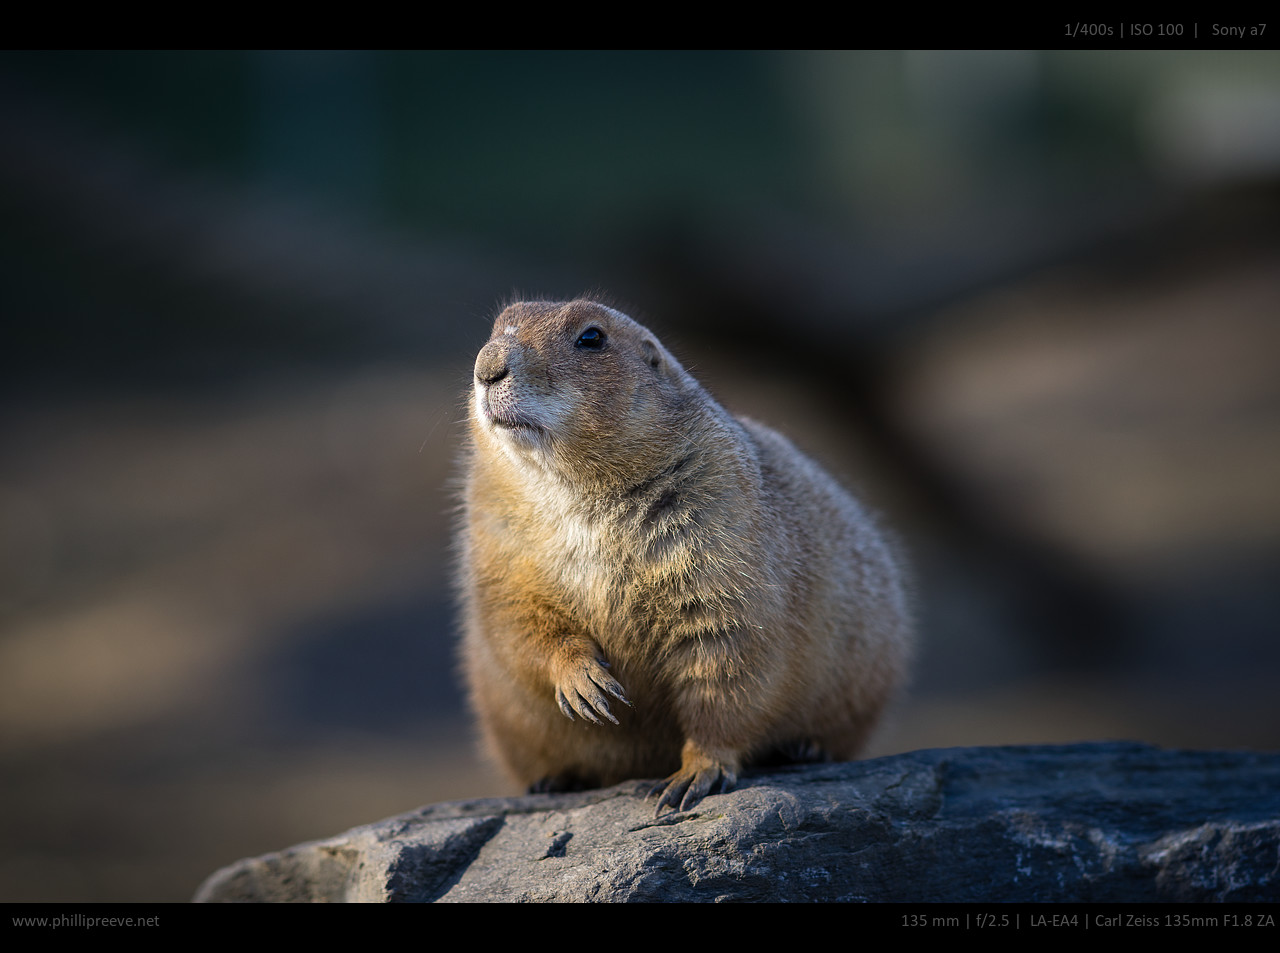 for this picture I used the display to get as close as possible
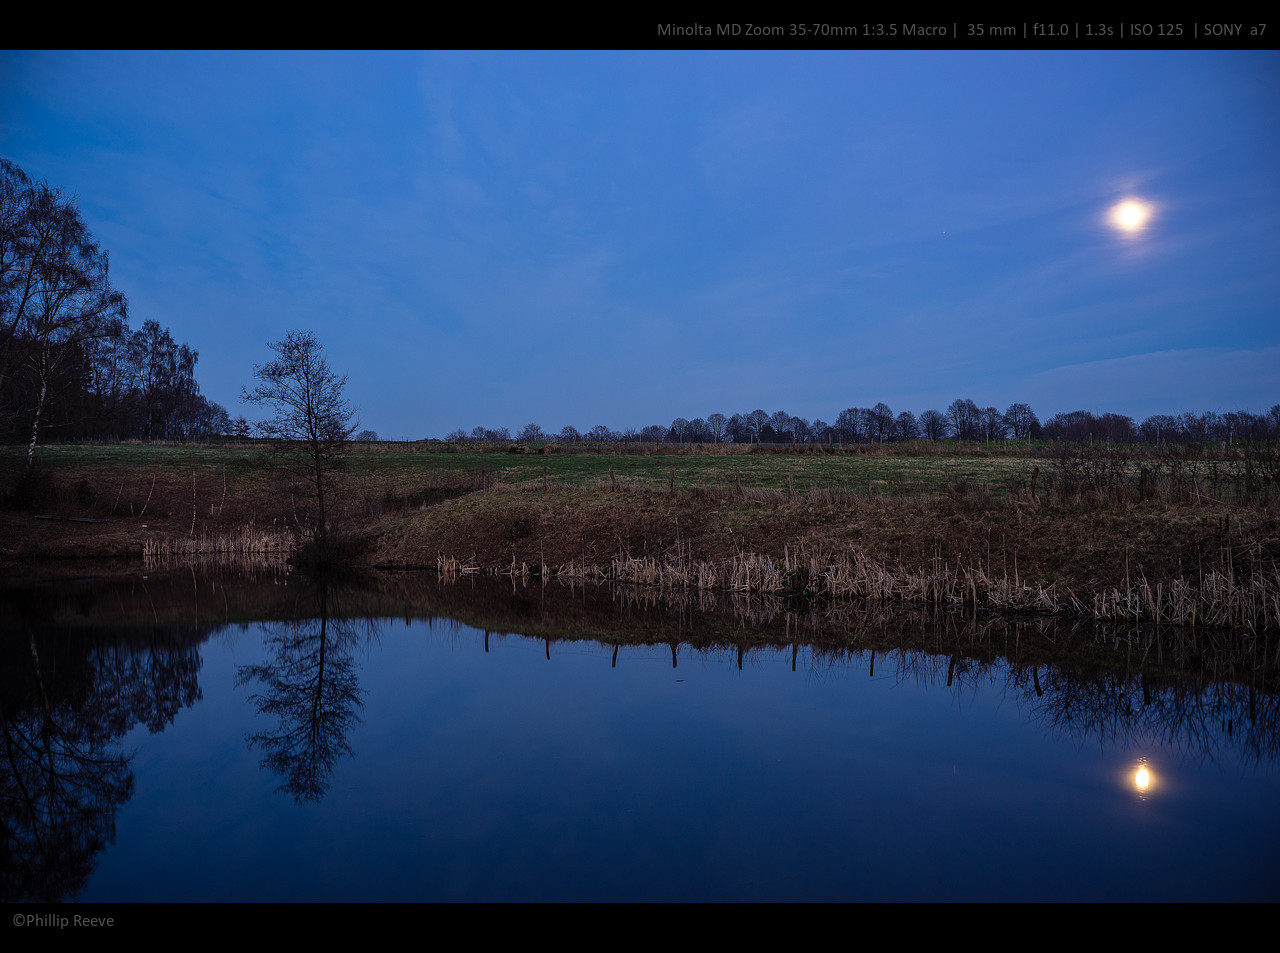 this picture was taken with a tripod, a handhold image would have had a much worse quaility
If you liked this part you might enjoy the other parts as well:
HOW I CREATE IMAGES – PART 1 : THE SEARCH FOR GOOD LIGHT
HOW I CREATE IMAGES – PART 3: POSTPROCESSING
If you want to learn more about manual lenses then this article will be useful: Manual Lenses on the Sony a7 – a beginners guide
This site contains affiliate links. If you make a purchase using any of the links marked as affiliate links, I may receive a small commission at no additional cost to you. This helps support the creation of future content.
Latest posts by Phillip Reeve (see all)
- Review: Samyang AF 75/1.8 FE - April 12, 2021
- The FE-List now has 113 lenses on it - March 25, 2021
- 2020 – Year’s end review - December 28, 2020
Philip, your images are absolutely wonderful. Now I know that the ones you post on our common forum are but a small percentage of the ones you shoot, and I could easily turn green with envy! Super comments, too, very educational, with lots of good tips. Thanks!
Philip – I hope you will keep blogging. Thank you for your insights. It is rare to find someone who reviews photographic equipment and who a) makes excellent images of a range of different subjects, b) who actually owns and uses the review equipment and c) knows how to use it as a result of thorough experience.
Keep up the good work!
PS I hope they create a FE version of the 70-400 – if they do it’s on the GAS list for my A7
the La-EA4 and all the A-mount lenses are actually loaners from Sony 😀
But the A7 is my own and I really like it and use it exclusively
thanks,
Phillip
Phillip,
Thanks for this Part 2 – very useful and appreciated.
Would you mind being more specific regarding this comment: “for slowly moving objects I look for flickering in the EVF, flickering will only occur in really sharp areas. It is more sensitive than the focus peaking and much less distracting.With this technique I usually get critically sharp images without using magnified focus “. I have been looking for this “flickering” without success (peaking being turned off). Not really sure what you mean by that.
Based on your comment regarding exposure, You obviously do not subscribed to the “expose to the right” school of thought? Your logic appears to be unassailable, but why then is the “expose to the right” dogma so prevalent?
Thanks again!
Marc
I think Phillip uses the ‘true’ ETTR method: expose to the right depending on the intended result: detail in shadows vs. detail in highlights.
ps: I know it’s 3 years after…
🙂
wait what does that mean?
Phillip:
Wonderful article and quite helpful. You have confirmed much of the way I have learned to shoot with the a7R and provided some insights that I will use in the future such as Zebra stripes.
Thanks and keep up the great work.
Bob
Hi Phillip
Thanks for the great tips, I just got my A7 and still learning the ropes. What telephoto prime lens do you recommend for this?
Thanks
Charles
how much do you want to spend and which focal length do you prefer?
Very nice, lovely images, philip – congrats.
which kind of minolta md 35-70 are you using`? i’ve got the
latest version, w/o macro feature.
i’d consider to buy myself a A7R within a few years for using
all my legacy lenses, i just can’t sell them, and they’re great.
Is the Minolta 35-70 MD really _that_ great? 😉 i’ve got some
few Zeiss Contrax C/Y mount lenses, which i’d love to use
with a A7R someday…
The problem is, that A7R costs 2k EUR, so i can’t afford it yet.
I use the latest version with macro feature.
Stopped down it has better across the frame sarpness than my Zeiss 4/24-70 😉
déjà-vu on autumn-leaves:
http://www.dieterhoppe.de/natur_7.htm
Thanks for your help getting familiar with my A7 because the Sony manual is bullshit. At this moment I’m fighting for custom settings on mode 1 & 2 – pray for me!
Phillip,
Thanks for the post. Learned a lot as I aslo use only manual lenses (FD) on the A7.
As Marc B in a previous reply I’d like to understand more the notion of “flickering” in the EVF. Is it an option that has to be activated (like for focus peaking) or something you see natively happening in the EVF when something is in focus ?
Thanks
Yannis
Hey Yannis,
this flickering or glimmering is always there, you don’t have to activate it. Just look for something with fine details, view it through the EVF and then focus on it. You will notive some glimmer were fine detail is.
I hope this makes it somewhat clearer, if not just ask ;-).
Phillip
Phillip,
Another question related to the way you use the MD 35-70 on the A7.
I see some of your nice shots taken at 35mm range with almost no distortion. Mine has a lot and I find it almost unusable. Is you lens “defaultless” or did you applied some lens correction in LR ?
Globally speaking how do you recommend to use it ?
Thanks again
Yannis
It surely has some distortion at 35mm, but I don’t shoot architecture often and even when I did distortion wasn’t a problem for me. I never corrected it.
Phillip
Thank you for your very useful post and a lot of practical tips. I love your photos. Have you got a 24-70 lens? Please share your experience and tips in using this lens. Thank you again.
Thanks for your wonderful photos and insightful articles. just wonder which adaptor you use for Minola lenses.
I use cheap ones for 10 bucks from China
Hello,
Thank you for your helpfull remarks and the great sample pictures. But I have one question: I tried a Minolta AF 35-70 with Sony adapter LR-A4 ( own focus system) and I found that with this configuration focus magnification doesn’t work. Could it be or am Iwrong? I’m still fighting with the focus …
Best wishes – Andreas
Hi Andreas,
you are pressing the button which usually engages focus magnification but with this specific lens it doesn’t work?
Philip,
Excellent blog and very informative post. I just got my Sony A7 and the tips you’ve described here will definitely come in handy. The photo of the eagle is great, quite impressive that you took it without image stabilization and just using focus peaking.
Could you let us know what focus peaking/DMF settings you are using and the functions you have assigned to the custom buttons?
Please, let me know if you have a twitter account. I am already following you on FlickR.
Hi Lenin,
I don’t use focus peaking and I have assigned focus magnification to the AF/MF button and AEL to C1, I don#t use the other ones. This is a setup for manual lenses only.
Phillip
Hallo,
ich bin heute zufällig bei der Suche nach Erfahrungen mit der Sony A7 auf deinen Blog gestoßen und nachdem ich dann überascht festgestellt habe, okay, der Bloggt zwar auf Englisch, ist aber Deutscher sah ich dann zufällig das letzte Bild in diesem Blogeintrag und musste sehr schmunzeln. Verdammt das ist doch der Teich am Köckerwald. Wenn ich mich jetzt nicht komplett täusche 😀 Ich Wohne keine 5 Minuten davon entfernt..
Ich finde die Bilder alle toll und überlege mir eine A7 zu Weihnachten schenken zu lassen. Wäre mir als Schüler so zu teuer. Aktuell fotografiere ich mit einer 650D..
Liebe Grüße Johannes
klein ist die Welt 😉
Does DRO adjustment work on the RAW file, or the JPG that is output from the camera? Thanks, wondering why you use it. Also, any way to move the spot meter while composing?
No, it does not affect the raw image. But it pushes the shadows of the jpg a lot and so I can anticipate how much I can push the raw in post.
Hi Phillip, Thanks for writing these articles and sharing your experience. I have been using Fuji XE1 and A6000 for a little while. and lately I have bought an A7r. My main lens is a leica F4 lens, which means I have to pre-set aperature before focusing. One problem i found (which applies to all three camera) is that let say I am shooting late evening or at night. There is simply not enough light feeding to live view. This leads to very grainy feed in the EVF/LCD i.e. very difficult to judge if subject is in focus. I am interested in your technique for focusing, especially the “flickering”. Is it an option in the menu or is this just something will occur on the sharpest focus? It would be very ideal if you have a video or some picture illustration. Many thanks!
Phillip,
Deine Berichte und Fotos sind immer erstklassig! Weiter so!
Danke Rainer 😉
Hi Phillip,
you said you use DRO “on” to see how much you can lift up the shadows in post processing. I have deactivated it as it lights up the darks and I saw for me that I tend to go down with my exposure then which results in an underexposed RAW. Might be that’s interesting to add as information what DRO exactly does. I prefer to play with exposure compensation if my darks are to black.
But the other settings are same for me like grid and sharpness.
Thanks for your remark 😉
I use DRO only when I expose for very contrasty situations. Here I give enough exposure that the zebra begins to show because I am close to losing highlight detail (I can recover a bit more highlight detail in post than the zebra would make me asume). If it is a contrasty situation this will result in nearly black shadows unless I activate DRO. With activated DRO I can see details in the shadows an judge exposure.
What DRO does is that it lifts the shadows of the jpg so that you can capture a wider dynamic range.
Hi Phillip,
I have a question about the assignable functions of the camera. I’ve looked online, but found no information on the matter of assigning functions to the custom buttons, which aren’t in the menu. For example: I would like to assign a toggle for switching between viewfinder/monitor on say C2 button (since when using the auto function the sensor for the EVF switches the monitor off – quite annoying when you want to shoot from the hight of your hip and hold the camera close to your body for steady shot).
Thanks for considering,
Nedelcho
Sadly the camera can’t do what you want it to do. I agree that the EVF sensor is way to sensitive and it would be great to be able to shwitch with a button.
I enjoyed reading this article as well as Part I and II. One suggestion on gear is the Peak Design Clutch: https://peakdesign.com/store/clutch . It really help me to hold the camera steady. It also provides some safety from accidentally dropping the camera, a real plus when working around water.
Dear Philip,
Very nice tutorial. What will be the best suitable wide angle lens available for this cam. Can we use the tamron 18-200 mm lens. Sine this is a full frame one what about using the lens of nex f3 18-55 mm or 70-210 mm lenses.
Regards,
James
the lenses you mention are APS-C lenses and won’t cover the fullframe sensor. i would recommend the Zeiss 4/16-35 http://phillipreeve.net/blog/sony-fe-16-35mm-f4-za-t-review/
Dear Philip,
Very good tutorial sir. Really help me a lot on manual focusing techniques. I owned a Sony A7 also with 4 manual lenses, a Minolta MD 35-70mm F3.5-5.6, a Minolta MC-Rokkor 135mm F2.8, a Tamron 17-35mm Di LD F2.8-4 and a FED 52mm F2.8 (M39). Never comes in my mind that I can use flickering in EVF to assist me in focusing.
Thanks & regards,
Mozakim
You are welcome 🙂
Hi Phillip,
I discovered your site today while looking for info on how to use my brand new A7 with legacy lenses. I mostly own Konica lenses and I am quite delight with the results.
Could you explain me pros and cons of using A mode or S mode with manual lenses?
I tend to use S mode as the aperture is a quickly set value with these lenses, so I then play with speed and ISO, but I am surely missing something.
Meant to say I mainly use it for street photography and for portraits of my wife and little son.
Thanks for sharing,
Rafa
If I am in A-mode I can chose the aperture I want.
Do I want small depth of field? Then I will use f/2 or whatever aperture is the fastest aperture of the lens I am shooting. Do I want large depth of field and very sharp corners? f/8 or f/11 it is.
The only problem with A-mode is that when there is little light the resulting shutter speeds are too long to handhold the camera. So when I see that the shutter speeds get to long I switch o S-mode and auto iso.
For street photography S-mode is probably the better choice, for portraits in good light I would chose A-mode
Thanks for your reply.
Well, with these lenses you can always set the desired aperture as the camera cannot manage it 🙂
I gave it a quick try and the good thing of A mode is that saves time as the camera will set the speed.
Will use your advise and set the custom modes so I can quickly change them to the best settings.
Any advises to achieve the nice bokeh of your pictures when using a small dof? (Guess that is not all because of the lens used).
Kr
When I am indoor with good strobe lights I have set my camera to M mode (sony 7R) but see only black. I can’t focus properly. So I switch back to Auto…focus and turn back to M mode. What am I doing wrong? Thanks for your help
Go to gear wheel/2/Live View Display and select Setting Effect OFF.
Phillip,
Thanks for the great work you do. Fred Miranda, on the site of the same name, says that he uses Zebra like you, but that the point at which any flashing stops can easily be pushed 2 stops. In other words, based on my experience using your technique, my photos are very under-exposed. It varies depending on each situation, but to get “rid” of all zebras usually requires from 1 to 2,5 stops under-exposure. Based on Fred’s practice and tests, it seems that you can have even more room to adjust areas of the picture using his technique.
And thoughts on the matter?
Thanks. Marc
I think Fred is right that you can often give 2 more stops exposure than the Zebra suggests. But when one color is much brighter than the others you can’t e.g. a red pre-sunrise sky.
Hallo Phillip, erstmal mein Kompliment zu Deinen sehr gut gemachten Reviews .
Es gibt aber einen Abschnitt den ich nicht ganz verstehe. “for slowly moving objects I look for flickering in the EVF, flickering will only occur in really sharp areas. It is more sensitive than the focus peaking and much less distracting.With this technique I usually get critically sharp images without using magnified focus “. I have been looking for this “flickering” without success (peaking being turned off). Not really sure what you mean by that. Ist focus peaking nicht das gleiche wie flickering ? Und ist Flickering das was in der Anleitung mit Kantenanhebungsstufe bezeichnet wird, oder ist daß noch etwas anderes ? Wäre schön wenn Du das für mich klären könntest.
Gruß Peter
Hallo Peter,
Kantenanhebungsstufe bezieht sich aufs Focus peaking, darum gehts mir hier nicht.
Das Flimmern ist eigentlich ein Bildfehler weil die Kamera fürs Livebild nicht den ganzen Sensor ausließt sondern nur einzelne Zeilen. Am leichtesten ist das zu sehen wenn man z.B. auf einen grob gewebten Stoff fokussiert.
Grüße,
Phillip
Hi Phillip
I have just recently swapped my Canon 6D for an A7 and am just starting the long journey of getting to know this new camera properly. Your blog is very helpful, thanks.
I was particularly interested that you shoot mostly in RAW. I was doing the same on my 6D, but was starting to become convinced (from some other things I’ve seen and read) that the A7 would be better suited to in-camera processing. Now I’ve read how you shoot in RAW but use functions such as DRO to anticipate what you can get from the RAW, it makes a lot more sense to approach it this way.. particularly for landscapes and more static subjects.
I was experimenting with the Zebra thing at first but had turned it off after it started annoying me. Silly me. Now that you’ve explained it a bit more I’ll be re-attempting using it.
Thanks
Phillip,
I bought the A7ii to use with manual lenses and I’m having a little difficulty figuring out what mode to use. I want to be able to set the ISO rather than have the camera do that and, of course, I want to pick the aperture. As to the shutter speed I will let the camera decide. What mode do I use for this? P? Auto?
Thanks for your help and for what you do.
A with ISO on the control wheel and a default setting of 100 is what I use
Phillip,
Thank you very much for the quick response. I’ll set up the camera as you specified.
Have a Happy New Year,
Andrew
How’s your editing workflow? Those images are very vivid and clear to me. I never used any Sony A7 series before but Im interesting to buy it soon.
check out : part 3 for that
Hi Phillip. very good and informative tutorial. I have used the A7 for 18 months now but cannot get really sharp images. I am using the Sony Zeiss 24-70 f4 which many reviews saying it is their worst ever lens. I have an old Pentax prime 105mm f2.8 with a Metabones adapter. I will try some of these techniques to see if I can get better image quakity.
Thanks
Tom
It’s like deli to read your blog.
I’m reading a lot of blogs, but I am sure I decided to buy each of my 3 lenses (Loxia50, CG90+Fotodiox Pro, CY35/2.8+Novoflex) only after reading through your posts guys. Great work!
I have an A7II.
My question regarding this post is related to the manual-no-EXIF lenses and the discussion about A-mode and S-mode. Does A7 have a way to inform the camera about the aperture for manual old lenses, or the talk regards only the native lenses?
Thank you
There is no way for the camera to know the aperture of your lens
Should I understand that you use (not always, of course) A-mode with a no-EXIF lens?
90% of the time: yes. The this results in critical shutter speeds I usually change to S-mode
Thank you, Phillip.
Hi Phillip
Thanks for sharing your techniques and images with us.
Really stunning images though you are self taught (My perspective, I am also hobbiest photographer & self taught with internet :))
Since this site is full of Fullframe cameras, can you share your opinion about APSC cameras like A6000/ A6300? or any other camera (your favourite, if any).
Thanks once again. Really helpful content.
Well the blog is focused ob the a7 series because that is by far the best platform for using manual lenses in my opinion.
The a6x00 series has it’s strengths but the high pixel density brings many legacy lenses to their limits and the crop factor limits lens choices.
May not put it in right thread, but Bastian once wrote he would do a comparison between Sony A7 II / RII and Sony A 6300/6500 if there was interest. There is interest on my side so would be welcomed.
(obviously APS-C would lead to more compact system and full frame better choice for wide angles, but much more to it)
Yannik is indeed planning a a7ii/a6500 comparison. I would be very surprised if Bastian had offered to do such a comparison 😉
Philip,
I was speaking from memory… so my mistake… I trust the 3 of you anyway so I am very happy about your answer
Mother of god. What an absolute luck to stumble onto your website. The manual lenses and technical reviews for the Sony A7 ‘s, but you can actually take beautiful photographs? Are you for real? :))))
Much Love! Thank you!
Philip,
You are a nice photographer and great website with wealth of to-the-point infirmation.
Your images are a deliberately on the side of under exposure, of course thats your style and creative expression…i want to ask you one question: How do you judge or decide on the brightness levels of your images, especially considering people are looking at them on different monitors, on phones etc? For your type of images, judging the right brightness level must be critical because you like to make them darker.
Hope i am clear 🙂
Thanks 🙂
No real process. I try to not set my monitor to bright and then go by gut feeling.
Hi Philip!
Love your blog, I recently got a Canon FD L 24-35 f/3.5 for my a7ii, I was wondering is there any way to use image stabilization for zoom lenses since you have to manually set the focal length? What could go wrong if the focal length set is wrong? Eg if I just leave the focal length setting at 30mm and shoot?
Thank you so much!
Clement
Hello,
the link from the ‘photography’ page (From getting out of bed to publishing – Phillips photographic process section) that should lead to this article is wrong and skips to the third part of the article (same as the actual part 3 link). Perhaps old stuff, but a very pleasant read nonetheless. 🙂
fixed thanks 🙂
Dear Phillip, can u please refer me, some step by step guide to set my sony A7r so I can avoid these: “Film Noise / Texture: Content includes chrominance noise, luminance noise, definition noise, or film texture that is detrimental to the main subject.” (from shutterstock), I`m getting these negative to post reason too much.
I use a sony 35mm 2.8 Zeiss mostly. Thank u so much.
I don’t really know what you are talking about. Can you share some examples to clarify?
Have you switched to a later A7 model?
If so updating this piece would be very welcome.
Nowadays I am using a a7rII since it offers modern sensor performance, somewhat better handling and somewhat usable AF for a modest price. But I can’t keep all the pieces on this blog updated 😉
Have any of you guys found a solution dust on your sensor? No matter what I do my sensor always gets tons of dust on it from switching lenses and I have to imagine from small gaps between adapters, and lenses ect. I have used dust aid, the rocket blower, and I have tried multiple types of wipes. So far the only thing that consistently works is the most expensive brand of wipe with eclipse fluid together with regular air blowing when I switch lenses.
This is obviously really inconvenient and pricey. Have you guys found anything that works for you?
I wish somebody made an installable rubber gasket or a double sided weather sealed adapter to prevent that.
There’s no solution other than cleaning your sensor once in a while. I usually only do it once I get dust specks even at f8 and just clone it out at smaller apertures.