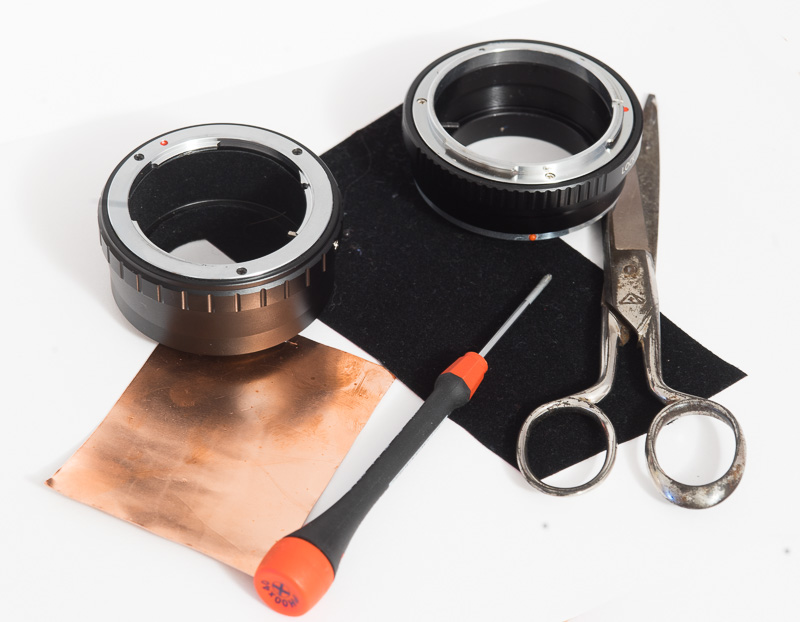
Since a few people asked this is a short how-to on how I tune my adapters. As you will notice I am far from a perfectionist but so far my method has worked well for me and I think it could solve issues for some of you as well.
Correcting Infinity Focus
The Issue
Most adapters, not only the cheap ones, are a bit too short. This means that the markings on your lens are off and you can focus your lens behind infinity so the infinity hard stop of your lens won’t work. It makes sense for adapter manufacturers to make their adapters a bit too short because your Sony’s flange focal distance varies a bit and so does lens calibration. If their adapters were exactly as thick as specified there would be quite a few cases were people couldn’t focus at infinity which is way more annoying than a focus scale which is a little off.
But a too short adapter can also have negative impact on the image quality if you use a lens with floating elements. Especially with fast wide angle lenses you can get serious field curvature issues as many users of the Metabones Canon EF adapters have found out.
Important notice: This fix only works if you can focus at infinity and beyond! If you can’t reach infinity the fix will only make matters worse.
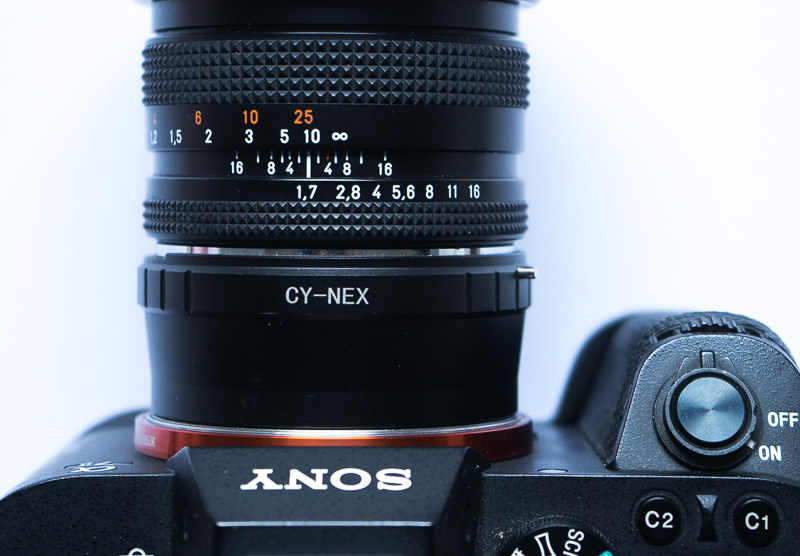
The Idea
To fix the issue you want to make your adapter thicker. Thankfully this is easily done because on about any adapter I have come across so far you can unscrew the mount and add some spacing material.
Materials
You could use just folded tinfoil from your kitchen which is basically free. I use self adhesive copper foil (affiliate link) which is affordable and easy to handle. You could also make yourself some metal shims like they are used in many lenses but in my eyes that is overkill.
Tools
- Finer scissors
- A fine decent quality screw driver
The Fix
- Step: Unscrew the mount of your adapter
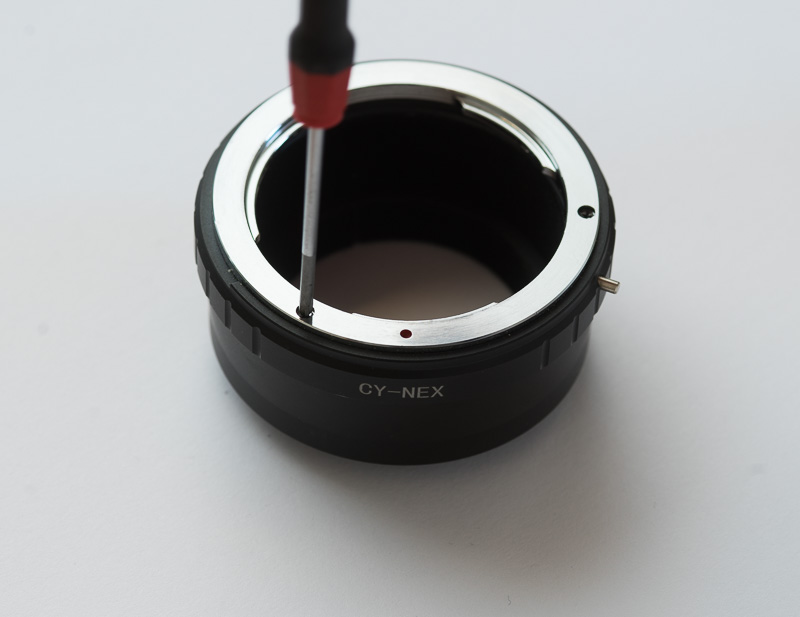
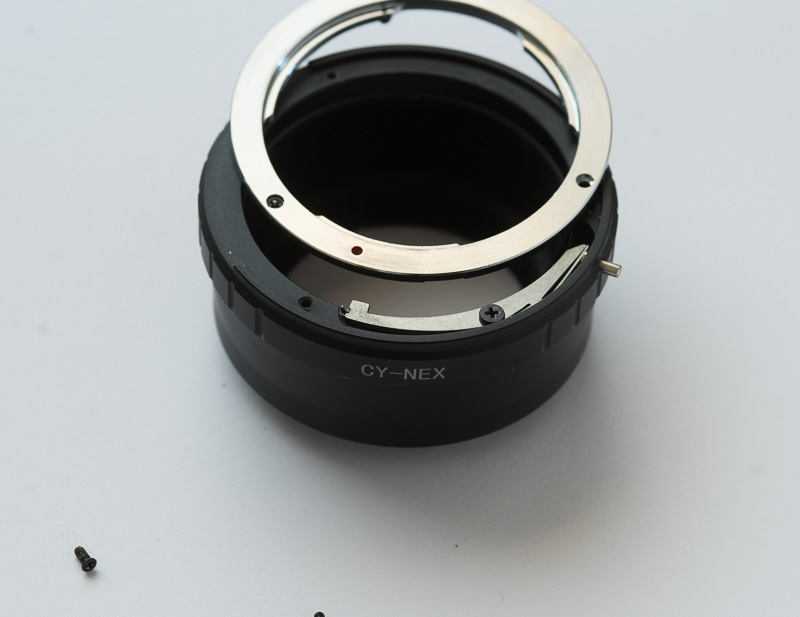
2. Step: Add shimming material
This is the only part which is a little tricky. You need to add the right amount of shimming material. So better start with a little less than needed, test and then add some more until infinity focus is spot on.
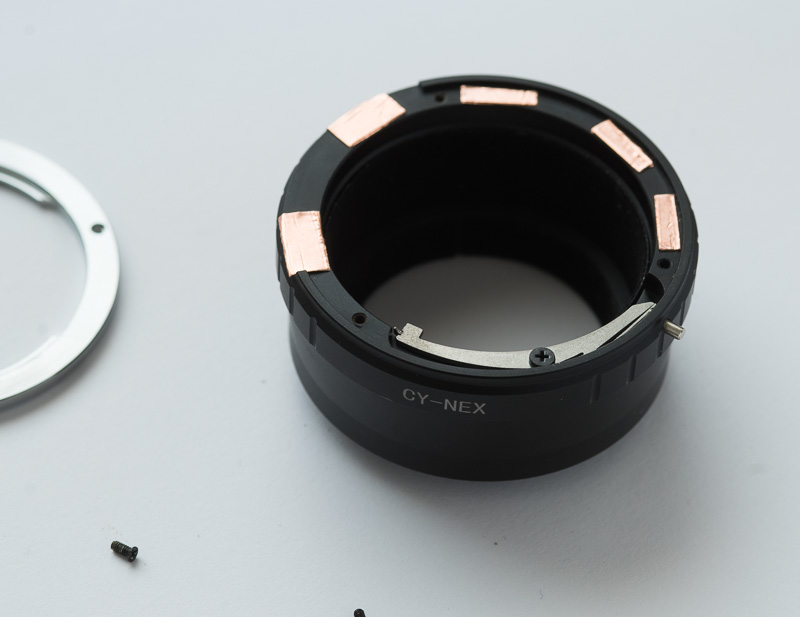
Step 3: Put the screw back in and test
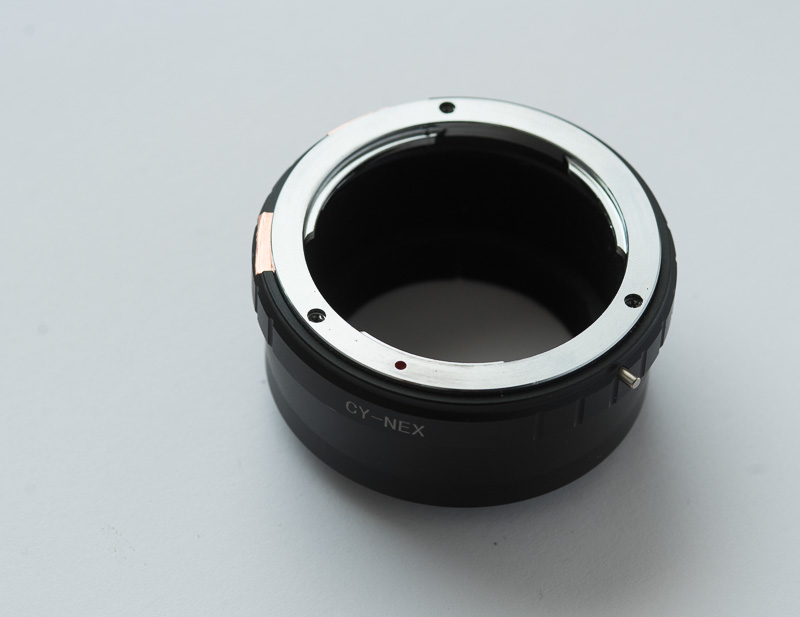
After you have put the screws back in you need to test if you added the right amount of shimming material. So open your aperture as wide as possible and focus at an object far away. If the focus scale shows infinity you are done. If not go back to step 2 and add some more material.
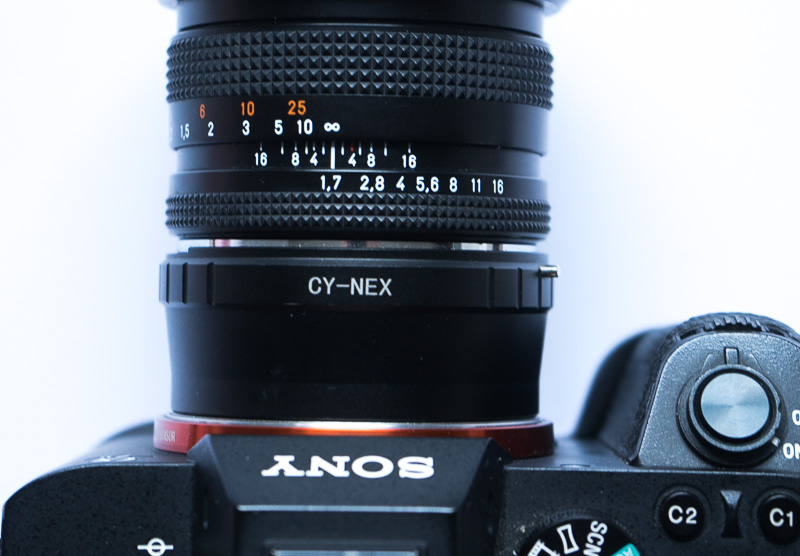
Limitations of my method
My method won’t result in a super exact alignment of the adapter. It is precise enough for any lens I have tested so far but those were older wide angles which have softer corners at wider apertures anyway which might mask issues. A modern super wide angle like the Laowa 2.8/12 or Nikon 1.8/20 will be more sensitive. My method might be precise enough for them or not, I simply haven’t tested so far.
Adapter Reflections
The Issue
Especially cheaper adapters are often quite reflective which can cause reflections which degrade image quality.
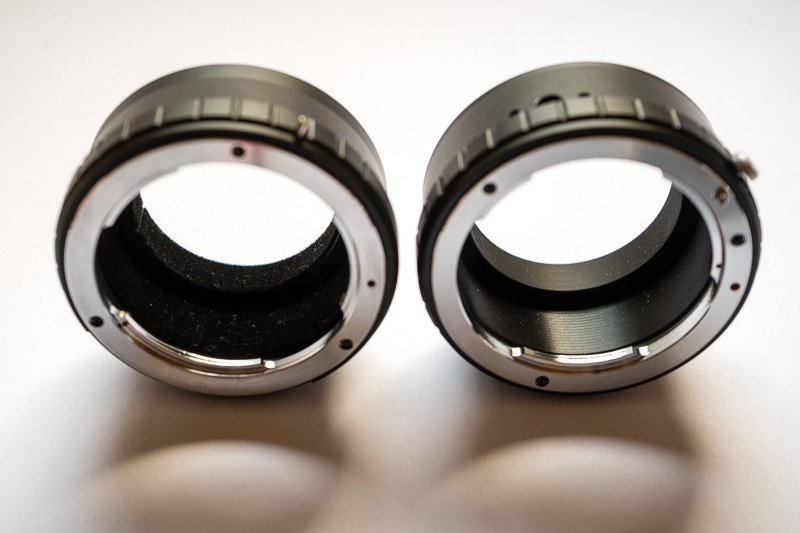
Adapter reflections do only happen if you have a very high contrast in your image and some lenses are more susceptible to it than others. See the image below for a demonstration of how adapter reflections can destroy your image.
before: adapter reflections cause annoying flares after: the same scenario with fixed adapter
Adapter reflections do not happen often and you can shoot an reflective adapter for a log time without running into issues but since the fix is easily applied I can only recommend to do it.
The Fix
The idea is simple: You want to cover the shiny inside of your adapter with something which absorbs the stray light. I have seen solutions ranging from light absorbing paint over custom made light baffles to felt like material. I use DC-fix black velours (affiliate link) which absorbs light very well and it is easily applied because it has a self-adhesive backside.
Step 1: Get the right measurements
You could take very exact measurements of you adapter and then calculate the exact measurements you need for the felt-like material. I simply took a piece of paper, took a rough measurement on the correct height, inserted into the adapter and then cut it to length.
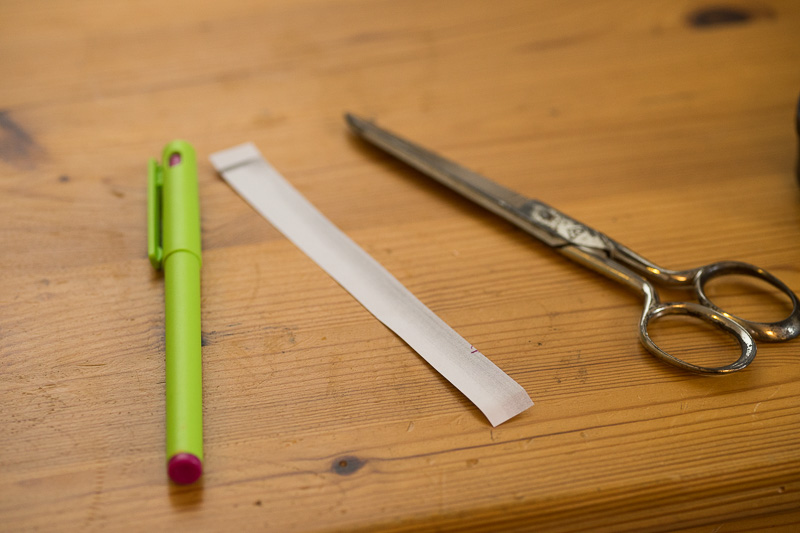
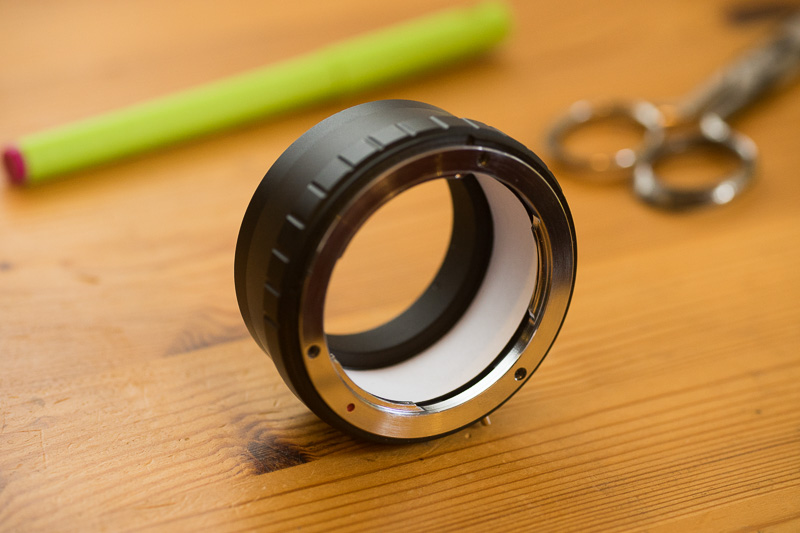
Step 2: Cut material to size
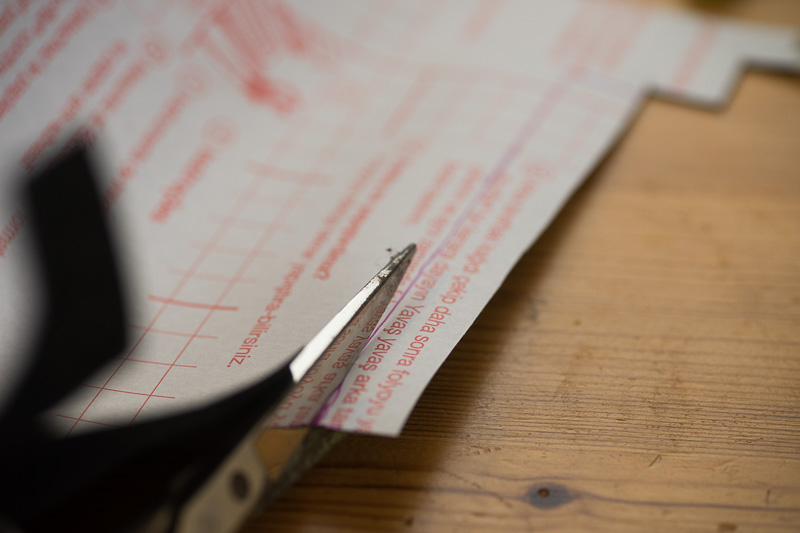
I then used this mask to cut my DC-fix black velours to the right dimensions.
Step 3: Apply material
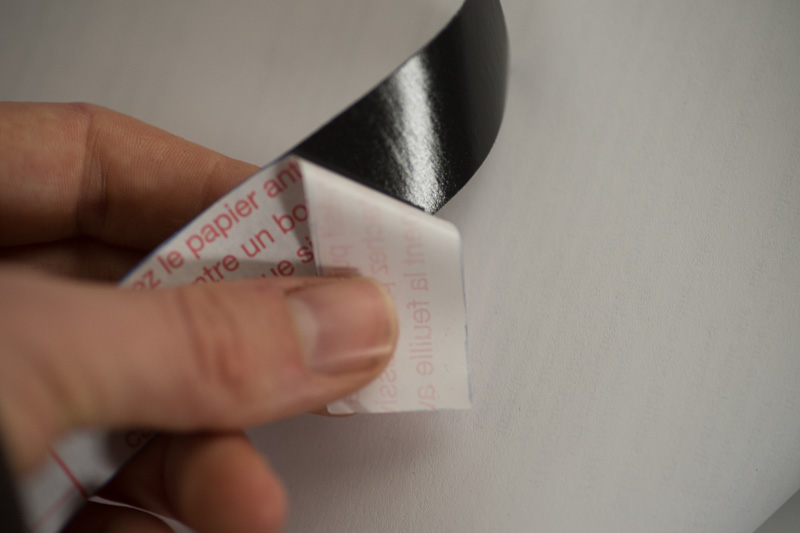
Now I just had to put the material into the adapter and I was done.
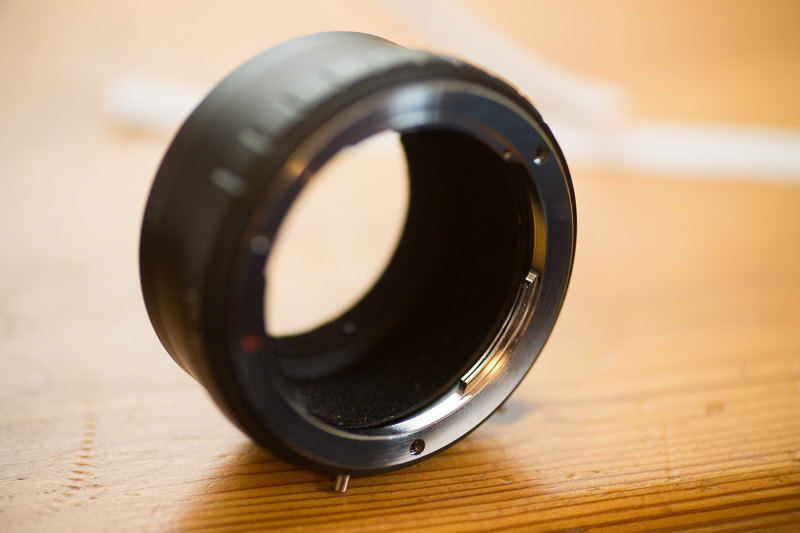
Step 4: Vacuum the adapter
Do yourself a favor and use a vacuum cleaner to remove any fuzz from the velours. I haven’t had any issues with threads on my sensor after vacuuming.
If you have come up with a better method please let us know, so that we can all benefit.
This site contains affiliate links. If you make a purchase using any of the links marked as affiliate links, I may receive a small commission at no additional cost to you. This helps support the creation of future content.
Latest posts by Phillip Reeve (see all)
- Review: Samyang AF 75/1.8 FE - April 12, 2021
- The FE-List now has 113 lenses on it - March 25, 2021
- 2020 – Year’s end review - December 28, 2020


I had one adapter for a Minolta /Nex where the lens wouldn’t lock on the adapter. This can be caused by two issues.
1: There is a little screw on the back of the mounting plate that is used as a stop. Remove this totally ( put in a white dish 🙂 ) and check does the lens now rotate enough to lock. If it does you have 2 options, put back the screw and file flat the side of the screw that hits the mount allowing it lens to rotate further or file the side of the locking plate that drops into the notch. You can see the plate in the pic in step 3 above. To check how much more you need to rotate to fit the adapter to the lens and look down into with from the camera side. Note: If you leave don’t put back the screw your lens can keep rotating around
2: The locking plate is too wide for the notch in which case file down to the required width.
I had one other that I couldn’t fix simply because the piece sticking out of the locking plate was too short to lock into the notch on the lens.
I am really surprised that manufacture haven’t designed a mount where one part screws into another along with a locking ring to lock infinity position. Apply a bit of loctite or the like to the locking ring then and it would never move again
Thanks for the info on the flocking, I wasn’t sure what to look for when I considered doing it before
Just one thing looking at the placement of the shim material, Its nit picking but I would recommend getting a piece at the locking side of each screw hole as well so as not to create an issue of the plate bending downwards on that side. Assuming that everything is parallel anyway. From pic 3
Also if anyone knows the exact specification of the screws so slightly longer ones can be got it would be great info to have. Some are very short if you have to shima lot.
I also saw a post where one guy after shimming, taped neatly around the adapter where the plate goes on to the adapter to eliminate any possible light leaks in that area. He had shimmed a good bit for one lens but no harm in doing it while you are at the work yourself
I think you are right. This was the first adapter which I modified which had den locking mechanism taking up most of the space between two screws.
If you want to be *really* obsessive you could do what I’ve done a couple of times and make a rectangular mask out of two pieces of flocking (I use self adhesive telescope flocking which may be very similar to your velour) stuck together to ensure that it’s matte on both sides, with the sticky parts left separated at the base to act as tabs. I make one for both ends of the adapter. It’s important to make the rectangular hole just a bit larger than in a purpose built masked adapter, because you’ll never get the alignment exactly right, and you need some room for error. I have seen situations in which this makes a (small) difference…
Can you recommend any adapters that aren’t reflective on the inside? (Particularly for Nikon manual focus lenses)
Sure I can: Rayqual adapters are by far the best in this category. But they cost 10 times as much as a cheap adapter so not everyone can or wants to afford one.
Hi Phillip, I have a question for you about adapted wide angle lenses: given your vast experience do you see often uneven corner performance caused by the adapter itself? I’m asking because I think I clearly see the problem with all my wides: a 24 fdn Canon, a 20 fdn (with rayqual adapter), a 28 distagon c/y with cheap adapter, a minolta 24-105 @ 24 with ea3 and 4 sony adapter. Is it possibile? Thank you in advance.
In theory adapters can cause such issues and when I tuned one of my adapters in a very crude way I saw a filted image plane. But I have never seen any issues with a normal adapter and with a Rayqual I would be very surprised if your issues were due to the adapter. Do you have access to other WAs which have symmetric corners? Because you camera mount could be the culprit.
I hope the camera mount is ok, but I guess it’s difficult to check it… probably I have a bad combination of lenses+adapter. For example the 24 fdn although in excellent conditions has focusing ring play. I read this can cause problems to the optics. Maybe also the 24-105 af has some decentring. But how can you really understand if the focus plane is tilted or the lens is defective?
If you vave issues with every single lens/adapter combination you own then there is a pretty high chance that your mount has issues. Maybe you can borrow other native lenses/adapters and check if those work better. If they don’g it is almost certaibly the mount.
Hi, would adding shims introduce stray light into the adapter?
If you add a lot of them they might. I had no issues with that.
Very useful for me!I also cover the gap to prevent light and dust.
This is what i done:
http://pic.yupoo.com/jjx874/GrVYXlxG/zzTRN.jpg
http://pic.yupoo.com/jjx874/GrVYXN0d/b2CVC.jpg
To prevent reflective i use tamiya model paint XF-1 with a small brush:http://www.ebay.ca/itm/O-TAMIYA-COLOR-FLAT-ENAMEL-PAINT-NEW-10ML-XF-1-FLAT-BLACK-/331781337623?hash=item4d3fb57217:g:qtQAAOxy2YtRvAK9
It’s easy to use but less effective than black velours.
Hi Phillip,
Great article!
I have a MD 24 2.8 which has so far disappointed me because of extreme softness in the corners. But having read your article, I gave it another try with a different adapter – et voila: corner sharpness is much improved. I noticed that the first adapter focuses quite a lot before infinity. With other lenses this has never been a problem for me. Do you know why this is so apparent with wide angles like the 24mm?
Because of the floating elements mostly.
Don’t you think the adhesive layer of the copper foil might be squeezed over time, changing the adjustment?
BTW, I second the Tamiya model paint XF-1, good alternative.
I don’t think that it’s thickness is relevant relative to the thickness of the copper foil. But time will tell. So far I have used it for over a year and not noticed any issues.
I would also recommend the Tamiya model paint XF-1 it’s cheap and the 10ml size will be more than enough to cover multiple adapters.
Great article! Very useful for me!I also cover the gap to prevent light and dust.
Hi Philip, first off I have to say I live your website and you have inspired me to buy the Sony a7 and shoot manual lenses. Thanks you for your work!
I used the Minolta 58mm 1.2 with a K&F Adapter which worked out really well except for really severe reflections caused by the adapter. I decided to use the flocking material and it worked out perfectly. However, while I applied the material to the adapter, a lot of particles got loose and tiny little velour pieces fell out. I can’t help but worry about my lens and camera. Having used this solution for a while, what’s your experience with this? Did you notice any velour fallout in the lens or on the sensor? Is there any way to avoid this?
Did you use a vacuum cleaner on your adapter? I usually do that and haven’t noticed any issues. An alternative method would be to use light absorbing paint which other people have done successfully but I have no personal experience with that.
Phillip, are you sure that infinity focus loss is due to adapters that are too short, rather than too long? I did your shim mod, that did not help. Twice, so the screws were barely in. Then i ground the faceplate down by a mm, that didnt work. The adapter is now loose on the camera, not a workable solution. The problem is getting focus at infinity with a Nikkor 600mm f5.6 IF ED. No problems on my A6000, but my A7rii will not focus. Same issue with a 300mm F5.6 nikkor. Fine on yhe A6000 but wont go to infinity on the A7rii.
It seems there is a differnce between focus points between the two camera bodies. Does this seem right? Thanks for your article and help.
I am sure that a too long adapter will result in your lens not being able to reach infinity ;).
If your adapter is too long I wouldn’t bother with it and spend 20 bucks on a replacement. You might be able to fix it but only with considerable effort and uncertain results.
Sadly Sony’s E-mount cameras vary quite a bit in flange focal distance which is why every adapter I have used so far is too short.
Unendlich Fokus korrigieren
Die Adapter sind ungenau nur ab 120€ gibt es gut genaue Adapter wird ja oft behauptet.
Bei Kamera und Objektiv ist das Auflagemaß das Nennmaß 18 -0,02 /-0,06.
Nur bei der A6000 liegt der Bajonettring auf Kunststoff, dazwischen ist noch die Zwischenlage mit dem Bajonettklauen auch aus Kunststoff . Die 18mm habe ich nicht überprüft, aber den Sony LA-EA4 Adapter habe ich gemessen er hat -0,05mm und ist somit auch nicht besser als viele NoName Adapter. Fast alle Adapter liegen zwischen 0,05 bis 0,1mm zu klein, der K&F wirkt sehr gut ist aber beim Auflagemaß auch nicht besser. Bei dem K&F Adapter II sind beide Bajonette aus Messing und verschraubt, dadurch wird das Auflagemaß aber nicht genauer sonder eher schlechter. Dein Ansatz solang zu unterlegen bis die Skala auf Unendlich zeigt ist ja richtig, aber ich stelle einfach nur scharf, oft mit einem Helicoid-Adapter.
Gruß Ewald
Mit einem Objektiv ohne IF oder floating elements ist es auch tatsächlich nur eine geringe Einschränkung.
I have found that the infinity stop on my lenses is not always in the right place. I have used this method and my Minolta F4 70-210 is now correct at infinity, but other lenses focus beyond infinity, Minolta MD 35-70, Minolta Rokkor 24 and Tokina RMC 17, the last is the worst. Does that mean each lens needs its own adaptor or do the lenses need calibrating?
Lenses all vary in a bit in spec, and final infinity focus is a combination of the lens and adapter.
Playing with a cheap adapter is less scary than calibrating a lens.
Also, multiple calibrated adapters is cheaper than sending even one lens off for calibration if you don’t do it yourself.
Most of us tend to give any lens we use regularly it’s dedicated adapter anyway, so there’s no messing around with both lens and adapter if you are changing lenses.
The other thing to do is relax and don’t worry. So long as you can achieve infinity, just remember where the real infinity is a bit before it. Especially with larger lenses infinity may vary with temperature too; when it’s very cold you may find you have to focus behind the infinity point anyway.
Thanks ordered more adapters
For $1 at of all places, The Dollar Store? Hair Ties with no clasp 15 of them all black (a lifetime supply), stretch them around the gaps where the lens mounts and adapters mount to get anal over light leaks … they work and there’s no magic
Brilliant !
DC-fix black velour didn’t work for me as it didn’t want to stick to my k&f concept adapter. Actually it didn’t want to stick anywhere I’ve tried it. Pretty disappointed with that – waste of money. Waiting for xf1 paint now. I really need that working as I get TERRIBLE flare with both of my 50mm Pentax (K and M ver) lenses.
That’s curious since I have used it on K&F adapters for years now. Which adapter was it exactly?
Tried again just while ago and was bit closer to succeed. Looks like it has to be put like a layer, rather than just stick like an adhesive tape. But I failed badly again:-) Will try again later but I need to calm a bit down as I get frustrated with things like that very easly.
I managed to find some nice Pentax K lenses (28f3.5, 35f3.5 and 55f1.8) but especially with last one I get pretty bad flares, exactly like it’s shown above in your tutorial. Same with later version of that lens (A50mm1.7)… Having said that, I don’t mind to pay more for one proper adapter, as I’m attached to Pentax system, and need only one. Is there any particular brand you can recommend that don’t require any additional tweaks to reduce flare? It looks like 50-55mm focal lenght is very prone to do that. The other two I mentioned are fine… Rayqual are pretty hard to find at the moment, what about Novoflex? Have you ever tried Gobe adapters? They’re more of k&f price range…
I also found this: http://camerapix.co.uk/index.php?id_product=290&controller=product
It says you can set flange focal distance yourself and lock it with screws hence you don’t need any other adjustments with foil. Have you heard about this one? Tried to google something but found nothing.
Don’t think that would work for your Pentax lenses.
Novoflex adapters have good flare suppression.
@Jacek
My Pentax K 55/1.8 flares isn’t flare resistant too. I flocked my adapter, but it still flares like hell. Similar to other legacy gauss design lenses.
I haven’t read all the comments, but you can calibrate the adapters for infinity and get a fairly decent centering (0.02/0.05mm precision) by measuring the adapter length with a (digital) caliper instead of checking the focus through the lens.
Let’s say that you want to correct a PK adapter.
https://en.wikipedia.org/wiki/Flange_focal_distance
PK flange: 45.46 mm
NEX flange: 18 mm
Difference: 27.46 mm
You just take measures of the length at 4, 6 or 8 points and add tinfoil until all the sides give you 27.46 mm (or very near depending on your patience).
This may not work with some mounts like Canon FD (I haven’t tried), but most mounts are OK.
For the reflections I just paint the inside with flat chalkboard paint.
I also manufacture an inside donut with cardboard and paint it with the same paint (indian ink is also suitable here) so mount reflections (if any) are blocked.
Does putting in small pieces in individual spots throw off the alignment or focus from side to side? Just wondering if it would be possible to get something circular instead… I’m having an issue with my k&f filter for an MD 50mm f2 on a Fuji body and infinity focus is very soft. Do you know how much material is generally required? Just wondering what exactly to buy in order to create the shim. I’m in Australia.
It is not the most precise method for sure but precise enough fot my applications so far and a MD 2/50 should be uncritical.
How much material is needed varies from adapter to adapter and camera and lens play a role as well.
I am really surprised that manufacturer hasn’t designed amount where one part screws into another along with a locking ring to lock infinity position. Apply a bit of Loctite or the like to the locking ring then and it would never move again I really like it.
I think I would prefer a shimming solution but I see the same demand.
Problem is, if you don’t have a proper helicoid the lens will rotate when you adjust infinity. I am sure many people would not like that.
You can use post-it note paper to make the shims. You just cut the glue part thicker than the required shim width and dispose the rest. It has some advantages:
-It is readily available.
-If you have a caliper you can get it to the desired width by removing sheets.
-You can adjust it after testing by removing sheets.
I have an idea.
How about painting the inside of the adapter or any lens, with the BLACK 2.0 paint by culturehustle ? This paint is supper flat and eats 99% of the reflections so it should be epic good for this use.
https://culturehustle.com/products/black-v1-0-beta-the-world-s-mattest-flattest-blackest-art-material
What you guys think ?
Yeah I have some of this Stuart Semple paint, and it is pretty good for reflections.
My only concern is that I’m not sure that it is strong enough not to risk flaking off, which could contaminate the sensor. Not saying I know this is a worry, but it’s not exactly an ename;….
Hello,
Anyone knows if it is possible to tune infiniti focus on Canon nFD lenses when lens focus ring is short from infiniti (I have this on the very cheap 35-70mm f3.5/4.5) ? The Novoflex adaptor for the lens is fine, it enable infinity on all other FD lenses I have – it really is the lens the issue. Thank you.
Thomas
No experience with that.
soft edges problem on irix 15mm. Can I fire the thickness of the adapter and get rid of this problem? the center of the image will not be sharp?
There are many reasons a lens could have soft edges.
A different adapter thickness may help, but there is no guarantee.
If true infinity is far away from the infinity symbol on the focus ring it might be worth a try.
Is there any way screw the lens on the adapter so the distance scale on the lens is oriented properly. When I screw the lens on my sony adapter the distance scale is at the bottom? thanks
Probably the only way is getting a less shit adapter here.
Unless it is an old manual lens that someone put together in the wrong way
or it is an M39/42 adapter, as some of these have tiny screws on the sides that Will allow to rotate the lens.
I just picked up some black3 — absorbs 99% of light — the “blackest black” and will try this on the interior of some adapters.
https://www.culturehustleusa.com/products/black-3-0-the-worlds-blackest-black-acrylic-paint-150ml
Hi,I’m an astrophotographer.I use Sony A7s and i get the same problem by using Viltrox EF to NEX IV…The bad flange focal distance create field astigmatism (too short) and the stars are not pin point into peripheral aera…I bought a Metabones V and the flange focal distance was perfect (exactly the same as EF lens mount on Canon stock camera)…This problem is coming from the chinese adaptor,who are made with tolerance ( 0,05 to 0,1mm),but all the camera (nikon,canon,sony…) sensor are precisly shimed at 0,01mm (shim or spin).The problem is oly coming from adaptor.I recently get a Nikon Z6,and same problem with adaptor first ,Fringer EF to NZ is too short and second,Commlite was too long (impossible to reach infinity).Metabones do not made Ef to Nz adaptor yet,so i will shimed a 30$ adaptor with spin under the screw…
Sorry,i would say spring,not spin…
Hello Philllips
i Stumbled on this website your providing many valuable information art lenses thank very much and appreciate for tips
Regarding the velvet. I don’t think this is a good idea. It works and it’s effective and in fact in the past they used to use velvet for camera equipment. However, the issue was that as it aged it released fibers and they got into the equipment. I think you should use a non-reflective paint like Black 2.0 or Black 3.0.
So far I haven‘t experienced any such issues. Today for example K&F have improved their adapters a lot in this regard so you don‘t need to tinker.
I have seen this and they look like a nice upgrade. However, I have many older versions which would benefit from anti-reflective treatment.
I tried a solution by using a flexible macro adapter that has the ability extend the adapter barrel by turning the wheel on the adapter, it worked perfectly with Nikon and Leica lens.
And I found another issue recently with my Sony A7R3, when I mount the Voigtlander APO Lanther 50/2 I found the infinity focus is around 6 meters away, far away from the infinity marking, I suspect the A7R3 mount flange might be the cause, so I tried the APO on an old A7 M2, the infinity focus is very close to the marking…
Flange distance on Sony cameras is unfortunately too variable.
My A7rII and A7III are also noticeably different here.
Hi,
I have an issue where I’m unable to reach infinity. I measured the length of the adapter and it seems that is 5mm too short (which doesn’t make sense as if it is too short I would be able reach infinity before the mark)… so I’m guessing this is an issue with the lens?
How can we help you if you don’t tell us what camera, lens and adapter you are using?
It’s a Sony a6000 with a Tokina 70-210 3.5 (Nikon AI mount). The adapter is a cheap no name one, so I guess I shouldn’t be surprised…
I have a Voigtlander Ultron 21mm f/1.8 lens that I’m trying to adapt to a Nikon Z camera. I’ve tried this on four different Z bodies with the same results. I really like the lens, but the two adapters that I have don’t seem to allow it to go to infinity. As I move it towards infinity, it seems to get sharper until it hits the hard infinity stop. I feels like it will get sharper if it goes just a bit further. I expect the adapters are just a little too long.
Fotasy L/M- Nik Z adapter – this is the best one. It almost gets there.
K&F Concept L/M – Nik Z adapter – this one is a lot worse.
Any ideas on how to fix this problem?
Trying more adapters is your only option.
This is an old thread I came across by chance, hopefully it is not dead 🙂
I would like to shim my adapters, but I have no idea how to fix the shimming material on the adapter.
I do not want to use glue, because I am afraid that the chemicals in the glue and the fume coming out from the glue might do harm to my lenses or the sensor.
Has anyone an idea how to avoid this problem? Thank you in advance.
The copper foil mentioned in the article already features adhesive on one side.
I’ve shimmed one or two adapters with just tin foil without any adhesive, it works fine if you’re careful when reassembling. After putting the screw back, nothing should move around because of pressure.
The problem I have is that I’m using OM lenses on a m4/3 body.
From Wiki Flange focal distance table I get OM mount of 46.0mm minus m4/3 mount of 19.25mm equals an adapter width of 26.75mm.
I have 2 adapters, a K&F that measures 25.9mm and a Fotga that measures 25.8mm.
How can I possibly fit 0.9mm of shim in an adapter whose top plate is only slightly rebated into the adapter body ?
The effect of the focus scale being so far out means that my OM 50mm f3.5 when focussed at infinity shows only 3 metres on the lens scale !
There is the point where shimming makes sense and then there is the point where investing in a better adapter might make sense.
The latter could be the case here.
Hi.
Yes , I agree entirely but do any of your readers know of a M42 to OM adapter that actually measures 26.75mm ?. I could spend a small fortune buying them from different manufacturers (probably all Chinese) only to find they are all made to approx the same width. Both K&F and Fotga are fairly highly regarded , so why are they both made so drastically undersized ? Thanks.
Thanks for the article!
Do you have any idea how to reduce the rotatory play between lens and adapter (meaning, increasing the stiffness how the lens mounts on the adapter)?
I usually use Novoflex adapters, but I seem to be out of luck regarding my Zeiss Contax lenses. I tried three Novoflex adapters, and all of them showed noticeable play on my Zeiss Contax lenses. That means, when I turn the aperture ring or even the focus ring, the whole lens turns within the adapter by approx. half a degree.
Thanks again!
I do have a workaround which is adding some small pieces of duct tape where the lens bayonet hits (or doesn’t fully hit in this case) the adapter bayonet.
This is only really viable when you use adapter and lens together exclusively though.
Thanks, Bastian. I will try your idea, although I am a bit scared that the duct tape snippets will get lost in the internal mechanics of the adapter and stay there forever.
Also, your reply certainly proves that this is not an uncommon problem. I have contacted Novoflex and asked them for a solution to this issue.
Update: Novoflex offered me to adjust my adapters to my lenses. And the best is, they offered to do this free of charge as part of customer service.
Each adapter will then be specifically adjusted to one of my lenses, but since I permanently attach adapters to my legacy lenses anyway, this sounds like the ideal solution for me. I will keep you posted if this works.
Hi Christian,
You announced you wanted to update us with regards to the Novoflex adapter adjustments by Novoflex.
May I ask you about the end of the story?
Fantastic info. Thank you. I have an EOS to M4/3 K&F adapter. To use both a Canon 50 1.8 on my Olympus EM10, but primarily to use my EOS fit Rokinon 12mm. The Rokinon especially, was largely free of aberrations on the Canon, but terrible on the M4/3, even though only using centre of lens. This info explains likely issue and solution. About to K&F adapt Minolta 200 2.8 APO, And now a lot less concerned about any possible issues. Thanks again Phillip.
1. 3M Scotch 805 F Tape ultrathin
2. antireflexion. Musou velvet darkest black
also Musou paint darkest black-its like day and night i tested on scura pinhole cams in-and outside- not waterproof!
3. show the counterpart. too long or normally long adapter.
no old lens reach infinity on digital. thats a fact or its built to go beyond. zeiss, leica, novoflex confirmed.
take a sharp object at 8km leica told 10km. but adapter must reach also extraterrestrial infinity for moon-shots and stars.
we need variable register adapters- i have made one for P67-Ni, EOS and more. go to mllenses and pentaxforums for big discussions also astro.
Hello,
I use Sony A7 rII for digitizing my old negatives. I use Minolta MD bellows extension with Minolta MD to Sony adapter and a Canon FD bellows extension with a Canon FD to Sony adapter. ON the lens side I use a Rodenstock APO Rodagon 80mm (but that is ireleveant to the problem I have).
On both occasions, (FD and MD adapters) when they click on the body, and camera is pointing down to digitize the negativa (on a repro stand) the whole assembly is somewhat rotated to ine side, meaning the infinity mark is not centered in the middle of the body. While this can be corrected by rotating the negative stage, it is still very annoying. Is there a soultion?
Thanks in advance! BTW, great article, lots if useful info!
Best
Milos