Introduction
Landscape astro photography or milky way photography is getting more and more popular nowadays. In my opinion a good milky way picture is about more than the stars alone, a good foreground is what makes your picture stand out. Landscape astro photography has been one of my favorite subjects for several years now, so in this article I will share my experiences for those that are just starting out.
Gear
Camera
Most modern Full frame and APS-C camera’s nowadays have good enough high ISO capabilities to capture the milky way, and with some tricks even cameras with less modern sensors can deliver images with only little noise. For most pictures in this article I have used the Sony a7S, despite it being quite old now, and sensor resolution being a bit low, it still is a great camera for milky way photography. You can find the a7S cheap nowadays so if you have a camera that performs lousy at high ISO’s and you don’t want to spend a lot, keep this in mind.
I’ve also used the Sony a7II for some of my milky way shots, for single exposures this camera isn’t ideal as images get really noisy at higher ISO settings. If you don’t mind to invest some time in stacking, one can get good milky way images out of it though.
The a7III and a7RII/III/IV are currently the best e-mount camera’s for milky way photography. I bought the a7RIII about a year ago and it didn’t disappoint so far. High ISO performance is on par with the a7S and you get much higher resolution files.
Lenses
In terms of lenses there is no right focal length, there are several options which all heave their own pros an cons. I’ll try to give you a short summary below.
Super wide, & moderately fast
In case you want to capture as much of the milky way as possible without having to stitch panoramas, this is the type of lens you need. In order to collect as much light as possible (to keep the ISO as low as possible) you need the lens to be quite fast. A 14mm f/2.8 is a good example, and if size/weight are no issue the 1.8/14 Sigma is a really great option.
Recommendations
- Zeiss Batis 18mm f/2.8
- LAOWA 15mm f/2 Zero-D
- Samyang/Rokinon 14mm f/2.8 (Budget recommendation)
Also see our Guid to best Astro-Photography Lenses for the Sony A7 series.
Wide & super fast
In case you are prepared to spend some extra time on editing, a super fast wide angle lens like a 1.4/24 or 1.2/35 can give you great results. With these fast lenses you can gather a lot of photons and by stitching a panorama of 2-4 photo’s you can improve image quality a whole lot. These lenses are also wide enough to decently frame the core with some foreground.
Recommendations
- Sony GM 24mm f/1.4
- Sigma Art 35mm f/1.2
- Samyang 24mm f/1.4 ED AS IF UMC (Budget recommendation)
Fast standard lens
By making panoramas with a fast standard lens like a 50mm f/2 you can make great milky way photos with superb image quality. Typically you will need to stitch 15-20 pictures to create a reasonable field of view which can be quite some work. However this results in a hugely improved image quality.
Recommendations
- Voigtlander 50mm f2 APO-Lanthar
- Sony ZA 50mm f/1.4 / Sigma 50mm f/1.4 ART
- Zeiss Loxia 50mm f/2 second hand (Budget recommendation)
Tripod
A decent tripod with a good ballhead is very much recommended. I did it with a shitty tripod for years which was very, very annoying. See this article for more information about this topic.
Accessories
Intervalometer: To prevent vibrations one can use an Intervalometer. This device is also very handy as you can set the amount of pictures you want to take in case you want to stack in post.
Didymium filter: A Didymium filter filters out certain wavelengths that are produced by e.g. street lamps and help to reduce the orange glare in you night sky pictures. Check out this article for more information.
Lens heater: In cold nights you may encounter condensation on your front lens, a lens heater will prevent this.
My kit
Currently my astro photography kit consists of the following gear:
- Sony a7RIII*
- Sony GM 1.4/24*
- Zeiss Loxia 2/50*
- Sigma DN DG Art 1.4/85*
- Leofoto Ranger LS-284C*
- Cheap JJC Intervalometer*
- Black Diamond head light*
*Affiliate links (If you purchase the lens through one of these affiliate-links we get a small compensation with no additional cost to you.)
The Sony a7RIII is a great camera for astro photography, I like it more than my a7S for this task because of the much higher resolution sensor.
The Sony GM1.4/24 is a very good lens for astro photography. Stopped down to f/2, when focused on the midframe sharpness across the frame is very good with virtually no visible coma. Wide open there is only a little coma visible, and the corners are a bit weaker, still much better than most competitors.
There might be better options nowadays but the Zeiss Loxia 2/50 still is a good option for milky way photography, in fact I used it for some of my favourite shots. It’s not free from coma wide open, but it is decently sharp with very high contrast. I still like it a lot to take (stacked) panoramas of the milky way with it.
The Sigma DN DG Art 1.4/85 is the newest member to the family and therefore I had no time to use it for milky way photography yet. I think it will be a great option for stitching panoramas as coma correction seems to be pretty good.
The Leofoto Ranger LS-284C is a very decent travel tripod and did not disappoint me so far. It is even stable enough to use with my GM100-400 for landscape photography.
I use more or less the cheapest intervalometer I could find a few years ago, and it works fine, no need for expensive stuff here 😉
I did not save on my headlight though. As I often hike in the dark a good headlight is one of the most important things in my kit. Hiking high up in the mountains with a shitty headlight is dangerous, so make sure you have a decent one when you go out at night.
Information sources
Moon, position of the milky way
As you might know the core of the milky way isn’t visible all year. To determine where the core will be positioned at night you can use some apps. I personally use Stellarium which is free and works fine on my PC.
Furthermore moon light will decrease the milky way’s visibility so its important to check whether the moon is there at you desired time. I use Photographers ephemeris which is free and works completely fine.
If you want an all-in-one app check out Photopills, this phone app costs €11,-. I don’t use it since the gps module of my phone is to shitty for it to work properly but on a newer phone I would probably try it out.
Dark location
As a reader commented below, a dark location is very important of course so therefore added this section. I usually use this website to find my location.
Weather conditions
Of course we need clear sky to to see and shoot the milky way, therefore checking out the weather forecast carefully is very important. Especially if you plan to shoot on a location that’s hard to reach, like a mountain top or so, it is wise to check out several sources to make sure your effort will be rewarded.
I often use wetterradar.de and buienradar.nl, of course the country were you are based will determine what source will perform the best. I found wetterradar.de to work very well throughout Europe so far.
Techniques
The simplest method is of course just using a single exposure for editing. However since high ISO values are used you usually end up with rather noisy images with little detail in the foreground. Luckily there are some techniques which will help you to get clean images with little noise and nice foreground detail.

Exposure stacking
You take about 8 pictures with exactly the same settings directly after each other which you will stack in post. The software will calculate the median value for each pixel, this way you get rid of noise effectively as noise is a random process. I usually use Photoshop for this task with the technique here described by Ian Norman. By using exposure stacking your get rid of a lot of noise, however your foreground stays dark nevertheless. Therefore taking a very long exposure or blending in a blue hour foreground shot will often be necessary to get a foreground with a decent amount of detail.
This technique, though very efficient is – especially in post – quite time consuming. In case you don’t want to spend that much time on PP the technique below might be more your thing.
Panorama
By stitching a panorama of shots taken with a 24, 35 or even a 50mm lens you can get the same field of view as with for example a 14mm lens but with much better image quality and much higher resolution. By stitching the panorama you are basically reducing the size of the noise and other aberrations a lot which makes them less obtrusive.
This is the technique I use the most, and it delivers much better pictures than single exposures without adding too much workload in post.
I also combined this technique with stacking a few times which is a huge load of work but delivers you extraordinary image quality.
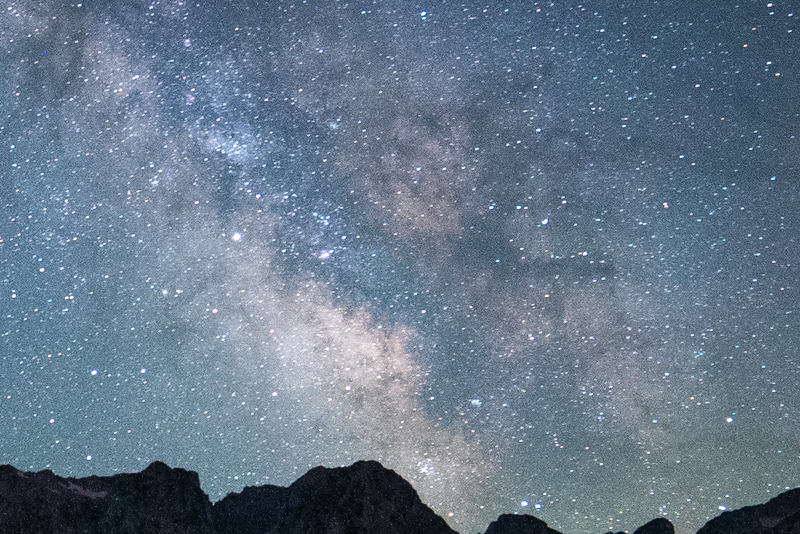
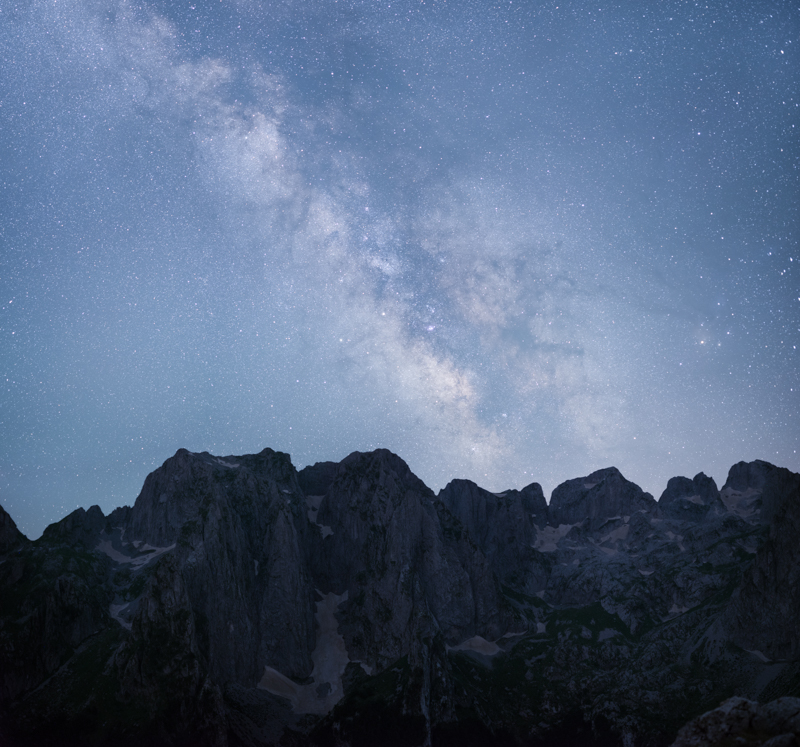
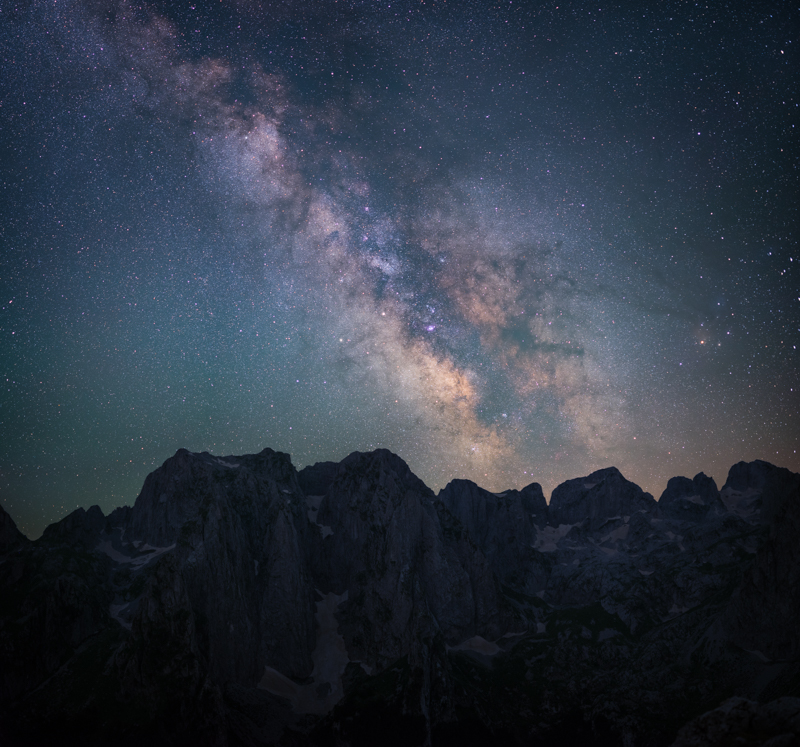
Check out the comparison of different techniques below.
Additional
Besides these techniques you can also work with a tracker, Bastian wrote an article about the use of trackers and the techniques above, be sure to check it out!
Taking pictures
Composition
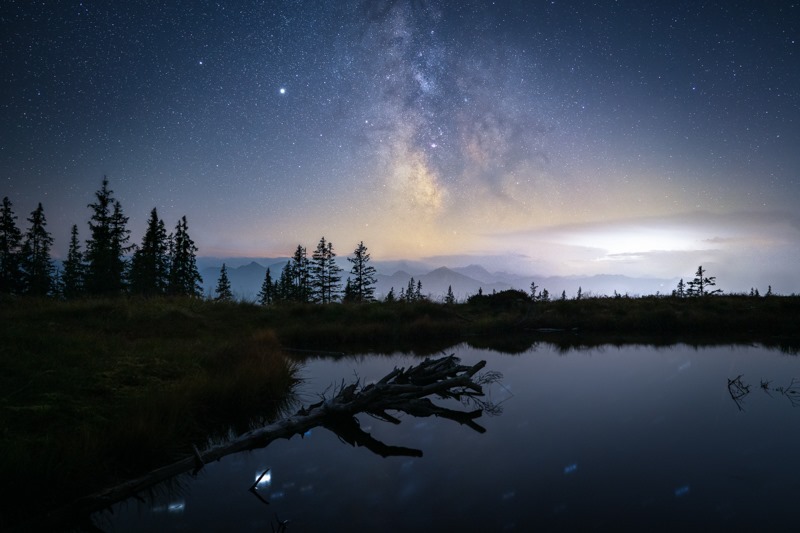
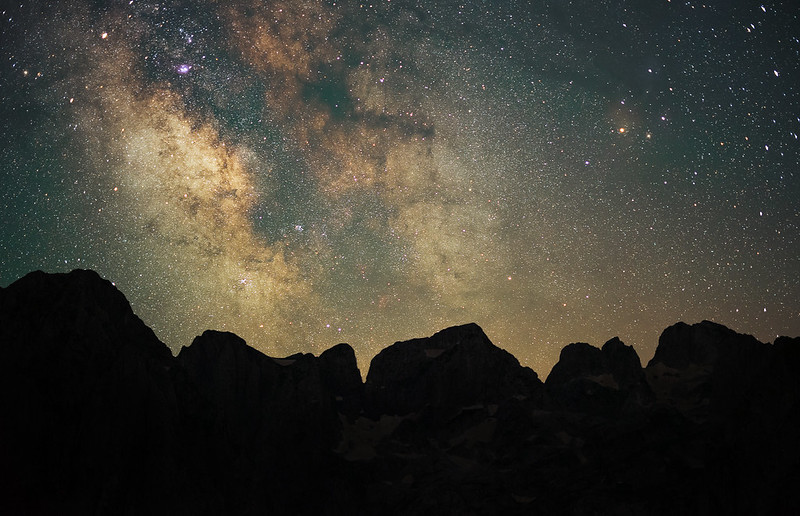
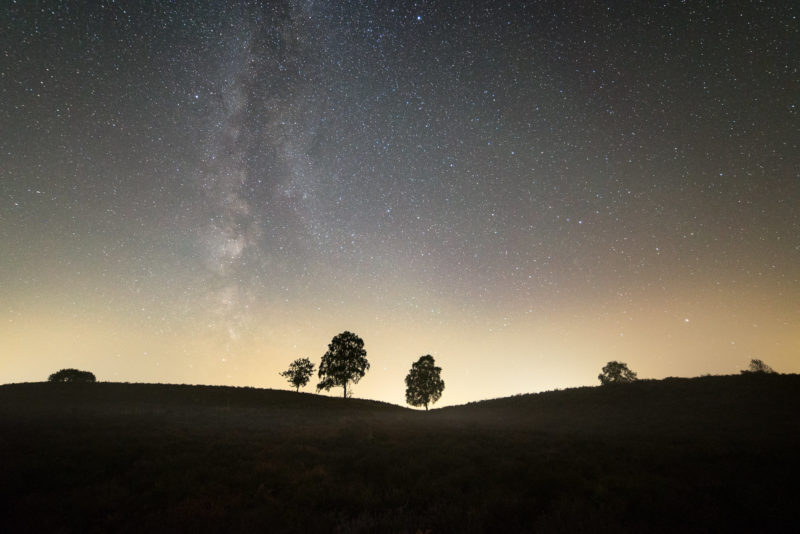
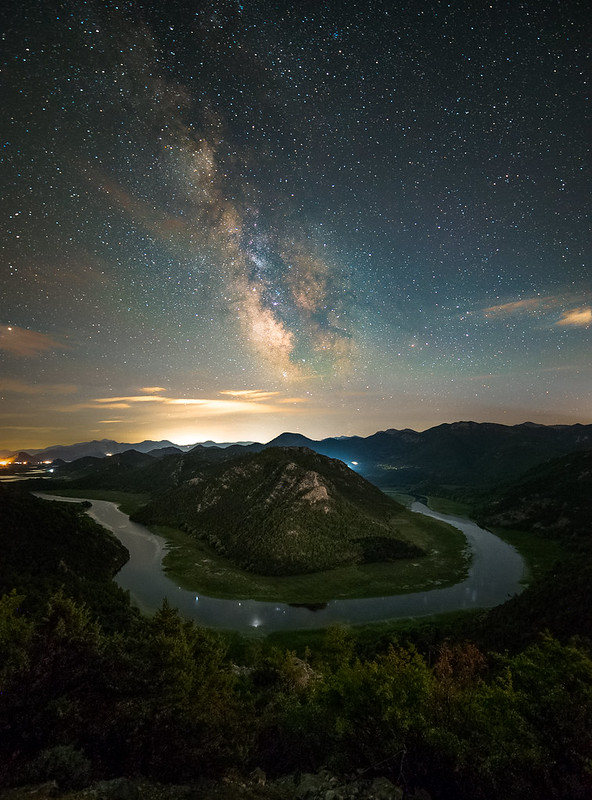
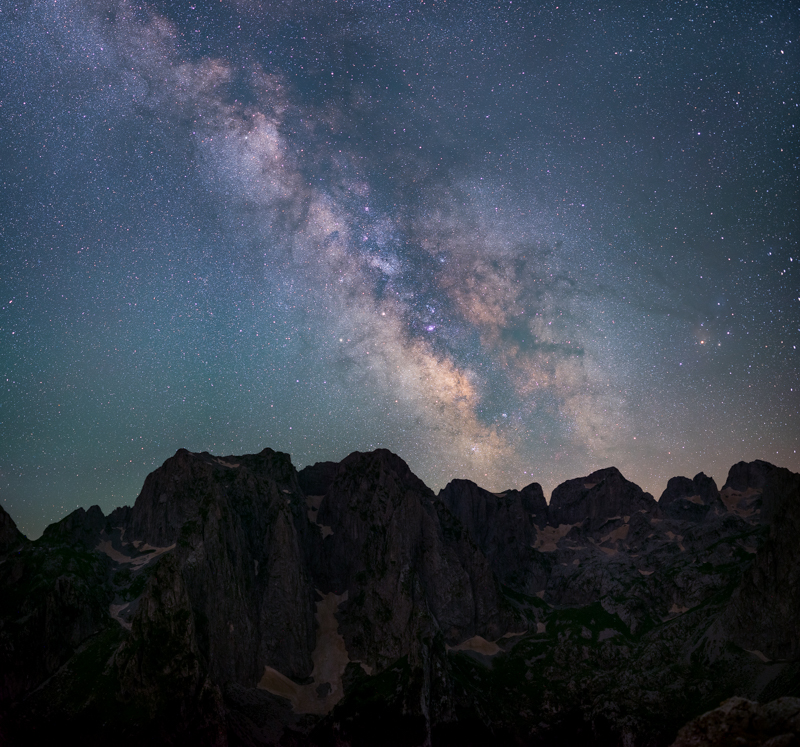
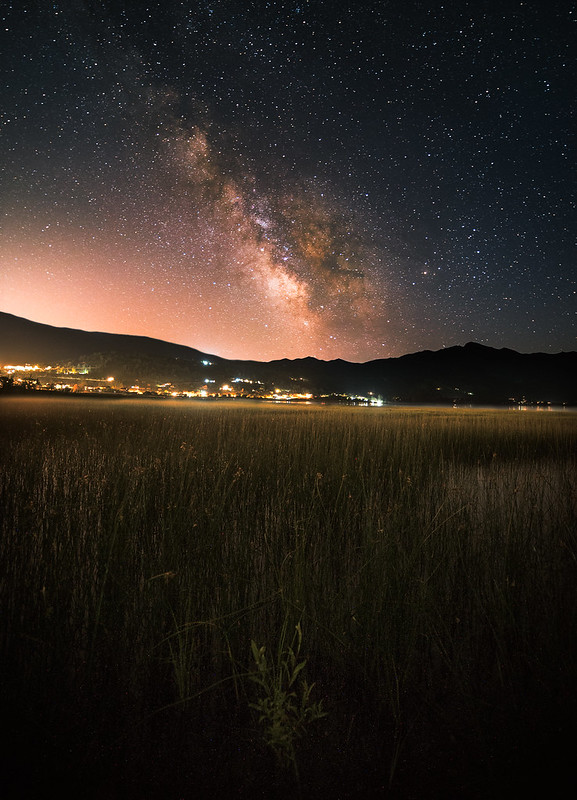
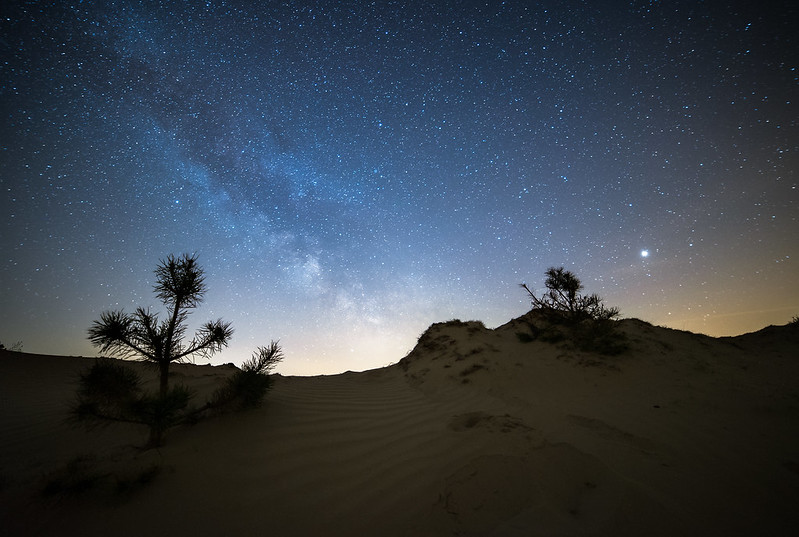
Many people (including me) seem to totally forget about composition when starting with milky way photography and only focus on the stars. This is a pity as a picture with an interesting foreground is much more appealing then one without.
Especially if you live in a light polluted area like I do, more emphasis on the foreground is important.
A good foreground should not distract from the sky but complement it and help to lead the viewer through the image.
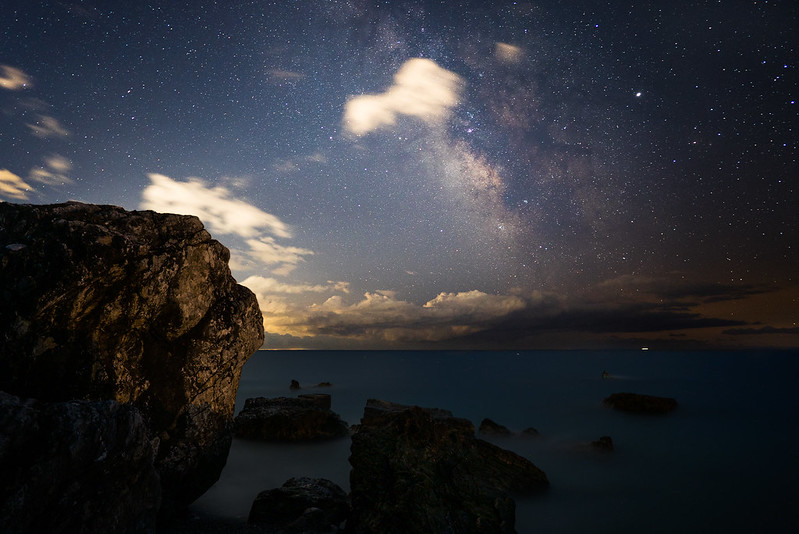
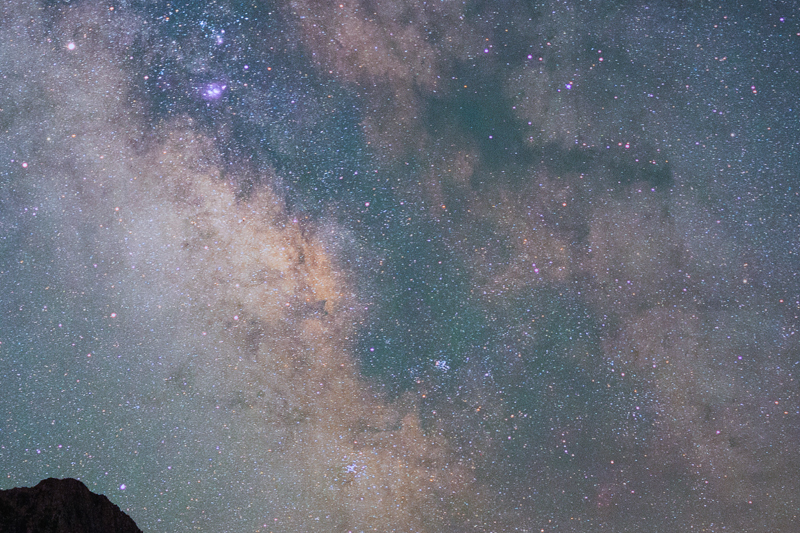
Another easy method is the use of symmetry and lines in the foreground. In the example below the foreground is rather symmetrical and the milky way, slightly away from the center, is complementary with the foreground.
Taking the pictures in the field
In the field at night it can be challenging and time consuming to find a decent composition. Everything is dark and one often needs to take a picture to see what actually is in the foreground. Therefore I always try to arrive at the beginning of the blue hour, or I scout the site during daytime.
Once I’ve found my composition I try to find optimal focus. I do this by focusing on a bright bright star. Once I think the stars are well in focus I take a test shot which I carefully evaluate at the back of the camera. I forgot checking once and focus was slightly off which ruined my shot, so be sure to always critically check your focus!
Once everything is set up and and in focus I set my intervalometer to take 10 pictures with a 1 second interval, which will be stacked in post. I use the following rule of thumb to determine the longest possible shutter speed without getting start trails: 400/FL= max shutter speed.
Usually the foreground is too dark and noisy on the exposures for the sky, therefore I always take a few very long exposures (several minutes) of the foreground, slightly stopped down at a lower ISO setting.
Something else I like to do is taking my foreground shot during blue hour. This might be the best way to get a well exposed foreground with no noise. This method is very time consuming (and a bit boring) though. You need to make your composition before the milky way is visible, therefore you need the
aforementioned apps to determine where the milky way will be.
Once you took the foreground shots you have to wait till the milky way appears without touching the camera in between. As soon as the stars are visible you optimise focus and proceed as described above.
The panorama method with a super fast wide angle lens or a standard lens has much overlap with the method mentioned above. The only difference is that you don’t have your whole composition in the picture at once, so you really need to overthink what you want in the frame. I tend to shoot one extra row at all sides to make sure I’ve got everything. Cropping in post works better than going back because you shot it too tight.
I always use at least 30% overlap between the different pictures at all sides of the picture. This helps preventing alignment problems in post.
With this method you can also shoot the foreground during blue hour, but blending in the foreground in post is a bit harder with the panorama technique. I’ve had some cases where aligning the foreground I shot during blue hour with the one of the night image was quite a pain.
Editing
More than in daylight landscape photography editing is very important to achieve pleasing results. Below I will explain a few methods I like to use. I won’t go too far into detail however, there are so many different ways to get the same result and its such a matter of taste that I feel going into far detail is a bit pointless. I will share some links to good tutorials below.
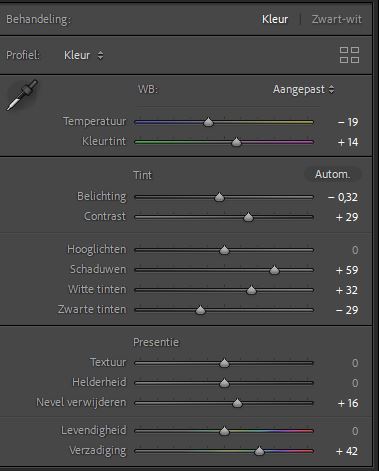
When editing a single exposure I start by making a copy of the picture in Lightroom. One copy I edit to my taste without taking the foreground into account this fairly old tutorial of Michael Shainblum is good start, especially if your base picture is very good (read: dark sky). Sometimes it is hard to get a satisfactory sky with Lightroom alone, in such situations I skip the edit in Lightroom completely and start with the RAW in Photoshop. Usually these are pictures from light polluted areas here in the Netherlands, with Lightroom you very soon get blown out highlights with these. Therefore I mainly work with masks and Luminosity masks (I use the TK Basic panel for this). This way you can edit way more selectively and leave out the brightest parts when applying certain effects.
After the sky is up to my taste I start with the second copy to edit the foreground to my liking. After I like the foreground as well I open both pictures as layers on top of each other in Photoshop to blend them. Usually one needs to do some local adjustments here to make the foreground look natural, or I adjust the whole foreground in case its too far off.
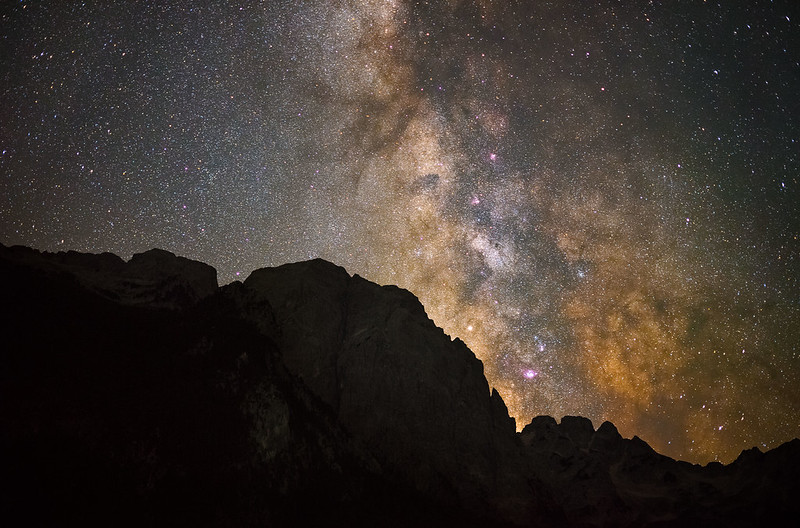
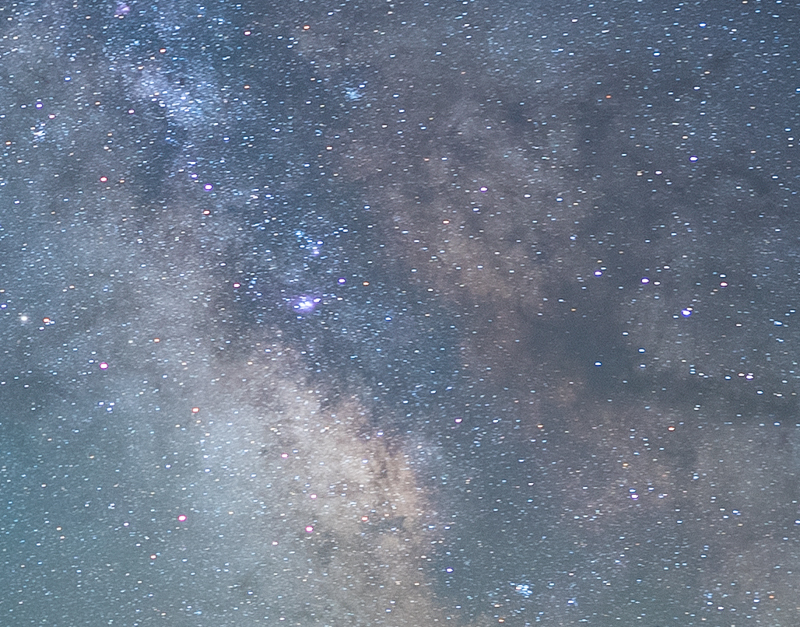
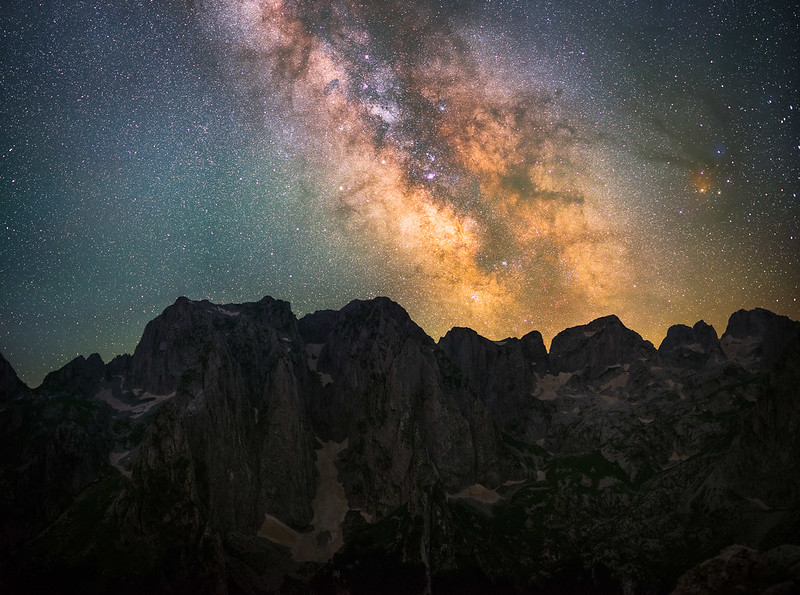
Below you can see the different stages of my edit process. You are looking at a stacked panorama here, but the procedure is the same as with a singe exposure.

Whenever I edit a panorama, an exposure stack or a combination of both, I first stack and or stitch the image before I start with the actual edit.
I stack my images with the technique here described by Ian Norman. Stitching the panoramas I do like Ian Norman in this tutorial.
When combining stacking and panorama stitching I always start with stacking the photos, with the stacks I stitch the panorama together.
One thing which is important to keep in mind when editing, don’t overdo it. When looking back at older photos I’m a bit ashamed by the amount of post processing which makes the images look way over the top. The picture underneath is the same as the example above here, but my original edit from 2018..
Final thoughts
Milky way photography is a lot of fun, and by far not as difficult as it looks like. Usually you already have the gear to give it a try, and trying never hurts right?
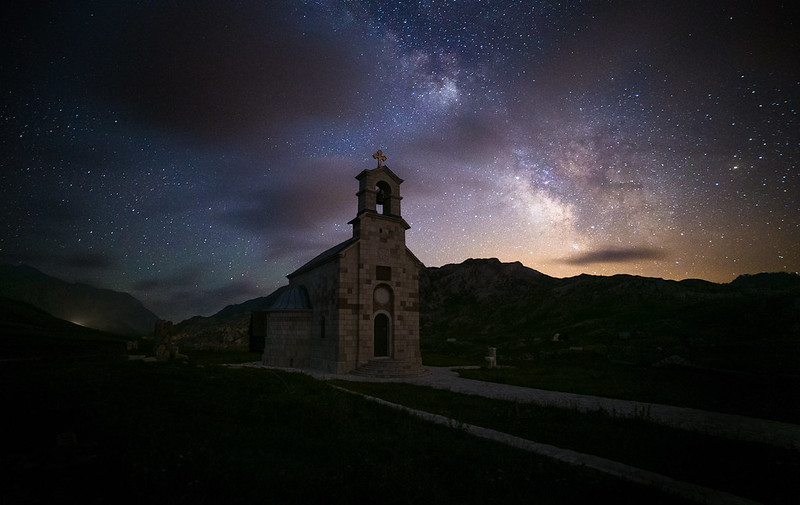
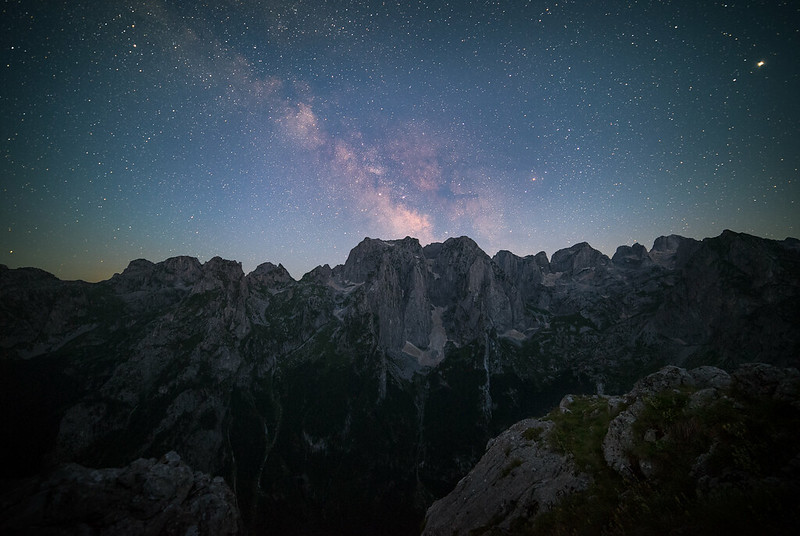
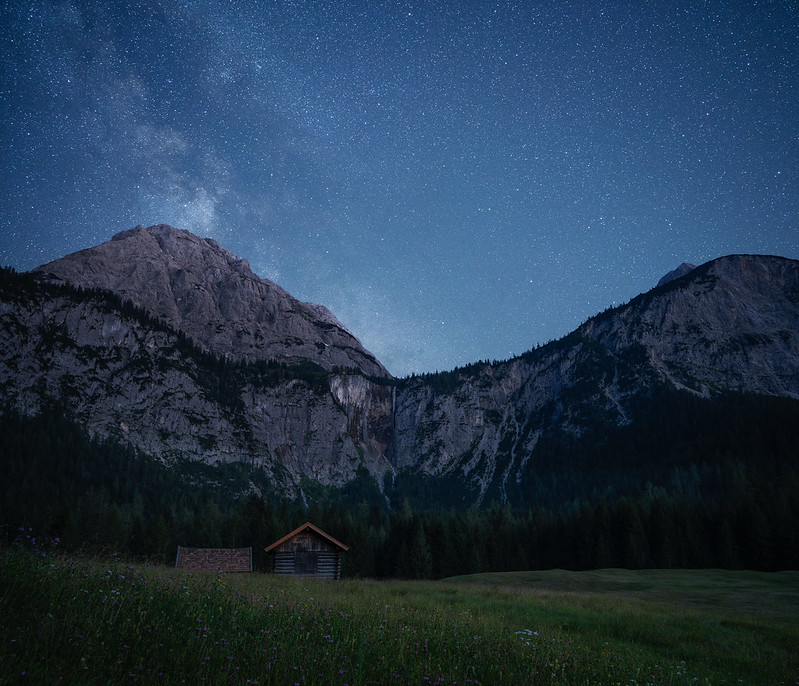
Samples


Further reading
- MAKING OF SERIES PART 3: “MILKY VALLEY” WITH VOIGTLANDER 1.7/35
- GUIDE TO ULTRA WIDEANGLE LENSES FOR THE SONY A7 SERIES V1.3
- BEST ASTRO-PHOTOGRAPHY LENSES FOR THE SONY A7 SERIES
- REVIEW: VOIGTLANDER 50MM F2 APO-LANTHAR
- REVIEW: MINOLTA MC ROKKOR 1:1.7 55MM ON SONY A7
This site contains affiliate links. If you make a purchase using any of the links marked as affiliate links, I may receive a small commission at no additional cost to you. This helps support the creation of future content.
JuriaanM
Latest posts by JuriaanM (see all)
- Review: Sigma 85mm f/1.4 DG DN Art - January 8, 2022
- A beginners guide to landscape astro photography - March 11, 2021
- Canon newFD 50mm f/1.8: A review - January 4, 2021
Wow cool article! Good foreground is always the challenge. For lenses I have always used the Tokina Firin 20mm f2 for Milky Way and it is really an amazing performer, super high resolution wide open! though because it’s daytime flare resistance and sunstar rendering is quite terrible I replaced it with a Nikon 20mm f1.8G. Milky Way season for me isn’t here yet but I cannot wait to try it out in a couple months
Great article, thanks for the inspiration and keep up the good work!
Really nice article, and your photos are inspirational! I think one of the most important aspects is to find dark skies, and there are great sites like darkskyfinder.com that help in that regard.
On the gear front, I really like the Sony 20mm f/1.8 G. It is an outstanding optic with minimal coma and works really well for a lot of other applications as well while also being quite tiny.
Thank you! I totally forgot that part, I have added it now 🙂
Great article, thanks! Another useful tipp I’ve come across is to find out the highest native ISO of your camera and use that for your images. You can raise exposure in post if needed without any noise penalty, while retaining more highlight information. For the Sony A7iii that’s ISO 640 for example.
There’s a open source timelapse app which can be installed on some sony cameras. https://sony-pmca.appspot.com/plugin/app/com.jonasjuffinger.timelapse
Installing can be a bit challenging, but I can totally recommend it.
Hi Juriaan, Nice article, like the others as well. I’m also Dutch, and (just by a small margin) living in the same light polluted country as you. I wrote an astro time lapsing article for Zenit (november 2020) . Basically landscape astrophotography is not that much different. I know this site is based on the Sony camera. I tried the Sony A7 III next to the Nikon D750 and Nikon Z6. The Z6 has the same sensor, but due to the tight wiring and lower heatsink capacity of the Sony the Z6 has quite a bit lower Amp-noise. Therefore the Z6 gives more headroom when you start processing the files. To add to the article there is a nice free ware easy to use stacking program called Sequator. You can even select the sky to keep the landscape sharp as possible.
Another tip to add, many people have a Syrp Genie mini. If one uses this in the video mode and with a speed of 15 degrees per hour and point the axis to the polar star it can give very nice results. With a 35mm lens you can go up to 8 seconds, with half speed tracking 7,5 deg/minute you can go up to 15 seconds and still keep the landscape sharp. You’ll gain 1 stop of more photons. in the end you want capture as much as possible photons. Actually in this case you can also turn horizontally if you have only one tripod head with you.
I included some tips below in the description. this combination of time lapses contains a few scenes II made for a National Parc and a Dark Sky Reserve a few years ago in the Pyrenees.
https://www.youtube.com/watch?v=42m31gyil8c
and this one, I also use a slider
and a tiny 3 Euro home made device made of a cooker clock
https://www.youtube.com/watch?v=42m31gyil8c
Would like to meet you, I live in Mheer (South Limburg) also uses a lot of vintage lenses since the 80’s. The Tokina 90 and Nikkor AIS 180 ED are both great for astro as well.
kind regards Bjorn
Hi Bjorn,
Thank you for sharing your experiences and tips! I have used sequator in the past but the results were less nice than with manual stacking (I might have been doing something wrong though!). It works pretty quick though.
Your video from the Pyrenees looks good, you had very good conditions as well 🙂
Kind regards, Juriaan
Hi Juriaan,
I have no photoshop, only Lightroom, but you can go two ways. First process the images in Photoshop or any RAW-converter And than stacking tiffs/jpgs into sequator and go back to photoshop when needed.
The central Pyrenees a very dark, for Europe’s standards…
Great article Juriaan, thank you!
I more or less started accidently with single photo astrophotography this winter with my A7RII. Exactly the article I needed, having also already read the other great articles on this site on the topic.
I have some questions for single photo exposures! Should I use the High ISO Noise reduction ON or OFF? What shutter mode gives the best result (e, front, mechanical)? And should I use the dark frame subtraction option?
Love your guys work, Adams
Hi Adam,
Nice to hear you started with milky way photography 🙂
I think you are shooting raw? In that case I would turn the in camera noise reduction off.
The electronic first curtain shutter is the best option to use with long exposures. With the mechanical first curtain shutter you can get some bothersome vibrations..
Kind regards, Juriaan
Thank you Juriaan!
Yes, I shoot raw.
Best regards Adam
In my experience, I have found not using long exposure noise reduction when shooting RAW leaves many hot pixels in the frame. I mostly shoot the dark skies during the summer in New England (we really have some fantastic places, despite the population density), not during the colder months. On the A7iii at least, I have to turn on the noise reduction or I get a few dozen red and blue hot pixels in the frame
What software you use for editing? I found out for me that Lightroom pretty much removes all the hot pixels anyway.
Ah… That is interesting! I have been using Capture One Pro for years, and it does NOT remove the hot pixels from RAW imaged.
BTW – my issues are with red and blue hot pixels. It seems that Capture One doesn’t remove those. It removes white hot pixels effectively, but it definitely does not work for the colored hot pixels.
I am talking about colored ones. Lightroom even has a slider for that.
Are you guys planning to do another podcast episode someday? I really enjoyed hearing you all discuss lenses and cameras. It would be nice to hear about the team’s techniques for photo planning, capturing good light, and traveling.
Yes there will be 🙂
Hello,
thank you very much for the article 🙂
I want to give a try to astro. I have had a look to your map of light pollution, which I like a lot, for finding a place to give it a trial, not so far away from home.
I have nevertheless a question related to the necessary darkness to see some milky way. In the forest near home lightness is around 500 micro candela per square meter, or Bortle 5. I made a try and the sky looked uniformly grey and I do not know if this is due to my absolute lack of experience or due to too much lightness in the sky.
Was is the maximum lightness acceptable? Bortle 4? 3? 300, 200 micro candela per square meter ?
Thanks in advance for your help!
Hi Jorge, in the Netherlands at good spots we have bortle 4. That’s more or less acceptable. The pictures taken at the dark spots were bortle 2.
Kind regards Juriaan
Love these photos. The stars are very beautiful with contracts of colors and composition.
Hi Juriaan,
Thanks for this interesting and informative article. I assume the lens recommendations here are only based on those lenses you have personally used?
The reason I ask is because there are obvious gaps….The Sony 20mm F1.8 G and Sony 12-24 F2.8 GM are obviously excellent lens choices for astro photography. The Sony 20mm F1.8 lens is particularly good value astro option and whilst the Sony 12-24gm is a pricey lens but unique in being an F2.8 zoom starting at 12mm
Surely such options should at least be mentioned here…
Cheers
Matt
I tried to include lenses at least someone in the team has used. The 1.8/20 indeed is a very good option!
Hi JuriaanM,
Really nice astroshots you have there.
You stated that several sony a7 series camera are really good for this topic. I have an a7 1st edition and i would like to upgrade to an a7r2, however I’ve read somewhere on the inet that the a7r2 is a “star eater”.. is being said that a firmware update removes some of the stars due to a noise reduction feature on longer exposures.
Do you know anything about this?
Maybe Bastian knows this since he is using a7r2 quite often , and i know he is passionate about milky way photography. Can someone confirm this?
Thank you&keep it up
Hi bili,
Thank you 🙂
With the a7rii you will indeed have to bother with the star eating software. This source has a good documentation of the issue and the workarounds https://www.lonelyspeck.com/sony-star-eater-and-how-to-fix-it/.
I guess milky way photography isn’t your primary use for your camera, and in that case the advantages of the a7rii over the original A7 should be worth the upgrade.
Kind regards,
Juriaan
This beginner’s guide to landscape astrophotography is fantastic, and I am thankful that you’ve shared this guide here. I will ask my colleagues if they want to read another guide like this, then I’ll share it with them.
Thank you!
Hey thanks so much for this article 🙂
I really wanted to buy a Sony A7RV, but I was advised against it and to take the A7IV for astro-landscape. What is your opinion on this? Is it a problem because of the noise?
Thank you for your feedback
Regards Ramon
It is not a problem with today’s generation of cameras.